



Cart
Your shopping cart is empty
Continue Shopping
Every Order, Backed by HBADA
30-day in-home Trial
Free 2-5 Business-Day Shipping
5-Year Hassle-Free Warranty
24/7 Customer Support
Remove this item from your cart?
Cart
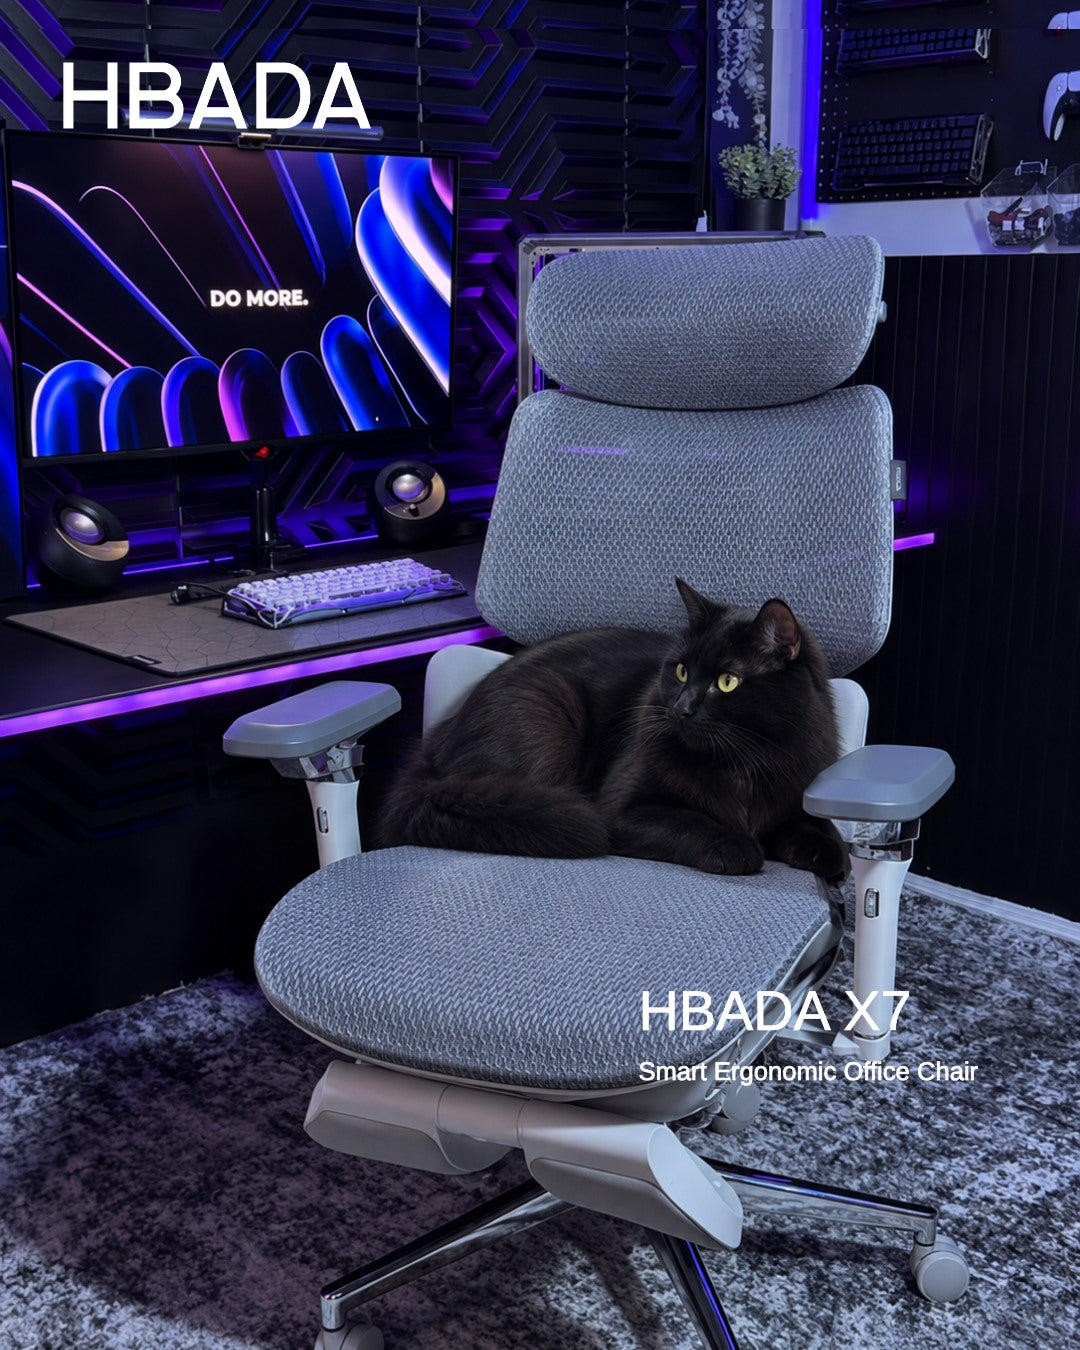 How Often Should You Replace an Ergonomic Office Chair? Seven Warning Signs
Dark reading mode
Still supportive?Or time for a change?
A chair’s age tells only part of its story. Look at how it supports you, whether its adjustments still work and which problems can be repaired before deciding to replace it.
Condition mattersmore than the calendar.
Repair a suitable replaceable part. Replace the chair when safe, reliable support cannot be restored.
How often should you replace an ergonomic office chair? There is no single replacement interval for every chair. Inspect it for lost seat support, sinking height adjustment, structural cracks and failing mechanisms. Repair isolated faults when compatible parts and a safe repair are available. Stop using an unstable or structurally damaged chair until it has been assessed.
In this guide
How long does a chair last?
Seven warning signs
Repair or replace?
Make your chair last longer
HBADA models and durability
When to get help
The takeaway
Frequently asked questions
Sources
How long does an ergonomic office chair last?
A well-maintained chair can remain useful for years, but build quality, hours of use, user load, care and storage conditions all affect how it wears. A lightly used home office chair and a shared chair used across multiple shifts do not experience the same demands.
Treat age as a reason to inspect the chair—not an automatic expiry date. A newer chair with a cracked frame needs attention immediately, while an older chair may remain usable if it is stable, supportive and functioning correctly.
Service life, testing and warranty are different. A design-life target describes intended use. A test result describes performance under specified test conditions. A warranty describes coverage under its terms. None should be treated as a promise that every component will last a fixed number of years.
What are the seven warning signs?
Some changes call for maintenance; others mean you should stop using the chair. The next step depends on the cause, the affected part and whether support can be restored.
Seven signs to investigate before your next workday
Warning sign
What to check
Repair or replace?
1. Sagging cushion or stretched mesh
The seat no longer supports you evenly, even after adjustment.
Ask about a replacement seat or mesh assembly. Replace the chair if support cannot be restored.
2. The seat keeps sinking
The height control may be engaging unintentionally, or the cylinder may be worn.
Have the fault diagnosed. A compatible cylinder may solve it without replacing the whole chair.
3. A cracked base or structural instability
Look for cracks, deformation or movement at load-bearing connections.
Stop using it. Seek an approved structural repair or replacement part; replace the chair if this is not feasible.
4. Broken lumbar support or backrest
The support no longer holds its intended position or attachment.
Request service or a compatible assembly. Do not continue using a loose or damaged backrest.
5. An unreliable recline or tilt lock
The backrest releases unexpectedly or cannot hold a selected position.
Stop using the chair until assessed. Service the mechanism or replace the chair.
6. Broken casters or armrests
Check the damaged part, its mounting point and compatible replacements.
Replace the part if the rest of the chair is sound. Do not assume universal parts will fit.
7. Persistent squeaks, wobbling or new discomfort
Check fasteners, fit, wear and the rest of the workstation.
Investigate first. Noise alone does not prove the chair is worn out; unresolved instability needs professional assessment.
Lost support is a reason to act
When a seat sags or a backrest no longer supports you, repeated adjustment may not solve the problem. Check whether the affected assembly can be replaced before discarding an otherwise sound chair.
Structural damage is different from cosmetic wear
A scuffed finish is not the same as a cracked base. Unexpected movement, a damaged load-bearing component or a failing tilt mechanism should not be ignored.
OSHA’s workstation checklist includes a sturdy five-leg chair base and sufficient adjustability. It does not prescribe a universal replacement age. Review the checklist.
Should you repair or replace?
Not every fault calls for a new chair. A worn caster or faulty cylinder may be repairable when the frame, seat and other mechanisms remain in good condition.
Repair when…
The fault is isolated and clearly identified.
The rest of the chair is structurally sound.
A manufacturer-approved compatible part is available.
The total repair cost is reasonable.
Replace when…
Structural damage cannot be safely repaired.
Several major assemblies are worn out.
Suitable parts are unavailable.
A repair cannot restore stable, comfortable use.
Compare the full repair cost—including parts, shipping and labor—with a suitable replacement. A low-cost part is not good value if it does not fit or leaves another serious fault unresolved.
Check coverage before dismantling. Read the HBADA US warranty and service information and contact support with your order details, model number and clear photos of the issue.
Gas lift cylinders are sealed pressure components. Do not open, drill, heat or attempt to refill one. Follow model-specific replacement instructions or seek qualified assistance.
How do you make a chair last longer?
Routine care helps identify wear before a small problem becomes a larger one. Follow your model’s instructions rather than applying the same maintenance method to every chair.
Respect the load limit: do not stand on the seat or use armrests and footrests as steps.
Inspect fasteners: check for looseness at the intervals in your manual, without overtightening.
Clean gently: remove dust from mesh and debris from casters using suitable tools and approved cleaning methods.
Address worn parts: request compatible replacements instead of accepting unstable movement.
Protect the materials: avoid prolonged direct sunlight, excessive heat and damp storage.
Watch for changes: investigate new sinking, unusual movement or damage promptly.
HBADA’s US maintenance FAQ recommends checking fasteners every one to three months depending on use. Consult your model instructions for the correct procedure. View the maintenance guide.
Which HBADA chairs should you consider for long-term use?
When replacing a chair, compare support, adjustability, maintenance requirements and after-sales service—not just a lifespan headline.
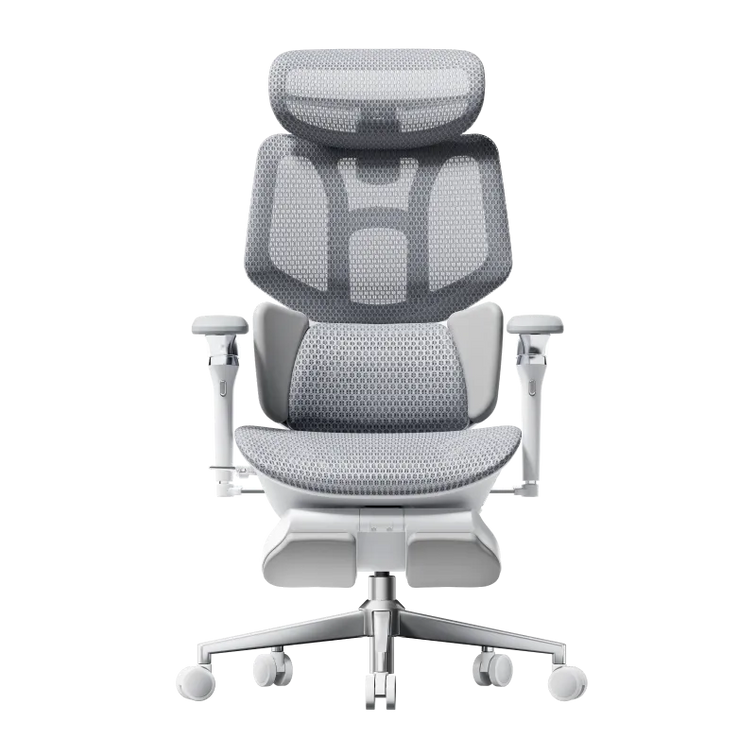
X7 and E3 Pro 2026: what to evaluate
Consideration
HBADA X7
E3 Pro 2026
Support approach
Powered automatic lumbar tracking
Mechanical three-zone adaptive lumbar support
Published durability information
The US listing describes an intended 10-year service life, subject to usage and care.
The US listing reports 120,000 recline, gas lift and rotation test cycles.
Ownership checks
Ask about structural parts, powered components and battery support.
Ask about the mesh seat, lumbar assembly and mechanical parts.
Warranty
Confirm coverage for your model, component and purchase.
Confirm coverage for your model, component and purchase.
These are manufacturer-published product details, not an independent prediction of your chair’s lifespan. Test cycles should not be converted directly into years of use.
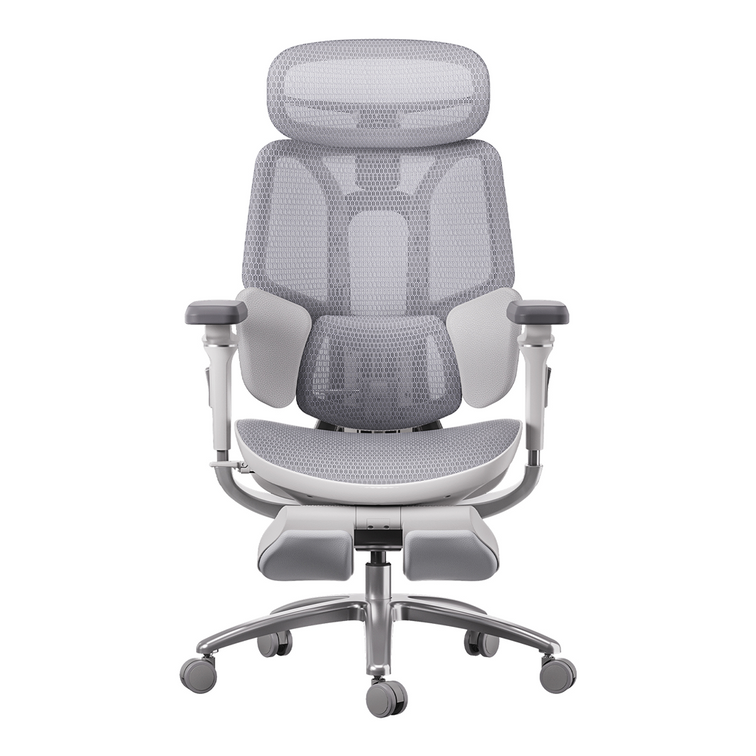
HBADA X7
Consider X7 if you want powered lumbar tracking alongside massage, heating and ventilation.
Explore X7 →
HBADA E3 Pro 2026
Consider E3 Pro 2026 if you prefer mechanical adjustment, adaptive lumbar support and breathable mesh.
Explore E3 Pro 2026 →
Limitations and when to get help
A visual check cannot confirm every internal component is sound.
Use the correct manual and parts for your exact model.
Do not force a jammed mechanism or improvise a structural repair.
New discomfort may involve desk setup, habits or health—not only chair wear.
Seek qualified healthcare advice for persistent, severe or radiating pain.
The takeaway: inspect first, then decide
Replace an ergonomic office chair when safe, reliable support cannot be restored—not simply because it has reached a birthday. Repair suitable individual parts, keep up with maintenance and act promptly on structural damage or failing mechanisms.
Start with the seven warning signs, check your warranty and ask about compatible parts before buying a replacement.
Frequently asked questions
How often should you replace an office chair?
There is no fixed interval for every chair. Assess stability, seat support, adjustment function and repair options. Replace it when damage or wear cannot be safely and reasonably resolved.
Is it worth repairing an office chair?
Often, if one replaceable component has failed and the rest of the chair is sound. Confirm compatibility and compare the complete repair cost with replacement. Do not assume a part labeled universal fits your chair.
Does stretched mesh mean I need a new chair?
Not necessarily. Ask whether the seat or mesh assembly can be replaced. If it cannot, or other major parts are also worn, replacing the chair may be more practical.
Should I replace a chair that keeps sinking?
Have the height control and cylinder checked first. A suitable replacement cylinder may restore the chair. Repeated sinking requires diagnosis rather than automatically discarding it or repeatedly fitting parts.
Does an old office chair cause back pain?
Lost support or poor fit may contribute to discomfort, but age alone does not identify the cause of pain. Review your setup and seek medical advice for persistent or severe symptoms.
Does a five-year warranty mean a chair lasts five years?
No. Warranty duration and useful lifespan are different. Coverage depends on the product, component and terms. A chair may remain usable after coverage ends, while a covered fault may occur earlier.
Sources
OSHA — Workstation Evaluation Checklist
HBADA US — Assembly, Maintenance and Troubleshooting
HBADA US — Warranty and Service
HBADA US — X7
HBADA US — E3 Pro 2026
Sep 29, 2026
How Often Should You Replace an Ergonomic Office Chair? Seven Warning Signs
Dark reading mode
Still supportive?Or time for a change?
A chair’s age tells only part of its story. Look at how it supports you, whether its adjustments still work and which problems can be repaired before deciding to replace it.
Condition mattersmore than the calendar.
Repair a suitable replaceable part. Replace the chair when safe, reliable support cannot be restored.
How often should you replace an ergonomic office chair? There is no single replacement interval for every chair. Inspect it for lost seat support, sinking height adjustment, structural cracks and failing mechanisms. Repair isolated faults when compatible parts and a safe repair are available. Stop using an unstable or structurally damaged chair until it has been assessed.
In this guide
How long does a chair last?
Seven warning signs
Repair or replace?
Make your chair last longer
HBADA models and durability
When to get help
The takeaway
Frequently asked questions
Sources
How long does an ergonomic office chair last?
A well-maintained chair can remain useful for years, but build quality, hours of use, user load, care and storage conditions all affect how it wears. A lightly used home office chair and a shared chair used across multiple shifts do not experience the same demands.
Treat age as a reason to inspect the chair—not an automatic expiry date. A newer chair with a cracked frame needs attention immediately, while an older chair may remain usable if it is stable, supportive and functioning correctly.
Service life, testing and warranty are different. A design-life target describes intended use. A test result describes performance under specified test conditions. A warranty describes coverage under its terms. None should be treated as a promise that every component will last a fixed number of years.
What are the seven warning signs?
Some changes call for maintenance; others mean you should stop using the chair. The next step depends on the cause, the affected part and whether support can be restored.
Seven signs to investigate before your next workday
Warning sign
What to check
Repair or replace?
1. Sagging cushion or stretched mesh
The seat no longer supports you evenly, even after adjustment.
Ask about a replacement seat or mesh assembly. Replace the chair if support cannot be restored.
2. The seat keeps sinking
The height control may be engaging unintentionally, or the cylinder may be worn.
Have the fault diagnosed. A compatible cylinder may solve it without replacing the whole chair.
3. A cracked base or structural instability
Look for cracks, deformation or movement at load-bearing connections.
Stop using it. Seek an approved structural repair or replacement part; replace the chair if this is not feasible.
4. Broken lumbar support or backrest
The support no longer holds its intended position or attachment.
Request service or a compatible assembly. Do not continue using a loose or damaged backrest.
5. An unreliable recline or tilt lock
The backrest releases unexpectedly or cannot hold a selected position.
Stop using the chair until assessed. Service the mechanism or replace the chair.
6. Broken casters or armrests
Check the damaged part, its mounting point and compatible replacements.
Replace the part if the rest of the chair is sound. Do not assume universal parts will fit.
7. Persistent squeaks, wobbling or new discomfort
Check fasteners, fit, wear and the rest of the workstation.
Investigate first. Noise alone does not prove the chair is worn out; unresolved instability needs professional assessment.
Lost support is a reason to act
When a seat sags or a backrest no longer supports you, repeated adjustment may not solve the problem. Check whether the affected assembly can be replaced before discarding an otherwise sound chair.
Structural damage is different from cosmetic wear
A scuffed finish is not the same as a cracked base. Unexpected movement, a damaged load-bearing component or a failing tilt mechanism should not be ignored.
OSHA’s workstation checklist includes a sturdy five-leg chair base and sufficient adjustability. It does not prescribe a universal replacement age. Review the checklist.
Should you repair or replace?
Not every fault calls for a new chair. A worn caster or faulty cylinder may be repairable when the frame, seat and other mechanisms remain in good condition.
Repair when…
The fault is isolated and clearly identified.
The rest of the chair is structurally sound.
A manufacturer-approved compatible part is available.
The total repair cost is reasonable.
Replace when…
Structural damage cannot be safely repaired.
Several major assemblies are worn out.
Suitable parts are unavailable.
A repair cannot restore stable, comfortable use.
Compare the full repair cost—including parts, shipping and labor—with a suitable replacement. A low-cost part is not good value if it does not fit or leaves another serious fault unresolved.
Check coverage before dismantling. Read the HBADA US warranty and service information and contact support with your order details, model number and clear photos of the issue.
Gas lift cylinders are sealed pressure components. Do not open, drill, heat or attempt to refill one. Follow model-specific replacement instructions or seek qualified assistance.
How do you make a chair last longer?
Routine care helps identify wear before a small problem becomes a larger one. Follow your model’s instructions rather than applying the same maintenance method to every chair.
Respect the load limit: do not stand on the seat or use armrests and footrests as steps.
Inspect fasteners: check for looseness at the intervals in your manual, without overtightening.
Clean gently: remove dust from mesh and debris from casters using suitable tools and approved cleaning methods.
Address worn parts: request compatible replacements instead of accepting unstable movement.
Protect the materials: avoid prolonged direct sunlight, excessive heat and damp storage.
Watch for changes: investigate new sinking, unusual movement or damage promptly.
HBADA’s US maintenance FAQ recommends checking fasteners every one to three months depending on use. Consult your model instructions for the correct procedure. View the maintenance guide.
Which HBADA chairs should you consider for long-term use?
When replacing a chair, compare support, adjustability, maintenance requirements and after-sales service—not just a lifespan headline.
X7 and E3 Pro 2026: what to evaluate
Consideration
HBADA X7
E3 Pro 2026
Support approach
Powered automatic lumbar tracking
Mechanical three-zone adaptive lumbar support
Published durability information
The US listing describes an intended 10-year service life, subject to usage and care.
The US listing reports 120,000 recline, gas lift and rotation test cycles.
Ownership checks
Ask about structural parts, powered components and battery support.
Ask about the mesh seat, lumbar assembly and mechanical parts.
Warranty
Confirm coverage for your model, component and purchase.
Confirm coverage for your model, component and purchase.
These are manufacturer-published product details, not an independent prediction of your chair’s lifespan. Test cycles should not be converted directly into years of use.
HBADA X7
Consider X7 if you want powered lumbar tracking alongside massage, heating and ventilation.
Explore X7 →
HBADA E3 Pro 2026
Consider E3 Pro 2026 if you prefer mechanical adjustment, adaptive lumbar support and breathable mesh.
Explore E3 Pro 2026 →
Limitations and when to get help
A visual check cannot confirm every internal component is sound.
Use the correct manual and parts for your exact model.
Do not force a jammed mechanism or improvise a structural repair.
New discomfort may involve desk setup, habits or health—not only chair wear.
Seek qualified healthcare advice for persistent, severe or radiating pain.
The takeaway: inspect first, then decide
Replace an ergonomic office chair when safe, reliable support cannot be restored—not simply because it has reached a birthday. Repair suitable individual parts, keep up with maintenance and act promptly on structural damage or failing mechanisms.
Start with the seven warning signs, check your warranty and ask about compatible parts before buying a replacement.
Frequently asked questions
How often should you replace an office chair?
There is no fixed interval for every chair. Assess stability, seat support, adjustment function and repair options. Replace it when damage or wear cannot be safely and reasonably resolved.
Is it worth repairing an office chair?
Often, if one replaceable component has failed and the rest of the chair is sound. Confirm compatibility and compare the complete repair cost with replacement. Do not assume a part labeled universal fits your chair.
Does stretched mesh mean I need a new chair?
Not necessarily. Ask whether the seat or mesh assembly can be replaced. If it cannot, or other major parts are also worn, replacing the chair may be more practical.
Should I replace a chair that keeps sinking?
Have the height control and cylinder checked first. A suitable replacement cylinder may restore the chair. Repeated sinking requires diagnosis rather than automatically discarding it or repeatedly fitting parts.
Does an old office chair cause back pain?
Lost support or poor fit may contribute to discomfort, but age alone does not identify the cause of pain. Review your setup and seek medical advice for persistent or severe symptoms.
Does a five-year warranty mean a chair lasts five years?
No. Warranty duration and useful lifespan are different. Coverage depends on the product, component and terms. A chair may remain usable after coverage ends, while a covered fault may occur earlier.
Sources
OSHA — Workstation Evaluation Checklist
HBADA US — Assembly, Maintenance and Troubleshooting
HBADA US — Warranty and Service
HBADA US — X7
HBADA US — E3 Pro 2026
Sep 29, 2026
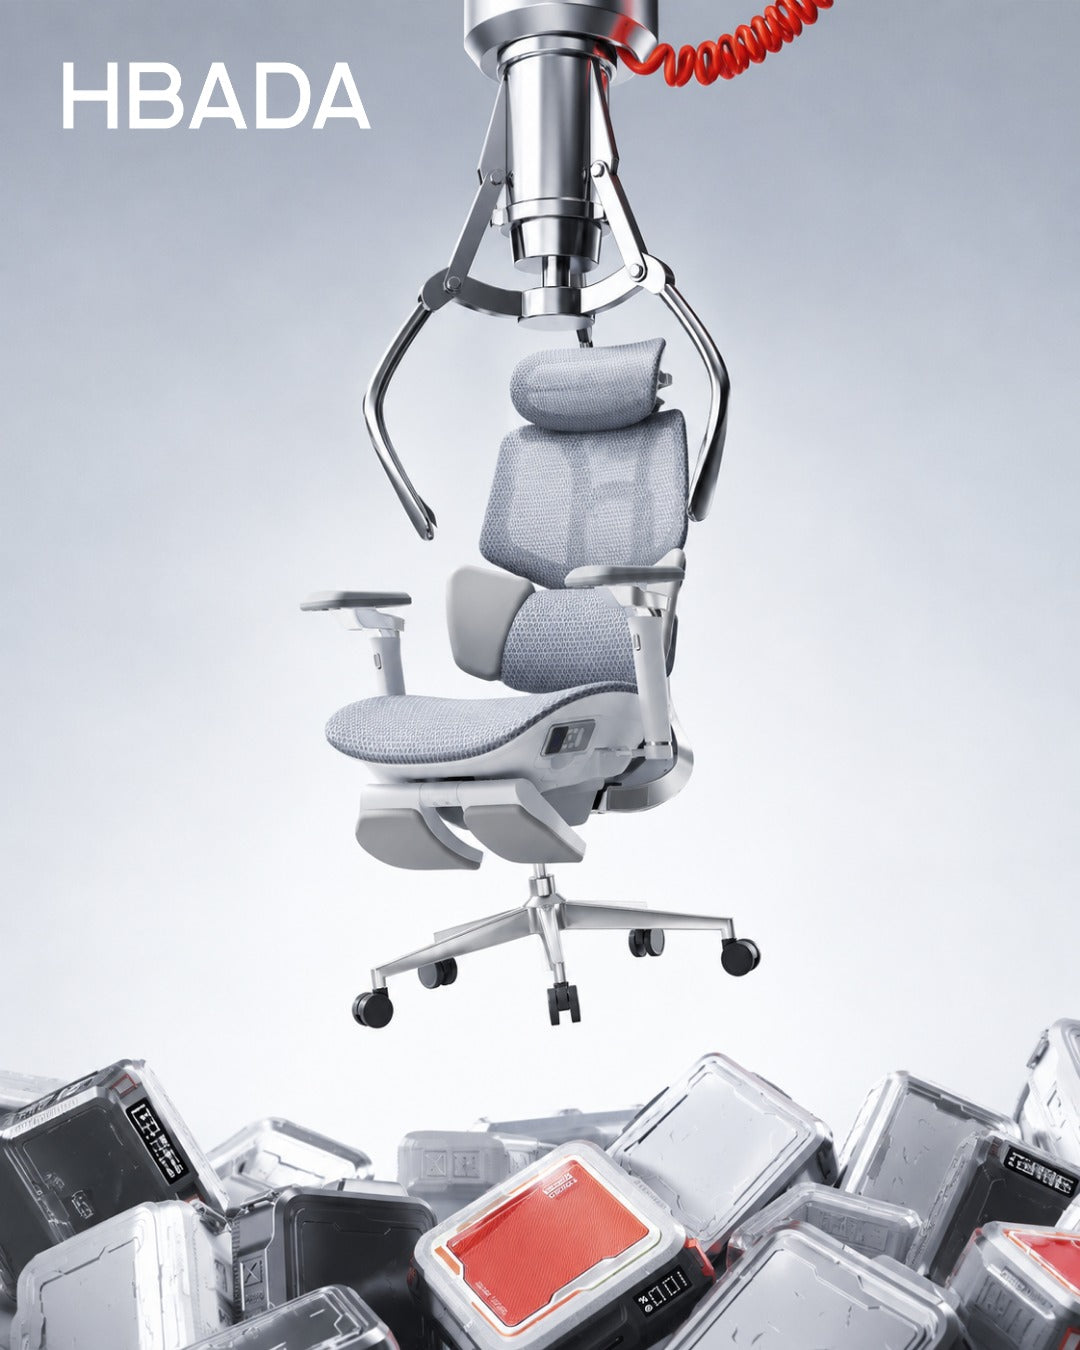 HBADA Ergonomic Office Chairs With Footrests: Models and Fit Compared
Dark reading mode
Room to focus.Space to lean back.
An ergonomic office chair with a footrest brings another option to your working day: a supported, reclined break. The right choice starts with how the chair fits—not just whether a footrest slides out.
Fit first.Footrest second.
Compare seat height, seat depth and lumbar support. Then choose the reclining comfort and features you want.
Which HBADA ergonomic office chair with a footrest should you choose? Consider the X7 for a pull-out footrest with powered lumbar tracking, massage, heating and ventilation. Choose the E3 Pro 2026 with footrest if you prefer mechanical adjustment and adaptive lumbar support. Confirm your selected configuration before ordering.
In this guide
Do you need a footrest?
HBADA model options
Chair comparison
Finding the right fit
Setup routine
Which should you choose?
Limitations
The takeaway
Frequently asked questions
Sources
Do you need an ergonomic office chair with a footrest?
Before comparing chairs, decide what you want the footrest to do. Supporting your legs while reclining is different from supporting your feet while typing at a desk.
For reclined breaks
A built-in chair footrest
A retractable footrest extends from beneath the seat to support your legs when you lean back. It tucks away when you return to upright work.
For upright work
A separate floor footrest
A stable platform under the desk supports your feet when the chair must be raised to reach the work surface comfortably.
OSHA’s workstation guidance recommends supporting the feet on the floor or a footrest. That does not mean extending a chair’s reclining leg support is the right solution for typing with dangling feet. See OSHA’s working-position guidance .
Who benefits most from a built-in footrest?
People who regularly alternate between desk work and reclined breaks.
Users who want leg support that stores beneath the seat.
Anyone who prefers an integrated setup instead of a separate ottoman.
Shorter users may need a floor footrest for upright work, whether or not their chair also has a retractable footrest.
Which HBADA models offer a footrest?
HBADA X7: powered support and reclining comfort
The HBADA X7 combines a pull-out footrest with automatic lumbar tracking, an 8D massage system, heating and fan-assisted seat ventilation. Its mesh construction and adjustable support provide options for both desk work and breaks.
HBADA E3 Pro 2026: mechanical adjustment
The E3 Pro 2026 offers adaptive three-zone lumbar support, an adjustable headrest, multi-directional armrests and breathable mesh. Select the With Footrest option if you want the retractable footrest included.
Check the exact model and option. This guide compares X7 with E3 Pro 2026. Do not assume that older E3 versions, X7 Air or other models have identical specifications or included accessories.
HBADA footrest chair comparison
Start with the difference in support systems, then check the dimensions and configuration on the product listing.
X7 vs. E3 Pro 2026 with footrest
Feature
HBADA X7
E3 Pro 2026
Footrest
Pull-out design; confirm the selected model
Choose the With Footrest configuration
Lumbar support
Powered automatic tracking
Mechanical three-zone adaptive support
Head support
4D bi-axial headrest
4D dual-axis headrest
Seat material
Breathable mesh
Breathable high-elastic mesh
Additional functions
Massage, heating and fan-assisted ventilation
Mechanical adjustments without powered comfort functions
Main choice
Powered features alongside reclining leg support
Hands-on adjustment with a retractable footrest
Product options can change. Confirm dimensions, footrest inclusion, load limits and warranty terms for the exact US configuration before purchasing.
How should a footrest chair fit?
A footrest cannot correct a seat that is too deep or a backrest that does not suit you. Compare four things: seat height, seat depth, lumbar position and armrest fit.
You should be able to sit against the backrest without crowding the backs of your knees. Your shoulders should remain relaxed when using the keyboard, and the lumbar support should feel comfortable rather than forceful.
What you feel—and what to check
If you notice
Check this
Aim for
Feet dangle while typing
Seat and desk height; a separate floor footrest if needed
Supported feet without reaching upward to the keyboard
Pressure behind the knees
Seat depth and seat height
Comfortable clearance at the seat edge
Lower back feels unsupported
Seat depth, sitting position and lumbar settings
Comfortable contact with the lower-back curve
Shoulders lift while typing
Desk height, keyboard position and armrests
Relaxed shoulders and easy keyboard access
Leg support feels awkward when reclining
Footrest extension, recline and model dimensions
Supported legs without uncomfortable pressure
How to set up your chair and footrest correctly
Start with upright work. Adjust seat height so you can use the keyboard with relaxed shoulders. Support your feet on the floor or a separate floor footrest.
Set the seat depth. Sit against the backrest and leave comfortable clearance behind your knees.
Position the lumbar support and armrests. Bring support to your body without pushing your torso forward or raising your shoulders.
Check your screen and reach. Keep the screen in front of you and the keyboard close enough to use without stretching.
Try the reclined position. Move clear of desk obstructions, extend the footrest according to the instructions and recline gradually. Do not stand or sit on the extended footrest.
Return to work—and keep moving. Retract the footrest when appropriate for desk work. Take regular opportunities to stand and walk rather than relying only on changes in recline.
Which HBADA chair should you choose?
Powered comfort
Choose X7
Choose X7 if automatic lumbar tracking, massage, heating and cooling airflow are features you want alongside a pull-out footrest.
Explore X7 →
Mechanical support
Choose E3 Pro 2026
Choose the With Footrest version if you prefer adaptive mechanical support and hands-on adjustment without a battery-powered comfort system.
Explore E3 Pro 2026 →
If your main problem is that your feet do not reach the floor while typing, evaluate the chair and desk height first. A separate floor footrest may address that need without changing the chair.
Limitations and when this advice may not apply
A chair and footrest are comfort tools, not medical treatments.
Recommended user-height ranges do not replace checking your actual proportions.
A height-adjustable desk may help, but the chair still needs to fit.
Check footrest instructions and load limits separately from the chair’s overall capacity.
Seek professional advice for severe, persistent or radiating pain.
The takeaway: choose fit before features
The right ergonomic office chair with a footrest should work well when you are sitting upright and when you take a reclined break. Start with seat fit and support, then choose between powered X7 features and the mechanical adjustment of E3 Pro 2026.
Confirm the footrest configuration, check the dimensions and leave room for movement throughout your day.
Frequently asked questions
Are office chairs with footrests good for your back?
A built-in footrest can make a reclined break more comfortable by supporting the legs. Overall comfort still depends on seat fit, back support and movement. It is not a treatment for back conditions.
Do all HBADA chairs come with a footrest?
No. Footrest availability depends on the model and configuration. For E3 Pro 2026, select With Footrest. Check the exact X7 model and included features rather than assuming every chair in the series is identical.
Is a built-in footrest better than a separate one?
They serve different purposes. A built-in retractable footrest supports the legs during reclining. A separate floor footrest supports the feet during upright desk work when the floor is out of reach. Some setups benefit from both.
Which HBADA chair should I choose for long workdays?
Compare fit first. X7 adds powered lumbar tracking, massage, heating and ventilation. E3 Pro 2026 offers mechanical adaptive support and an optional footrest. Neither replaces regular movement breaks.
Can a footrest help with short legs or a tall desk?
A separate floor footrest can help support your feet when the seat must be raised for a fixed-height desk. A reclining chair footrest should not automatically be used as a substitute.
Can I type with the chair footrest extended?
Check whether that position allows comfortable access to your keyboard without reaching forward. Deep recline is usually better suited to breaks than typing at a standard desk. Follow the chair’s instructions.
Sources
OSHA — Good Working Positions
OSHA — Workstation Evaluation Checklist
HBADA US — X7 Smart Ergonomic Chair
HBADA US — E3 Pro 2026
Sep 28, 2026
HBADA Ergonomic Office Chairs With Footrests: Models and Fit Compared
Dark reading mode
Room to focus.Space to lean back.
An ergonomic office chair with a footrest brings another option to your working day: a supported, reclined break. The right choice starts with how the chair fits—not just whether a footrest slides out.
Fit first.Footrest second.
Compare seat height, seat depth and lumbar support. Then choose the reclining comfort and features you want.
Which HBADA ergonomic office chair with a footrest should you choose? Consider the X7 for a pull-out footrest with powered lumbar tracking, massage, heating and ventilation. Choose the E3 Pro 2026 with footrest if you prefer mechanical adjustment and adaptive lumbar support. Confirm your selected configuration before ordering.
In this guide
Do you need a footrest?
HBADA model options
Chair comparison
Finding the right fit
Setup routine
Which should you choose?
Limitations
The takeaway
Frequently asked questions
Sources
Do you need an ergonomic office chair with a footrest?
Before comparing chairs, decide what you want the footrest to do. Supporting your legs while reclining is different from supporting your feet while typing at a desk.
For reclined breaks
A built-in chair footrest
A retractable footrest extends from beneath the seat to support your legs when you lean back. It tucks away when you return to upright work.
For upright work
A separate floor footrest
A stable platform under the desk supports your feet when the chair must be raised to reach the work surface comfortably.
OSHA’s workstation guidance recommends supporting the feet on the floor or a footrest. That does not mean extending a chair’s reclining leg support is the right solution for typing with dangling feet. See OSHA’s working-position guidance .
Who benefits most from a built-in footrest?
People who regularly alternate between desk work and reclined breaks.
Users who want leg support that stores beneath the seat.
Anyone who prefers an integrated setup instead of a separate ottoman.
Shorter users may need a floor footrest for upright work, whether or not their chair also has a retractable footrest.
Which HBADA models offer a footrest?
HBADA X7: powered support and reclining comfort
The HBADA X7 combines a pull-out footrest with automatic lumbar tracking, an 8D massage system, heating and fan-assisted seat ventilation. Its mesh construction and adjustable support provide options for both desk work and breaks.
HBADA E3 Pro 2026: mechanical adjustment
The E3 Pro 2026 offers adaptive three-zone lumbar support, an adjustable headrest, multi-directional armrests and breathable mesh. Select the With Footrest option if you want the retractable footrest included.
Check the exact model and option. This guide compares X7 with E3 Pro 2026. Do not assume that older E3 versions, X7 Air or other models have identical specifications or included accessories.
HBADA footrest chair comparison
Start with the difference in support systems, then check the dimensions and configuration on the product listing.
X7 vs. E3 Pro 2026 with footrest
Feature
HBADA X7
E3 Pro 2026
Footrest
Pull-out design; confirm the selected model
Choose the With Footrest configuration
Lumbar support
Powered automatic tracking
Mechanical three-zone adaptive support
Head support
4D bi-axial headrest
4D dual-axis headrest
Seat material
Breathable mesh
Breathable high-elastic mesh
Additional functions
Massage, heating and fan-assisted ventilation
Mechanical adjustments without powered comfort functions
Main choice
Powered features alongside reclining leg support
Hands-on adjustment with a retractable footrest
Product options can change. Confirm dimensions, footrest inclusion, load limits and warranty terms for the exact US configuration before purchasing.
How should a footrest chair fit?
A footrest cannot correct a seat that is too deep or a backrest that does not suit you. Compare four things: seat height, seat depth, lumbar position and armrest fit.
You should be able to sit against the backrest without crowding the backs of your knees. Your shoulders should remain relaxed when using the keyboard, and the lumbar support should feel comfortable rather than forceful.
What you feel—and what to check
If you notice
Check this
Aim for
Feet dangle while typing
Seat and desk height; a separate floor footrest if needed
Supported feet without reaching upward to the keyboard
Pressure behind the knees
Seat depth and seat height
Comfortable clearance at the seat edge
Lower back feels unsupported
Seat depth, sitting position and lumbar settings
Comfortable contact with the lower-back curve
Shoulders lift while typing
Desk height, keyboard position and armrests
Relaxed shoulders and easy keyboard access
Leg support feels awkward when reclining
Footrest extension, recline and model dimensions
Supported legs without uncomfortable pressure
How to set up your chair and footrest correctly
Start with upright work. Adjust seat height so you can use the keyboard with relaxed shoulders. Support your feet on the floor or a separate floor footrest.
Set the seat depth. Sit against the backrest and leave comfortable clearance behind your knees.
Position the lumbar support and armrests. Bring support to your body without pushing your torso forward or raising your shoulders.
Check your screen and reach. Keep the screen in front of you and the keyboard close enough to use without stretching.
Try the reclined position. Move clear of desk obstructions, extend the footrest according to the instructions and recline gradually. Do not stand or sit on the extended footrest.
Return to work—and keep moving. Retract the footrest when appropriate for desk work. Take regular opportunities to stand and walk rather than relying only on changes in recline.
Which HBADA chair should you choose?
Powered comfort
Choose X7
Choose X7 if automatic lumbar tracking, massage, heating and cooling airflow are features you want alongside a pull-out footrest.
Explore X7 →
Mechanical support
Choose E3 Pro 2026
Choose the With Footrest version if you prefer adaptive mechanical support and hands-on adjustment without a battery-powered comfort system.
Explore E3 Pro 2026 →
If your main problem is that your feet do not reach the floor while typing, evaluate the chair and desk height first. A separate floor footrest may address that need without changing the chair.
Limitations and when this advice may not apply
A chair and footrest are comfort tools, not medical treatments.
Recommended user-height ranges do not replace checking your actual proportions.
A height-adjustable desk may help, but the chair still needs to fit.
Check footrest instructions and load limits separately from the chair’s overall capacity.
Seek professional advice for severe, persistent or radiating pain.
The takeaway: choose fit before features
The right ergonomic office chair with a footrest should work well when you are sitting upright and when you take a reclined break. Start with seat fit and support, then choose between powered X7 features and the mechanical adjustment of E3 Pro 2026.
Confirm the footrest configuration, check the dimensions and leave room for movement throughout your day.
Frequently asked questions
Are office chairs with footrests good for your back?
A built-in footrest can make a reclined break more comfortable by supporting the legs. Overall comfort still depends on seat fit, back support and movement. It is not a treatment for back conditions.
Do all HBADA chairs come with a footrest?
No. Footrest availability depends on the model and configuration. For E3 Pro 2026, select With Footrest. Check the exact X7 model and included features rather than assuming every chair in the series is identical.
Is a built-in footrest better than a separate one?
They serve different purposes. A built-in retractable footrest supports the legs during reclining. A separate floor footrest supports the feet during upright desk work when the floor is out of reach. Some setups benefit from both.
Which HBADA chair should I choose for long workdays?
Compare fit first. X7 adds powered lumbar tracking, massage, heating and ventilation. E3 Pro 2026 offers mechanical adaptive support and an optional footrest. Neither replaces regular movement breaks.
Can a footrest help with short legs or a tall desk?
A separate floor footrest can help support your feet when the seat must be raised for a fixed-height desk. A reclining chair footrest should not automatically be used as a substitute.
Can I type with the chair footrest extended?
Check whether that position allows comfortable access to your keyboard without reaching forward. Deep recline is usually better suited to breaks than typing at a standard desk. Follow the chair’s instructions.
Sources
OSHA — Good Working Positions
OSHA — Workstation Evaluation Checklist
HBADA US — X7 Smart Ergonomic Chair
HBADA US — E3 Pro 2026
Sep 28, 2026
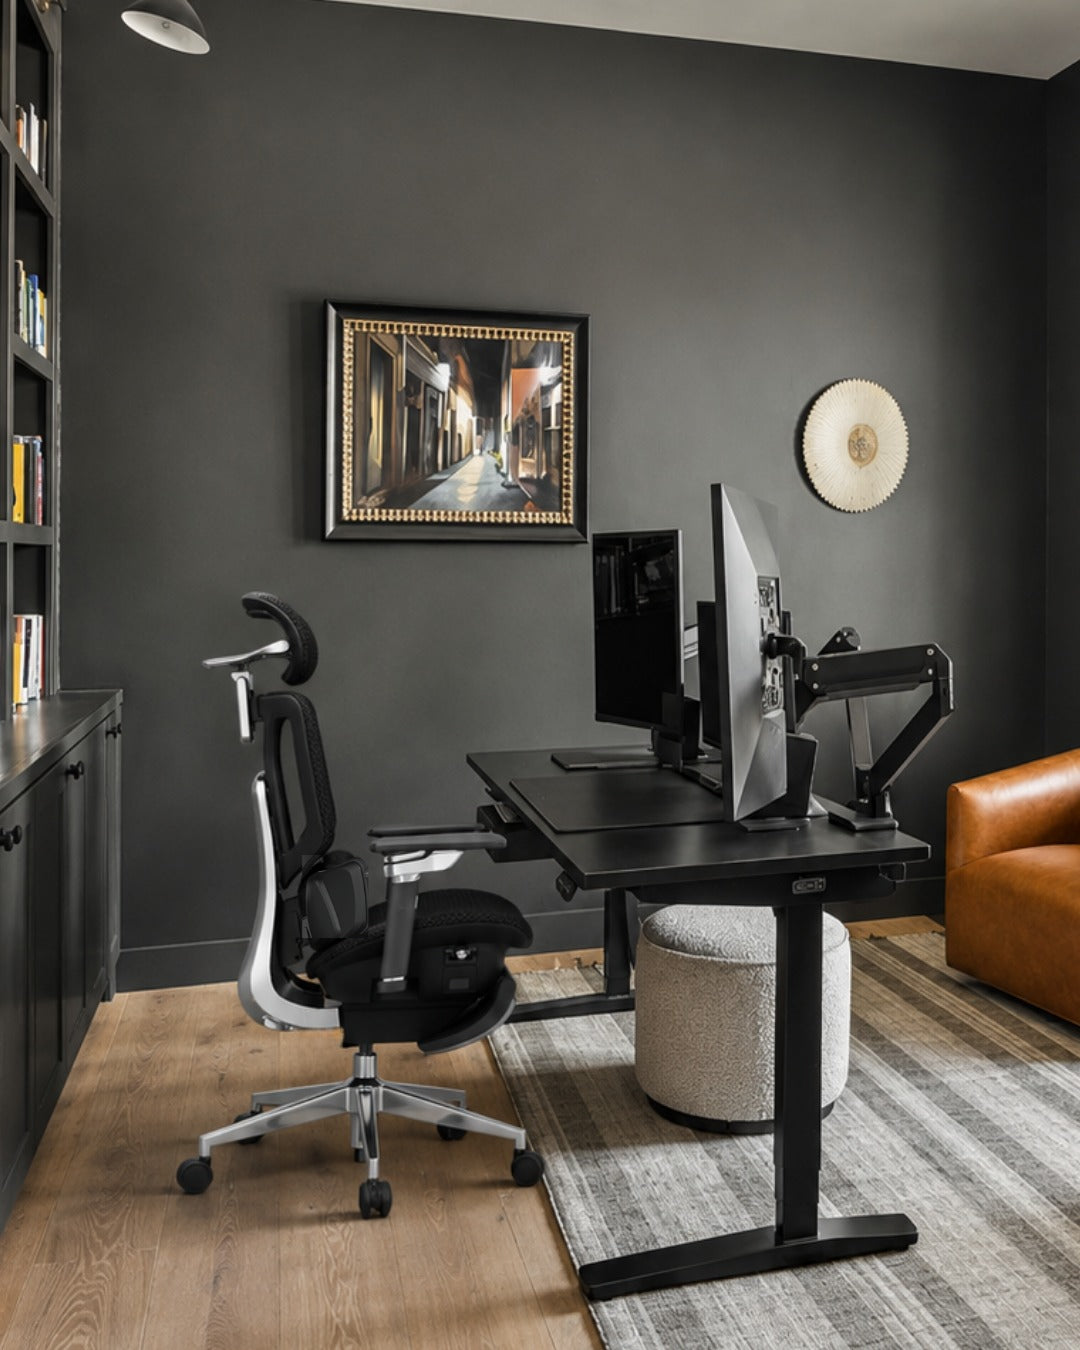 How to Adjust a Shared Ergonomic Office Chair for Hot Desking
Dark reading mode
A shared desk.A setup that is yours.
Someone else’s chair settings do not have to become your working posture. A simple reset helps you make a shared ergonomic office chair fit your body before the day begins.
One routine.Five adjustments.
Seat height
Seat depth
Lumbar support
Armrests
Recline
How do you adjust a shared ergonomic office chair? Start with seat height, then seat depth, lumbar support, armrests and recline. Check the desk and screen afterward. Once you know the controls, aim for a quick one-minute check, taking longer whenever you need to fine-tune the fit.
In this guide
Why reset a shared chair?
The adjustment order
The 60-second reset
What to look for
Shared-chair hygiene
HBADA chair comparison
Limitations
The takeaway
Frequently asked questions
Sources
Why must you reset a shared chair?
A hot-desk chair usually arrives set for whoever used it last. Their legs, back and arms may differ from yours, so the seat, lumbar support and armrests may not be in the right position for you.
Small mismatches can become distracting during a full workday. You might perch on the front edge because the seat is too deep, raise your shoulders to reach the keyboard or sit away from the backrest because the lumbar support is in the wrong place.
Resetting the chair gives you a more useful starting point than adjusting your posture around someone else’s settings. It also gives you a chance to check the rest of the workstation before getting absorbed in work.
Think beyond the seat. OSHA’s computer workstation guidance treats chair adjustment, desk setup and equipment placement as connected parts of the workstation. Explore OSHA’s chair guidance.
What order should you adjust the chair in?
Start with the settings that establish your overall position. Seat height sets your relationship to the desk; seat depth determines how far back you can sit. Then position the lumbar support and armrests around that foundation.
Your reset sequence:Seat height → seat depth → lumbar support → armrests → recline → desk and screen check.
At a height-adjustable desk, set the chair for supported feet and then bring the work surface to a comfortable working height. At a fixed-height desk, you may need to raise the chair to reach the keyboard comfortably and use a separate floor footrest.
Treat the sequence as a practical routine, not a rigid rule. If changing one setting affects another, go back and make a small correction.
The 60-second hot-desking reset
Learn the controls first, then use these five steps as a quick daily routine. The goal is a repeatable setup—not finishing before a timer runs out.
Set the seat height
Sit back and position yourself so you can reach the keyboard without lifting your shoulders. Keep your feet supported on the floor or a stable floor footrest, and check that the seat edge does not press into the backs of your thighs.
Slide the seat to fit your legs
Adjust the seat depth while keeping your back against the backrest. Leave roughly two to three fingers of clearance behind your knees as a starting point, then check that the position feels comfortable.
Position the lumbar support
Move the support toward the curve of your lower back. It should feel supportive rather than push you forward. With automatic tracking, still check the starting position and available support settings.
Bring the armrests to you
Adjust the available height, width or rotation so your forearms can rest without raising your shoulders. Make sure the armrests do not block you from moving close enough to the desk.
Check the recline
Lean back gently and locate the tilt lock. Adjust resistance if the chair has a manual tension control. With an automatic mechanism, check that the movement feels controlled and supportive.
Your final fit check
Adjustment
Aim for
Quick check
Seat height
Comfortable access to the work surface
Feet supported; shoulders relaxed
Seat depth
Thigh support with knee clearance
You can sit back without pressure behind the knees
Lumbar support
Comfortable contact with the lower-back curve
You do not feel pushed toward the seat edge
Armrests
Supported forearms and relaxed shoulders
You can move close to the keyboard
Recline
Controlled, supported movement
You understand the lock and resistance controls
Floor footrest
Foot support when the floor is out of reach
Both feet rest securely without stretching downward
What makes a chair good for hot desking?
A shared chair earns its place when different users can adjust it easily and understand how its controls work. Look beyond the feature count to how practical those adjustments are during a busy workday.
A useful adjustment range: compare seat height, depth and width with the people using the workspace. One chair may not fit everyone.
Clear, accessible controls: users should be able to identify and reach the controls without guessing.
Suitable build and service support: check intended use, maintenance requirements, replacement parts and warranty coverage.
Practical materials: breathable mesh allows airflow, while cleaning suitability depends on the specific materials and care instructions.
Appropriate capacity and dimensions: check both the weight limit and physical fit. Capacity alone does not tell you whether the seat fits.
Make adjustment easy to learn. Keep a short setup card or a link to the chair’s instructions at each shared desk. A clearly labeled control is more useful than a feature nobody knows how to operate.
How do you keep a shared chair hygienic?
Armrests, controls and headrests are common touch points. A consistent cleaning routine helps keep the chair pleasant for the next person.
Follow the chair’s care instructions and your workplace cleaning procedure.
Use a suitable cloth and a cleaner approved for the surface. Do not assume every disinfectant is compatible with mesh, padding or finishes.
Avoid soaking the seat or spraying liquid directly into controls, ventilation openings or electrical components.
Allow cleaned surfaces to dry before the next use.
Report spills, loose parts and damaged controls promptly. Remove an unsafe chair from use.
Breathability and hygiene are separate considerations: mesh allows airflow, but it still needs appropriate care.
Which HBADA chair suits shared desks?
The HBADA X7 and E3 Pro 2026 take different approaches to lumbar support. Compare fit first, then decide whether powered tracking or mechanical adjustment better suits the workspace.
X7 vs. E3 Pro 2026: what matters at a shared desk
Consideration
HBADA X7
E3 Pro 2026
Lumbar approach
Powered automatic lumbar tracking
3-zone adaptive lumbar support with mechanical adjustments
Daily reset
Check seat fit, armrests and preferred tracking settings
Check seat fit, lumbar position and armrests
Seat material
Breathable mesh
Breathable high-elastic mesh
Adjustment preference
For users who want powered lumbar tracking
For users who prefer hands-on mechanical adjustment
Before purchasing
Confirm dimensions, configuration and power requirements
Confirm dimensions and the selected footrest configuration
X7: powered lumbar tracking
Consider the X7 if you want lumbar support that responds automatically to posture changes. Each user should still check seat fit, armrests and preferred support settings.
Explore HBADA X7 →
E3 Pro 2026: mechanical adjustment
Consider the E3 Pro 2026 if you prefer hands-on adjustment with adaptive lumbar support, adjustable armrests and a breathable mesh seat.
Explore E3 Pro 2026 →
Refer to the linked US product listings for current dimensions and configurations. For office-wide purchasing, confirm shared or intensive-use requirements and warranty terms before ordering. Automatic lumbar tracking does not automatically fit the entire chair to a new user.
Limitations and when to get help
A chair reset is one part of setting up a shared workstation. It cannot compensate for every desk, screen or individual fit issue.
Check screen position, keyboard reach and available leg space after adjusting the chair.
If the adjustment range does not fit you, ask for a suitable alternative rather than forcing a position.
Change posture and take movement breaks throughout the day.
Ask for a workstation assessment if you cannot find a comfortable setup.
For severe, persistent or radiating pain, consult a qualified healthcare professional.
The takeaway: make the setup yours
Hot desking works better when you take a moment to adjust the workstation. Start with seat height, then work through depth, lumbar support, armrests and recline. Finish by checking the desk and screen.
Choose powered tracking if that suits your routine, or mechanical adjustment if you prefer a hands-on setup. Either way, learning the controls once makes every future reset more straightforward.
Frequently asked questions
How do you adjust an office chair for your body?
Start with seat height and depth, then position the lumbar support and armrests. Check the recline controls and finish by reviewing the desk and screen. Look for supported feet, relaxed shoulders and comfortable clearance behind your knees.
Is hot desking bad for your back?
Hot desking does not automatically mean an uncomfortable setup. Problems can arise when the chair or workstation does not fit the user or is difficult to adjust. Learn the controls, review your fit and keep movement in your workday.
What should you look for in a shared office chair?
Look for a useful adjustment range, clear controls, suitable dimensions and materials you can maintain according to the care instructions. Check intended use, weight capacity and after-sales support. A single model may not suit every colleague.
How do you know a chair fits after resetting it?
Check that your feet are supported, your thighs rest comfortably and the seat does not press behind your knees. Lumbar support should meet your lower back, and you should reach the keyboard with relaxed shoulders. Reassess comfort as you work.
Should a shared chair have a footrest?
Some users need a separate floor footrest when a fixed desk requires a higher seat position. A retractable chair footrest supports the legs during reclining and serves a different purpose. Choose support according to the working position.
Does automatic lumbar tracking adjust the whole chair?
No. Automatic lumbar tracking responds to posture changes, but it does not replace checking seat height, seat depth, armrests or workstation fit. Each new user should still run through the reset.
Can you really reset a chair in 60 seconds?
A familiar chair can be quick to check, but one minute is a practical target rather than a guarantee. Allow more time when learning a new chair or adjusting an unfamiliar workstation.
Sources
General workstation guidance is based on OSHA’s computer workstation resources. Product information refers to the linked HBADA US listings.
OSHA — Computer Workstations: Chairs
OSHA — Workstation Evaluation Checklist
HBADA US — X7 Smart Ergonomic Chair
HBADA US — E3 Pro Ergonomic Office Chair 2026 Edition
Sep 23, 2026
How to Adjust a Shared Ergonomic Office Chair for Hot Desking
Dark reading mode
A shared desk.A setup that is yours.
Someone else’s chair settings do not have to become your working posture. A simple reset helps you make a shared ergonomic office chair fit your body before the day begins.
One routine.Five adjustments.
Seat height
Seat depth
Lumbar support
Armrests
Recline
How do you adjust a shared ergonomic office chair? Start with seat height, then seat depth, lumbar support, armrests and recline. Check the desk and screen afterward. Once you know the controls, aim for a quick one-minute check, taking longer whenever you need to fine-tune the fit.
In this guide
Why reset a shared chair?
The adjustment order
The 60-second reset
What to look for
Shared-chair hygiene
HBADA chair comparison
Limitations
The takeaway
Frequently asked questions
Sources
Why must you reset a shared chair?
A hot-desk chair usually arrives set for whoever used it last. Their legs, back and arms may differ from yours, so the seat, lumbar support and armrests may not be in the right position for you.
Small mismatches can become distracting during a full workday. You might perch on the front edge because the seat is too deep, raise your shoulders to reach the keyboard or sit away from the backrest because the lumbar support is in the wrong place.
Resetting the chair gives you a more useful starting point than adjusting your posture around someone else’s settings. It also gives you a chance to check the rest of the workstation before getting absorbed in work.
Think beyond the seat. OSHA’s computer workstation guidance treats chair adjustment, desk setup and equipment placement as connected parts of the workstation. Explore OSHA’s chair guidance.
What order should you adjust the chair in?
Start with the settings that establish your overall position. Seat height sets your relationship to the desk; seat depth determines how far back you can sit. Then position the lumbar support and armrests around that foundation.
Your reset sequence:Seat height → seat depth → lumbar support → armrests → recline → desk and screen check.
At a height-adjustable desk, set the chair for supported feet and then bring the work surface to a comfortable working height. At a fixed-height desk, you may need to raise the chair to reach the keyboard comfortably and use a separate floor footrest.
Treat the sequence as a practical routine, not a rigid rule. If changing one setting affects another, go back and make a small correction.
The 60-second hot-desking reset
Learn the controls first, then use these five steps as a quick daily routine. The goal is a repeatable setup—not finishing before a timer runs out.
Set the seat height
Sit back and position yourself so you can reach the keyboard without lifting your shoulders. Keep your feet supported on the floor or a stable floor footrest, and check that the seat edge does not press into the backs of your thighs.
Slide the seat to fit your legs
Adjust the seat depth while keeping your back against the backrest. Leave roughly two to three fingers of clearance behind your knees as a starting point, then check that the position feels comfortable.
Position the lumbar support
Move the support toward the curve of your lower back. It should feel supportive rather than push you forward. With automatic tracking, still check the starting position and available support settings.
Bring the armrests to you
Adjust the available height, width or rotation so your forearms can rest without raising your shoulders. Make sure the armrests do not block you from moving close enough to the desk.
Check the recline
Lean back gently and locate the tilt lock. Adjust resistance if the chair has a manual tension control. With an automatic mechanism, check that the movement feels controlled and supportive.
Your final fit check
Adjustment
Aim for
Quick check
Seat height
Comfortable access to the work surface
Feet supported; shoulders relaxed
Seat depth
Thigh support with knee clearance
You can sit back without pressure behind the knees
Lumbar support
Comfortable contact with the lower-back curve
You do not feel pushed toward the seat edge
Armrests
Supported forearms and relaxed shoulders
You can move close to the keyboard
Recline
Controlled, supported movement
You understand the lock and resistance controls
Floor footrest
Foot support when the floor is out of reach
Both feet rest securely without stretching downward
What makes a chair good for hot desking?
A shared chair earns its place when different users can adjust it easily and understand how its controls work. Look beyond the feature count to how practical those adjustments are during a busy workday.
A useful adjustment range: compare seat height, depth and width with the people using the workspace. One chair may not fit everyone.
Clear, accessible controls: users should be able to identify and reach the controls without guessing.
Suitable build and service support: check intended use, maintenance requirements, replacement parts and warranty coverage.
Practical materials: breathable mesh allows airflow, while cleaning suitability depends on the specific materials and care instructions.
Appropriate capacity and dimensions: check both the weight limit and physical fit. Capacity alone does not tell you whether the seat fits.
Make adjustment easy to learn. Keep a short setup card or a link to the chair’s instructions at each shared desk. A clearly labeled control is more useful than a feature nobody knows how to operate.
How do you keep a shared chair hygienic?
Armrests, controls and headrests are common touch points. A consistent cleaning routine helps keep the chair pleasant for the next person.
Follow the chair’s care instructions and your workplace cleaning procedure.
Use a suitable cloth and a cleaner approved for the surface. Do not assume every disinfectant is compatible with mesh, padding or finishes.
Avoid soaking the seat or spraying liquid directly into controls, ventilation openings or electrical components.
Allow cleaned surfaces to dry before the next use.
Report spills, loose parts and damaged controls promptly. Remove an unsafe chair from use.
Breathability and hygiene are separate considerations: mesh allows airflow, but it still needs appropriate care.
Which HBADA chair suits shared desks?
The HBADA X7 and E3 Pro 2026 take different approaches to lumbar support. Compare fit first, then decide whether powered tracking or mechanical adjustment better suits the workspace.
X7 vs. E3 Pro 2026: what matters at a shared desk
Consideration
HBADA X7
E3 Pro 2026
Lumbar approach
Powered automatic lumbar tracking
3-zone adaptive lumbar support with mechanical adjustments
Daily reset
Check seat fit, armrests and preferred tracking settings
Check seat fit, lumbar position and armrests
Seat material
Breathable mesh
Breathable high-elastic mesh
Adjustment preference
For users who want powered lumbar tracking
For users who prefer hands-on mechanical adjustment
Before purchasing
Confirm dimensions, configuration and power requirements
Confirm dimensions and the selected footrest configuration
X7: powered lumbar tracking
Consider the X7 if you want lumbar support that responds automatically to posture changes. Each user should still check seat fit, armrests and preferred support settings.
Explore HBADA X7 →
E3 Pro 2026: mechanical adjustment
Consider the E3 Pro 2026 if you prefer hands-on adjustment with adaptive lumbar support, adjustable armrests and a breathable mesh seat.
Explore E3 Pro 2026 →
Refer to the linked US product listings for current dimensions and configurations. For office-wide purchasing, confirm shared or intensive-use requirements and warranty terms before ordering. Automatic lumbar tracking does not automatically fit the entire chair to a new user.
Limitations and when to get help
A chair reset is one part of setting up a shared workstation. It cannot compensate for every desk, screen or individual fit issue.
Check screen position, keyboard reach and available leg space after adjusting the chair.
If the adjustment range does not fit you, ask for a suitable alternative rather than forcing a position.
Change posture and take movement breaks throughout the day.
Ask for a workstation assessment if you cannot find a comfortable setup.
For severe, persistent or radiating pain, consult a qualified healthcare professional.
The takeaway: make the setup yours
Hot desking works better when you take a moment to adjust the workstation. Start with seat height, then work through depth, lumbar support, armrests and recline. Finish by checking the desk and screen.
Choose powered tracking if that suits your routine, or mechanical adjustment if you prefer a hands-on setup. Either way, learning the controls once makes every future reset more straightforward.
Frequently asked questions
How do you adjust an office chair for your body?
Start with seat height and depth, then position the lumbar support and armrests. Check the recline controls and finish by reviewing the desk and screen. Look for supported feet, relaxed shoulders and comfortable clearance behind your knees.
Is hot desking bad for your back?
Hot desking does not automatically mean an uncomfortable setup. Problems can arise when the chair or workstation does not fit the user or is difficult to adjust. Learn the controls, review your fit and keep movement in your workday.
What should you look for in a shared office chair?
Look for a useful adjustment range, clear controls, suitable dimensions and materials you can maintain according to the care instructions. Check intended use, weight capacity and after-sales support. A single model may not suit every colleague.
How do you know a chair fits after resetting it?
Check that your feet are supported, your thighs rest comfortably and the seat does not press behind your knees. Lumbar support should meet your lower back, and you should reach the keyboard with relaxed shoulders. Reassess comfort as you work.
Should a shared chair have a footrest?
Some users need a separate floor footrest when a fixed desk requires a higher seat position. A retractable chair footrest supports the legs during reclining and serves a different purpose. Choose support according to the working position.
Does automatic lumbar tracking adjust the whole chair?
No. Automatic lumbar tracking responds to posture changes, but it does not replace checking seat height, seat depth, armrests or workstation fit. Each new user should still run through the reset.
Can you really reset a chair in 60 seconds?
A familiar chair can be quick to check, but one minute is a practical target rather than a guarantee. Allow more time when learning a new chair or adjusting an unfamiliar workstation.
Sources
General workstation guidance is based on OSHA’s computer workstation resources. Product information refers to the linked HBADA US listings.
OSHA — Computer Workstations: Chairs
OSHA — Workstation Evaluation Checklist
HBADA US — X7 Smart Ergonomic Chair
HBADA US — E3 Pro Ergonomic Office Chair 2026 Edition
Sep 23, 2026
 How to Choose an Ergonomic Office Chair for 12-Hour Shifts
Dark reading mode
A longer shift.A better way to sit.
How to choose an ergonomic office chair for 12-hour shifts: start with fit, make room for movement, and choose the features you will actually use.
Support your work.Not uninterrupted sitting.
A 12-hour shift should include changes of activity and position. No chair makes movement breaks unnecessary.
What should you look for in a chair for 12-hour shifts?
Prioritize a seat that fits your body, adjustable lumbar and arm support, usable recline, and materials that feel comfortable to you. Check the manufacturer's intended-use and warranty terms, especially for shared or intensive workplaces. Treat ventilation, massage and a pull-out leg rest as optional extras—not substitutes for fit or regular movement.
01 / FOUNDATION Get the fit right 02 / SUPPORT Adjust the lumbar 03 / VARIETY Change position 04 / ROUTINE Build in breaks
Inside this guide
What matters most
Dynamic lumbar support
Posture and recline
Heat and seat comfort
Your chair checklist
Movement through a shift
Comparing HBADA models
Limits and getting help
The takeaway
Frequently asked questions
Sources
What matters most for a long-shift chair?
During a long workday, a small mismatch can become hard to ignore: a seat edge behind your knees, armrests that prevent you from moving close to the desk, or lumbar support that feels too high. Start with those practical details before comparing extra features.
An ergonomic office chair should work with your body and your workstation. Test whether you can reach the keyboard comfortably, use the backrest and keep your feet supported.
Start with three fit checks
Seat height: your feet should be supported by the floor or a stable footrest.
Seat depth: you should be able to use the backrest without the front edge pressing behind your knees.
Armrest position: your forearms should be supported without lifting your shoulders or pushing you away from the desk.
For shared workstations: check how easily the next user can reset the chair. A control that is difficult to reach or understand may be left in the wrong position.
Why consider dynamic lumbar support?
You do not remain in exactly the same position throughout a shift. You may lean toward a task, return to the backrest or recline between activities. Dynamic lumbar mechanisms are designed to respond to some of that movement.
What matters is how the support feels on your body—not simply whether it is called dynamic, adaptive or smart. It should feel supportive rather than forceful, and you should be able to find a suitable position.
The HBADA E3 Pro 2026 uses mechanical adaptive lumbar support. The HBADA X7 offers powered lumbar tracking. These are different approaches to adjustment, not a guarantee that one will suit every user better.
A well-fitted manually adjustable backrest may still be a good choice. Do not accept uncomfortable pressure just because a mechanism is more complex.
How does posture variety help during a long shift?
Choose recline controls that are easy to use and allow changes of position without making the chair feel unstable. Check the tension and locking options rather than judging the chair only by its maximum recline angle.
A reclined break is different from keyboard work. When typing, keep the screen and input devices within a comfortable reach; do not recline so far that you must lean your head forward or stretch your arms to continue working.
A footrest and a pull-out leg rest serve different purposes
A stable floor footrest can support your feet when the chair height needed for the desk leaves them unsupported. A chair's pull-out leg rest is generally intended for supported reclining. Do not assume it replaces a floor footrest for upright desk work.
Choose the accessory for the task. Check the product instructions, available space and selected chair configuration before buying a footrest or using a reclining leg support.
Why do heat and seat comfort matter?
Seat comfort depends on more than the material name. Consider the room temperature, your clothing, the seat shape and whether you notice pressure at the front edge or around the seat frame.
Open mesh can allow airflow, while a cushioned seat offers a different feel. Neither is automatically best for every body or every workplace. If possible, assess the chair during representative tasks rather than a quick sit-down.
Seat-depth adjustment can help position the seat for your leg length. It does not guarantee even pressure distribution, so check how it actually feels with your back supported.
Fan ventilation is an additional comfort feature on some smart chairs. It moves air; it should not be confused with refrigerated cooling. Consider the sound level and whether you would use it in your work environment.
The 12-hour shift chair checklist
Use this checklist when comparing an office chair for long hours. Passing it does not establish a 12-hour or 24/7-use rating.
Scroll sideways on smaller screens.
What to check before choosing a chair
Feature
What to check
Why it matters
Seat fit
Height, usable width and depth fit your body and desk.
Extra features cannot compensate for the wrong size.
Lumbar support
Position and pressure feel comfortable during your tasks.
Support should suit the individual user.
Armrests
They support your arms and clear the desk.
You should not have to reach around the chair.
Recline
Controls and tension are easy to use.
Usable adjustment matters more than maximum angle alone.
Seat material
Evaluate airflow, surface feel and edge pressure.
Mesh and cushioning feel different to different users.
Foot support
Distinguish a floor footrest from a reclining leg rest.
They address different sitting positions.
Load and intended use
Check the rated load and workplace-use conditions.
A load limit alone does not establish intensive-use suitability.
Service and warranty
Confirm coverage, exclusions and replacement-part options.
These matter for equipment used frequently or by multiple people.
A test claim is not a shift-length guarantee. Ask what any durability test actually covers. Do not treat a general test logo or cycle count as proof of suitability for continuous multi-shift use.
How to build movement into a long shift
Workstation adjustment and work habits belong together. OSHA's computer-workstation guidance encourages brief recovery pauses and task variation, including a five-minute break from computer tasks each hour. This is guidance, not a promise that one schedule makes prolonged sitting risk-free. Read OSHA's work-process guidance .
Set up before the shift. Adjust the chair for your body and check its relationship to the desk, keyboard and screen.
Use natural task changes. Where your duties allow, alternate computer work with tasks that let you change position.
Plan brief movement opportunities. Coordinate breaks with workplace procedures, especially where continuous coverage is required.
Recheck comfort during the shift. If something feels wrong, review the setup rather than repeatedly adding more lumbar pressure or recline.
Record recurring problems. Note which tasks or settings cause difficulty so you can discuss them with an ergonomics or occupational-health professional.
Which HBADA chair should you consider?
If both models fit your measurements and intended use, the practical distinction is mechanical adjustment versus added powered features. This is a feature comparison, not the result of a 12-hour endurance test.
Two approaches to ergonomic adjustment
Consideration
HBADA X7
E3 Pro 2026
Lumbar approach
Powered lumbar tracking
Mechanical 3-zone adaptive support
Seat ventilation
Fan-assisted ventilation
Breathable mesh
Additional functions
Massage and heating
Focus on mechanical ergonomic adjustment
Before ordering
Check size, selected configuration and powered-feature instructions.
Check size and the with-footrest or without-footrest option.
For intensive workplace use
Confirm intended-use conditions and warranty coverage with the seller before purchase.
Consider the X7 if…
You want powered support and would use its additional comfort functions. Check the controls and operating instructions before deciding.
Explore HBADA X7 →
Consider the E3 Pro if…
You prefer mechanical adjustment and do not need integrated powered comfort functions. Confirm that its dimensions suit your workspace.
Explore E3 Pro 2026 →
Product configurations and terms can change. Check the linked US product page and selected variant before ordering.
Limitations and when to get help
A supportive chair is one part of a workstation. It is not a medical treatment, and it cannot make an unsuitable desk, excessive reaching or uninterrupted sitting disappear.
Check dimensions rather than relying only on a suggested height range or maximum load.
For shared, continuous or specialist work, confirm that the model is appropriate for the intended environment.
Follow the instructions for heating, massage, recline and leg-rest use.
If discomfort persists or you develop pain, numbness, tingling or weakness, seek advice from a qualified healthcare professional rather than relying on chair changes alone.
Choose for the shift—not just the feature list
Start with body fit and workstation compatibility. Then compare lumbar adjustment, recline, material comfort and service terms. Powered features may be useful extras, but they should not decide the purchase before those basics.
Find support that fits.Leave room in the day to move.
Frequently asked questions
What kind of office chair is best for a 12-hour shift?
There is no single best chair for everyone. Look for dimensions that fit, accessible adjustments and suitability for your intended use. Compare optional features only after checking those basics, and build movement into the shift.
Does “ergonomic” mean a chair is rated for 12-hour use?
No. The word does not establish a particular shift-length or continuous-use rating. Ask the manufacturer about the specific model's intended use, testing and warranty terms.
Can a good chair make it safe to sit for 12 hours without breaks?
Do not treat any chair as permission to sit without breaks. A better setup does not remove the need for changes of activity and position. Follow workplace procedures and seek individual advice when needed.
Do I need a footrest for a long shift?
You may need a stable floor footrest if your feet cannot reach the floor at the seat height required by your desk. A pull-out chair leg rest serves a different purpose: supporting a reclined break.
Is mesh better than a cushioned seat?
Neither is universally better. Compare airflow, shape, support and how the edges feel. If possible, evaluate the chair during tasks that resemble your normal work.
How often should I take breaks during computer work?
OSHA suggests frequent short pauses, including a five-minute break from computer tasks each hour. Coordinate this with your duties and individual needs; it is not a substitute for a workplace-specific assessment.
Should I choose the HBADA X7 or E3 Pro 2026?
Compare fit first. If both are suitable, decide whether you prefer the X7's powered features or the E3 Pro's mechanical approach. Confirm workplace-use conditions separately if the chair will see intensive or shared use.
Sources and product information
OSHA: Computer Workstations eTool — general workstation guidance.
OSHA: Work Process and Recognition — task variation and recovery pauses.
HBADA X7: US product information .
HBADA E3 Pro 2026: US product information .
This article provides general buying and workstation guidance, not medical advice or a certification of suitability for a particular shift pattern.
Back to top ↑
Sep 23, 2026
How to Choose an Ergonomic Office Chair for 12-Hour Shifts
Dark reading mode
A longer shift.A better way to sit.
How to choose an ergonomic office chair for 12-hour shifts: start with fit, make room for movement, and choose the features you will actually use.
Support your work.Not uninterrupted sitting.
A 12-hour shift should include changes of activity and position. No chair makes movement breaks unnecessary.
What should you look for in a chair for 12-hour shifts?
Prioritize a seat that fits your body, adjustable lumbar and arm support, usable recline, and materials that feel comfortable to you. Check the manufacturer's intended-use and warranty terms, especially for shared or intensive workplaces. Treat ventilation, massage and a pull-out leg rest as optional extras—not substitutes for fit or regular movement.
01 / FOUNDATION Get the fit right 02 / SUPPORT Adjust the lumbar 03 / VARIETY Change position 04 / ROUTINE Build in breaks
Inside this guide
What matters most
Dynamic lumbar support
Posture and recline
Heat and seat comfort
Your chair checklist
Movement through a shift
Comparing HBADA models
Limits and getting help
The takeaway
Frequently asked questions
Sources
What matters most for a long-shift chair?
During a long workday, a small mismatch can become hard to ignore: a seat edge behind your knees, armrests that prevent you from moving close to the desk, or lumbar support that feels too high. Start with those practical details before comparing extra features.
An ergonomic office chair should work with your body and your workstation. Test whether you can reach the keyboard comfortably, use the backrest and keep your feet supported.
Start with three fit checks
Seat height: your feet should be supported by the floor or a stable footrest.
Seat depth: you should be able to use the backrest without the front edge pressing behind your knees.
Armrest position: your forearms should be supported without lifting your shoulders or pushing you away from the desk.
For shared workstations: check how easily the next user can reset the chair. A control that is difficult to reach or understand may be left in the wrong position.
Why consider dynamic lumbar support?
You do not remain in exactly the same position throughout a shift. You may lean toward a task, return to the backrest or recline between activities. Dynamic lumbar mechanisms are designed to respond to some of that movement.
What matters is how the support feels on your body—not simply whether it is called dynamic, adaptive or smart. It should feel supportive rather than forceful, and you should be able to find a suitable position.
The HBADA E3 Pro 2026 uses mechanical adaptive lumbar support. The HBADA X7 offers powered lumbar tracking. These are different approaches to adjustment, not a guarantee that one will suit every user better.
A well-fitted manually adjustable backrest may still be a good choice. Do not accept uncomfortable pressure just because a mechanism is more complex.
How does posture variety help during a long shift?
Choose recline controls that are easy to use and allow changes of position without making the chair feel unstable. Check the tension and locking options rather than judging the chair only by its maximum recline angle.
A reclined break is different from keyboard work. When typing, keep the screen and input devices within a comfortable reach; do not recline so far that you must lean your head forward or stretch your arms to continue working.
A footrest and a pull-out leg rest serve different purposes
A stable floor footrest can support your feet when the chair height needed for the desk leaves them unsupported. A chair's pull-out leg rest is generally intended for supported reclining. Do not assume it replaces a floor footrest for upright desk work.
Choose the accessory for the task. Check the product instructions, available space and selected chair configuration before buying a footrest or using a reclining leg support.
Why do heat and seat comfort matter?
Seat comfort depends on more than the material name. Consider the room temperature, your clothing, the seat shape and whether you notice pressure at the front edge or around the seat frame.
Open mesh can allow airflow, while a cushioned seat offers a different feel. Neither is automatically best for every body or every workplace. If possible, assess the chair during representative tasks rather than a quick sit-down.
Seat-depth adjustment can help position the seat for your leg length. It does not guarantee even pressure distribution, so check how it actually feels with your back supported.
Fan ventilation is an additional comfort feature on some smart chairs. It moves air; it should not be confused with refrigerated cooling. Consider the sound level and whether you would use it in your work environment.
The 12-hour shift chair checklist
Use this checklist when comparing an office chair for long hours. Passing it does not establish a 12-hour or 24/7-use rating.
Scroll sideways on smaller screens.
What to check before choosing a chair
Feature
What to check
Why it matters
Seat fit
Height, usable width and depth fit your body and desk.
Extra features cannot compensate for the wrong size.
Lumbar support
Position and pressure feel comfortable during your tasks.
Support should suit the individual user.
Armrests
They support your arms and clear the desk.
You should not have to reach around the chair.
Recline
Controls and tension are easy to use.
Usable adjustment matters more than maximum angle alone.
Seat material
Evaluate airflow, surface feel and edge pressure.
Mesh and cushioning feel different to different users.
Foot support
Distinguish a floor footrest from a reclining leg rest.
They address different sitting positions.
Load and intended use
Check the rated load and workplace-use conditions.
A load limit alone does not establish intensive-use suitability.
Service and warranty
Confirm coverage, exclusions and replacement-part options.
These matter for equipment used frequently or by multiple people.
A test claim is not a shift-length guarantee. Ask what any durability test actually covers. Do not treat a general test logo or cycle count as proof of suitability for continuous multi-shift use.
How to build movement into a long shift
Workstation adjustment and work habits belong together. OSHA's computer-workstation guidance encourages brief recovery pauses and task variation, including a five-minute break from computer tasks each hour. This is guidance, not a promise that one schedule makes prolonged sitting risk-free. Read OSHA's work-process guidance .
Set up before the shift. Adjust the chair for your body and check its relationship to the desk, keyboard and screen.
Use natural task changes. Where your duties allow, alternate computer work with tasks that let you change position.
Plan brief movement opportunities. Coordinate breaks with workplace procedures, especially where continuous coverage is required.
Recheck comfort during the shift. If something feels wrong, review the setup rather than repeatedly adding more lumbar pressure or recline.
Record recurring problems. Note which tasks or settings cause difficulty so you can discuss them with an ergonomics or occupational-health professional.
Which HBADA chair should you consider?
If both models fit your measurements and intended use, the practical distinction is mechanical adjustment versus added powered features. This is a feature comparison, not the result of a 12-hour endurance test.
Two approaches to ergonomic adjustment
Consideration
HBADA X7
E3 Pro 2026
Lumbar approach
Powered lumbar tracking
Mechanical 3-zone adaptive support
Seat ventilation
Fan-assisted ventilation
Breathable mesh
Additional functions
Massage and heating
Focus on mechanical ergonomic adjustment
Before ordering
Check size, selected configuration and powered-feature instructions.
Check size and the with-footrest or without-footrest option.
For intensive workplace use
Confirm intended-use conditions and warranty coverage with the seller before purchase.
Consider the X7 if…
You want powered support and would use its additional comfort functions. Check the controls and operating instructions before deciding.
Explore HBADA X7 →
Consider the E3 Pro if…
You prefer mechanical adjustment and do not need integrated powered comfort functions. Confirm that its dimensions suit your workspace.
Explore E3 Pro 2026 →
Product configurations and terms can change. Check the linked US product page and selected variant before ordering.
Limitations and when to get help
A supportive chair is one part of a workstation. It is not a medical treatment, and it cannot make an unsuitable desk, excessive reaching or uninterrupted sitting disappear.
Check dimensions rather than relying only on a suggested height range or maximum load.
For shared, continuous or specialist work, confirm that the model is appropriate for the intended environment.
Follow the instructions for heating, massage, recline and leg-rest use.
If discomfort persists or you develop pain, numbness, tingling or weakness, seek advice from a qualified healthcare professional rather than relying on chair changes alone.
Choose for the shift—not just the feature list
Start with body fit and workstation compatibility. Then compare lumbar adjustment, recline, material comfort and service terms. Powered features may be useful extras, but they should not decide the purchase before those basics.
Find support that fits.Leave room in the day to move.
Frequently asked questions
What kind of office chair is best for a 12-hour shift?
There is no single best chair for everyone. Look for dimensions that fit, accessible adjustments and suitability for your intended use. Compare optional features only after checking those basics, and build movement into the shift.
Does “ergonomic” mean a chair is rated for 12-hour use?
No. The word does not establish a particular shift-length or continuous-use rating. Ask the manufacturer about the specific model's intended use, testing and warranty terms.
Can a good chair make it safe to sit for 12 hours without breaks?
Do not treat any chair as permission to sit without breaks. A better setup does not remove the need for changes of activity and position. Follow workplace procedures and seek individual advice when needed.
Do I need a footrest for a long shift?
You may need a stable floor footrest if your feet cannot reach the floor at the seat height required by your desk. A pull-out chair leg rest serves a different purpose: supporting a reclined break.
Is mesh better than a cushioned seat?
Neither is universally better. Compare airflow, shape, support and how the edges feel. If possible, evaluate the chair during tasks that resemble your normal work.
How often should I take breaks during computer work?
OSHA suggests frequent short pauses, including a five-minute break from computer tasks each hour. Coordinate this with your duties and individual needs; it is not a substitute for a workplace-specific assessment.
Should I choose the HBADA X7 or E3 Pro 2026?
Compare fit first. If both are suitable, decide whether you prefer the X7's powered features or the E3 Pro's mechanical approach. Confirm workplace-use conditions separately if the chair will see intensive or shared use.
Sources and product information
OSHA: Computer Workstations eTool — general workstation guidance.
OSHA: Work Process and Recognition — task variation and recovery pauses.
HBADA X7: US product information .
HBADA E3 Pro 2026: US product information .
This article provides general buying and workstation guidance, not medical advice or a certification of suitability for a particular shift pattern.
Back to top ↑
Sep 23, 2026
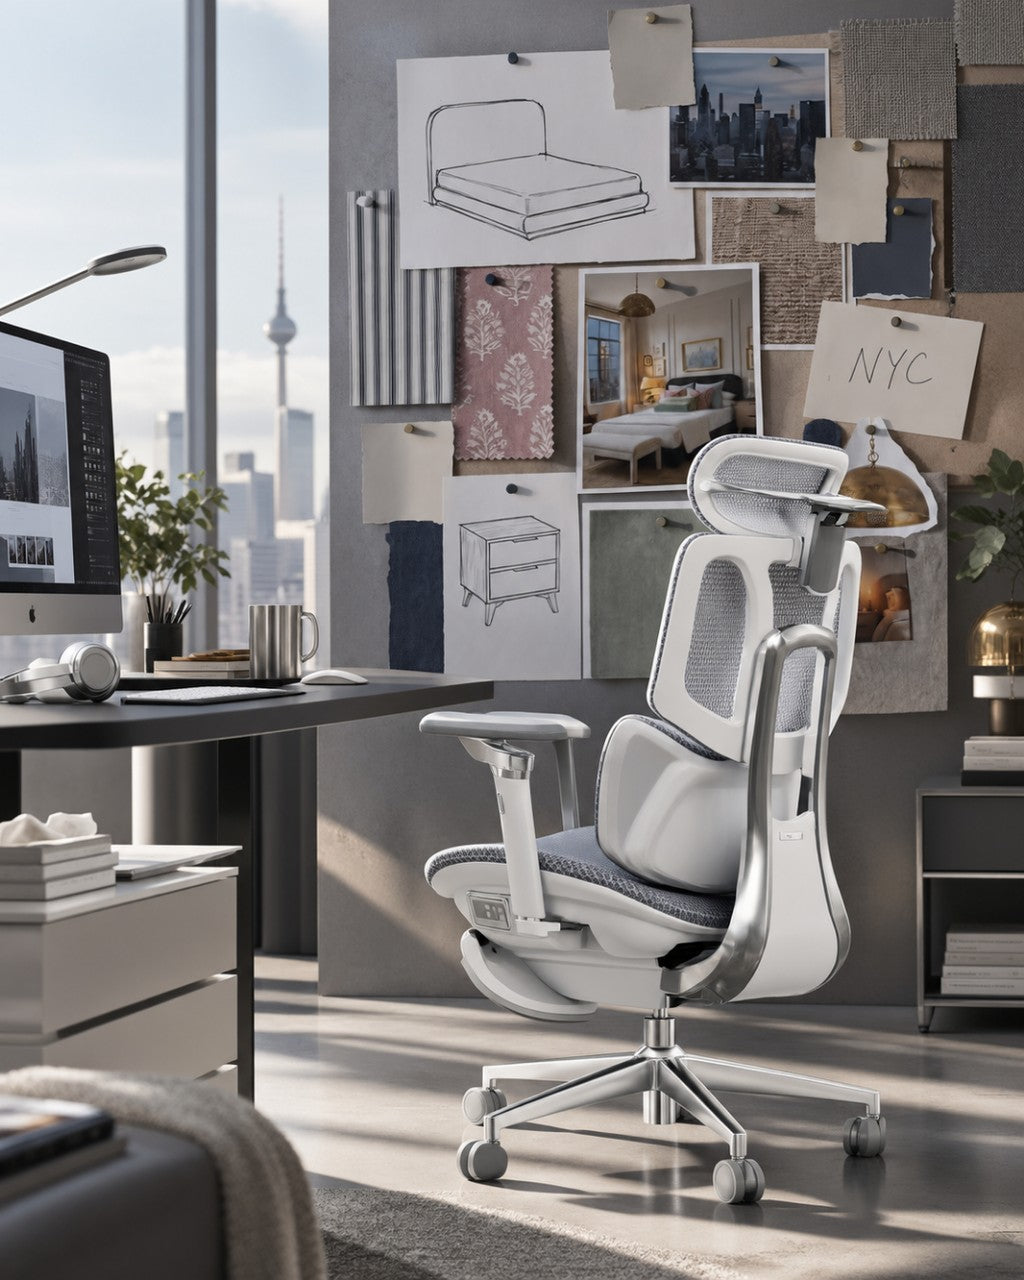 How to Recycle or Dispose of an Old Office Chair Responsibly
Dark reading mode
Not the end.The next chapter.
How to recycle or dispose of an old office chair responsibly in the United States—starting with the option that keeps it useful.
01Repair.
02Reuse.
03Recycle.
What should you do with an old office chair?
Repair it if practical, or donate, sell or give it away if it is safe to use. For an unusable chair, contact your local solid waste service or a recycler that accepts furniture. Identify any batteries, electronics and upholstery before booking. Do not put a rechargeable battery in household trash or curbside recycling.
Inside this guide
01 / Why disposal matters
02 / Repair and reuse
03 / Recycling a broken chair
04 / Compare your options
05 / Your action checklist
06 / Before replacing HBADA
07 / Safety and limitations
08 / Common questions
09 / Sources
Why responsible disposal matters
An office chair is a combination of materials, not a single recyclable object. A metal base may sit beneath a plastic frame, woven mesh, foam padding and fabric. A powered chair adds electrical components.
Keeping a safe chair in use avoids discarding those materials prematurely. When the chair can no longer serve its purpose, the right disposal route depends on its construction and the services available in your area.
Local rules come first. There is no single nationwide furniture pickup service. Check your city, county or contracted waste provider for accepted items, fees and preparation requirements.
Can you repair, donate or sell it?
Before arranging disposal, identify why the chair is no longer useful. A worn caster is different from a cracked structural frame. Ask the manufacturer whether a compatible part and safe repair instructions are available.
If the chair remains safe and functional, contact a furniture bank, charity, community organization or local recipient. Acceptance varies: a donation center may decline office furniture, damaged upholstery or items that require repair.
Check that the base, seat and backrest are stable.
Describe defects honestly and include clear photographs.
Keep model information, instructions and relevant accessories.
Confirm acceptance and transportation before making the trip.
Do not offer a structurally unsafe chair as ready to use. If a repair is needed, make that clear and confirm that the recipient can handle it.
How to recycle a broken office chair
Call ahead before taking the chair apart. Ask whether the facility accepts it whole and describe any powered features, padding and gas lift.
Metal, plastic and mesh
A recycler may accept steel or aluminum components, but mixed assemblies can require different handling. A recycling symbol on a plastic part does not guarantee acceptance by your curbside program. Mesh and foam also need a confirmed outlet.
Only remove ordinary components when the manufacturer's instructions and receiving facility allow it. Do not cut into the gas cylinder or dismantle electrical assemblies to recover scrap.
Powered chairs and rechargeable batteries
Ask an electronics recycler or your local waste authority whether it accepts powered furniture. A drop-off point for small electronics may not accept a complete smart chair.
The EPA advises keeping rechargeable batteries out of household trash and municipal recycling. For a safely removable battery, follow the manufacturer's instructions and the collection site's preparation requirements. Do not force open a sealed pack or cut wiring.
If the battery is built in, tell the receiving service and ask whether to bring the complete item. Damaged or swollen batteries require specific handling advice rather than a routine drop-off.
See EPA battery guidance and electronics recycling guidance.
Padded chairs and bulky item pickup
Ask your municipal waste service how it handles upholstered office chairs. It may offer scheduled bulky item pickup or direct you to a transfer station or another facility. Charges and restrictions vary.
Do not assume a pickup service will recycle the chair. Ask what happens after collection if material recovery is important to you.
Which disposal option fits your chair?
Scroll the table sideways on smaller screens.
Match the condition to the next step
Route
Suitable starting point
Check first
Repair
An identifiable, repairable fault
Compatible parts and safe fitting instructions
Donation or resale
A safe, usable chair
Recipient acceptance and condition requirements
Material recycler
Accepted metal or other components
Whether the chair must remain assembled
Electronics recycling
A chair with powered features
Furniture size limits and battery arrangements
Bulky item pickup
An unusable chair accepted by the service
Booking, fees, placement and electrical exclusions
Private removal
An item needing a collection service
Accepted materials, total cost and disposal destination
Your responsible disposal checklist
Assess the condition. Identify whether repair or safe reuse is realistic.
Identify the components. Note upholstery, a gas lift, batteries and electrical features.
Confirm a destination. Contact the recipient, recycling facility or waste provider.
Ask how to prepare it. Confirm whether it should remain whole and how batteries are handled.
Arrange the handover. Follow booking, transportation and placement instructions.
Before replacing your HBADA chair
A fault does not automatically mean the whole chair needs replacing. Contact HBADA support with the model name, order details, photographs and a description of the issue. Ask about diagnosis and compatible replacement parts before buying generic components.
HBADA X7
When discussing disposal, identify the X7 as a powered chair. Ask the receiving service how it handles the complete chair and its electrical components.
View X7 product information →
HBADA E3 Pro
Use the exact model and version when asking about repair. A mesh design does not guarantee that every material is accepted by your local recycler.
View E3 Pro product information →
Parts availability and warranty coverage depend on the product and applicable terms. Do not assume that bases, cylinders or casters are interchangeable between models.
Safety and limitations
Gas cylinder: Never puncture, cut, heat or open it.
Electrical parts: Follow manufacturer instructions; avoid improvised disassembly.
Battery damage: Contact the manufacturer or a qualified receiving service for handling advice.
Heavy lifting: Arrange help and suitable transportation.
Business furniture: Office clearances may not qualify for household collection programs.
This is general US household guidance. Confirm current state, local and facility requirements before disposal.
Frequently asked questions
Can I put an office chair in the trash?
Check your waste provider's rules. A non-electrical chair may be accepted through bulky item collection, but not through ordinary bin service. Powered components and rechargeable batteries require separate consideration.
Where can I recycle an office chair near me?
Start with your city or county solid waste department. Ask about furniture recycling, transfer stations and bulky item services. For a powered chair, confirm that a recycler accepts large electrical furniture.
Can I donate a used office chair?
Yes, if it is safe, usable and accepted by the recipient. Call first, describe its condition and confirm whether collection is available.
Should I take the chair apart before recycling?
Not automatically. Ask the receiving facility whether it wants the complete chair. Only separate components that can be removed safely using the manufacturer's instructions.
Is a mesh office chair completely recyclable?
Not necessarily. Mixed plastics, mesh, coatings and attached components may not have a local recycling route. Confirm acceptance rather than assuming that minimal padding means complete recyclability.
How do I dispose of the gas lift?
Tell the receiving service that the chair has a pressurized gas cylinder. Do not open or damage it. Ask for instructions before removing or transporting it separately.
The next step
Before booking a pickup, make one call: to support if repair is possible, to a recipient if the chair is reusable, or to your local waste service if it has reached the end of its life.
Keep it useful where you can.Choose its next destination with care.
Sources and further guidance
US EPA: Used Household Batteries
US EPA: Electronics Donation and Recycling
For furniture acceptance, pickup fees and preparation, consult your local solid waste authority or chosen facility.
Back to top ↑
Sep 21, 2026
How to Recycle or Dispose of an Old Office Chair Responsibly
Dark reading mode
Not the end.The next chapter.
How to recycle or dispose of an old office chair responsibly in the United States—starting with the option that keeps it useful.
01Repair.
02Reuse.
03Recycle.
What should you do with an old office chair?
Repair it if practical, or donate, sell or give it away if it is safe to use. For an unusable chair, contact your local solid waste service or a recycler that accepts furniture. Identify any batteries, electronics and upholstery before booking. Do not put a rechargeable battery in household trash or curbside recycling.
Inside this guide
01 / Why disposal matters
02 / Repair and reuse
03 / Recycling a broken chair
04 / Compare your options
05 / Your action checklist
06 / Before replacing HBADA
07 / Safety and limitations
08 / Common questions
09 / Sources
Why responsible disposal matters
An office chair is a combination of materials, not a single recyclable object. A metal base may sit beneath a plastic frame, woven mesh, foam padding and fabric. A powered chair adds electrical components.
Keeping a safe chair in use avoids discarding those materials prematurely. When the chair can no longer serve its purpose, the right disposal route depends on its construction and the services available in your area.
Local rules come first. There is no single nationwide furniture pickup service. Check your city, county or contracted waste provider for accepted items, fees and preparation requirements.
Can you repair, donate or sell it?
Before arranging disposal, identify why the chair is no longer useful. A worn caster is different from a cracked structural frame. Ask the manufacturer whether a compatible part and safe repair instructions are available.
If the chair remains safe and functional, contact a furniture bank, charity, community organization or local recipient. Acceptance varies: a donation center may decline office furniture, damaged upholstery or items that require repair.
Check that the base, seat and backrest are stable.
Describe defects honestly and include clear photographs.
Keep model information, instructions and relevant accessories.
Confirm acceptance and transportation before making the trip.
Do not offer a structurally unsafe chair as ready to use. If a repair is needed, make that clear and confirm that the recipient can handle it.
How to recycle a broken office chair
Call ahead before taking the chair apart. Ask whether the facility accepts it whole and describe any powered features, padding and gas lift.
Metal, plastic and mesh
A recycler may accept steel or aluminum components, but mixed assemblies can require different handling. A recycling symbol on a plastic part does not guarantee acceptance by your curbside program. Mesh and foam also need a confirmed outlet.
Only remove ordinary components when the manufacturer's instructions and receiving facility allow it. Do not cut into the gas cylinder or dismantle electrical assemblies to recover scrap.
Powered chairs and rechargeable batteries
Ask an electronics recycler or your local waste authority whether it accepts powered furniture. A drop-off point for small electronics may not accept a complete smart chair.
The EPA advises keeping rechargeable batteries out of household trash and municipal recycling. For a safely removable battery, follow the manufacturer's instructions and the collection site's preparation requirements. Do not force open a sealed pack or cut wiring.
If the battery is built in, tell the receiving service and ask whether to bring the complete item. Damaged or swollen batteries require specific handling advice rather than a routine drop-off.
See EPA battery guidance and electronics recycling guidance.
Padded chairs and bulky item pickup
Ask your municipal waste service how it handles upholstered office chairs. It may offer scheduled bulky item pickup or direct you to a transfer station or another facility. Charges and restrictions vary.
Do not assume a pickup service will recycle the chair. Ask what happens after collection if material recovery is important to you.
Which disposal option fits your chair?
Scroll the table sideways on smaller screens.
Match the condition to the next step
Route
Suitable starting point
Check first
Repair
An identifiable, repairable fault
Compatible parts and safe fitting instructions
Donation or resale
A safe, usable chair
Recipient acceptance and condition requirements
Material recycler
Accepted metal or other components
Whether the chair must remain assembled
Electronics recycling
A chair with powered features
Furniture size limits and battery arrangements
Bulky item pickup
An unusable chair accepted by the service
Booking, fees, placement and electrical exclusions
Private removal
An item needing a collection service
Accepted materials, total cost and disposal destination
Your responsible disposal checklist
Assess the condition. Identify whether repair or safe reuse is realistic.
Identify the components. Note upholstery, a gas lift, batteries and electrical features.
Confirm a destination. Contact the recipient, recycling facility or waste provider.
Ask how to prepare it. Confirm whether it should remain whole and how batteries are handled.
Arrange the handover. Follow booking, transportation and placement instructions.
Before replacing your HBADA chair
A fault does not automatically mean the whole chair needs replacing. Contact HBADA support with the model name, order details, photographs and a description of the issue. Ask about diagnosis and compatible replacement parts before buying generic components.
HBADA X7
When discussing disposal, identify the X7 as a powered chair. Ask the receiving service how it handles the complete chair and its electrical components.
View X7 product information →
HBADA E3 Pro
Use the exact model and version when asking about repair. A mesh design does not guarantee that every material is accepted by your local recycler.
View E3 Pro product information →
Parts availability and warranty coverage depend on the product and applicable terms. Do not assume that bases, cylinders or casters are interchangeable between models.
Safety and limitations
Gas cylinder: Never puncture, cut, heat or open it.
Electrical parts: Follow manufacturer instructions; avoid improvised disassembly.
Battery damage: Contact the manufacturer or a qualified receiving service for handling advice.
Heavy lifting: Arrange help and suitable transportation.
Business furniture: Office clearances may not qualify for household collection programs.
This is general US household guidance. Confirm current state, local and facility requirements before disposal.
Frequently asked questions
Can I put an office chair in the trash?
Check your waste provider's rules. A non-electrical chair may be accepted through bulky item collection, but not through ordinary bin service. Powered components and rechargeable batteries require separate consideration.
Where can I recycle an office chair near me?
Start with your city or county solid waste department. Ask about furniture recycling, transfer stations and bulky item services. For a powered chair, confirm that a recycler accepts large electrical furniture.
Can I donate a used office chair?
Yes, if it is safe, usable and accepted by the recipient. Call first, describe its condition and confirm whether collection is available.
Should I take the chair apart before recycling?
Not automatically. Ask the receiving facility whether it wants the complete chair. Only separate components that can be removed safely using the manufacturer's instructions.
Is a mesh office chair completely recyclable?
Not necessarily. Mixed plastics, mesh, coatings and attached components may not have a local recycling route. Confirm acceptance rather than assuming that minimal padding means complete recyclability.
How do I dispose of the gas lift?
Tell the receiving service that the chair has a pressurized gas cylinder. Do not open or damage it. Ask for instructions before removing or transporting it separately.
The next step
Before booking a pickup, make one call: to support if repair is possible, to a recipient if the chair is reusable, or to your local waste service if it has reached the end of its life.
Keep it useful where you can.Choose its next destination with care.
Sources and further guidance
US EPA: Used Household Batteries
US EPA: Electronics Donation and Recycling
For furniture acceptance, pickup fees and preparation, consult your local solid waste authority or chosen facility.
Back to top ↑
Sep 21, 2026
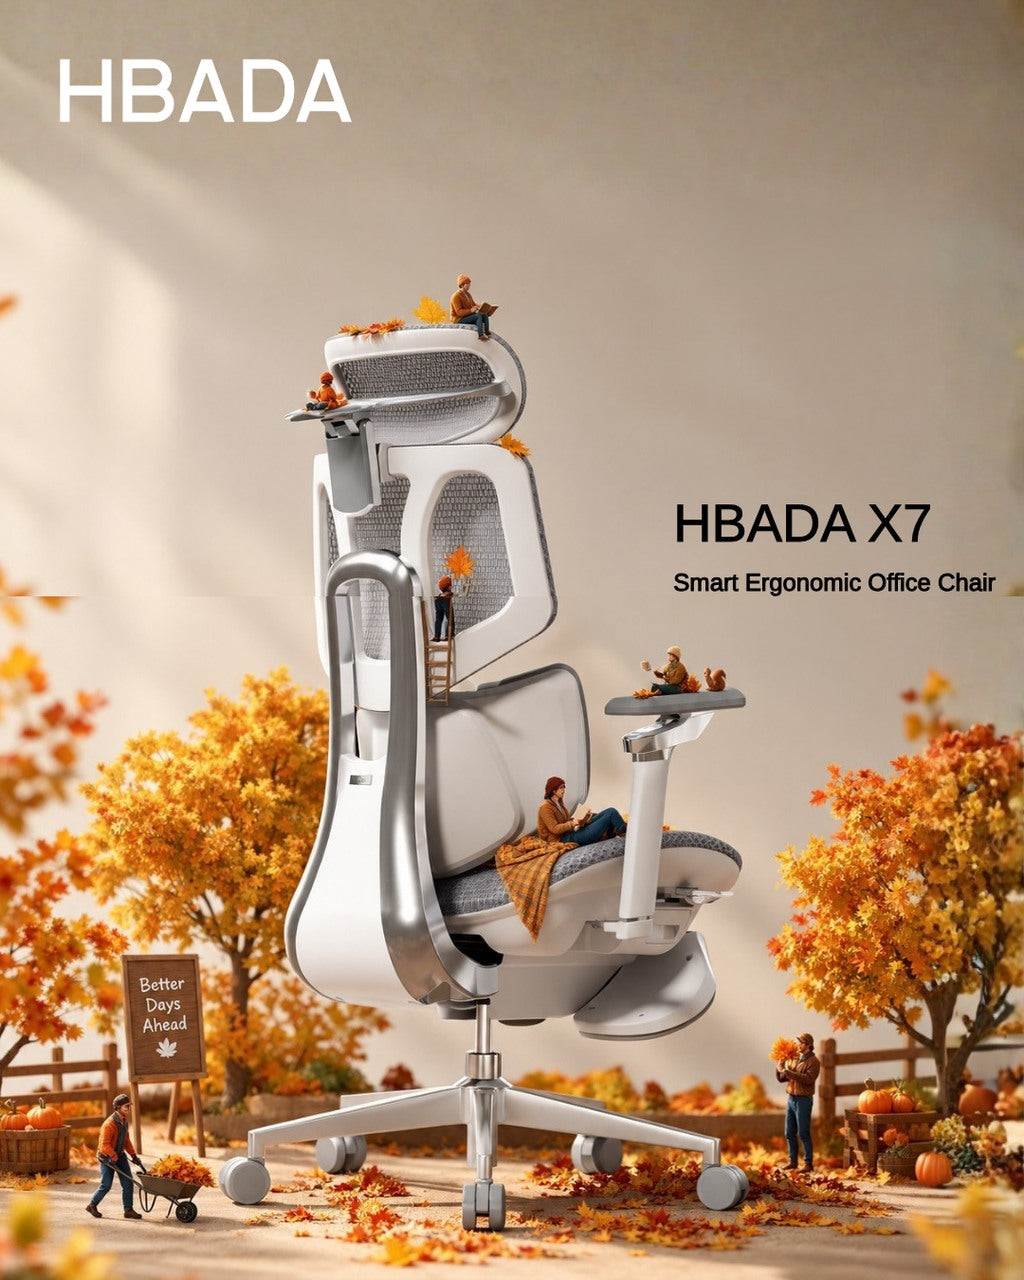 How HBADA Measures Office Chair Fit: Height, Depth, Width and Lumbar
HBADA A better fit starts with you.
Dark mode
Don't fit the chair.Find the chair that fits.
How to measure office chair fit: height, depth, width and lumbar support.
Two people of the same height can need very different chairs. Start with four measurements to check whether your feet, thighs, hips and lower back will get the support they need.
4
Measurements. One personal fit.
Match seat height, seat depth, seat width and lumbar adjustment to your body. A recommended height range is a starting point, not a comfort guarantee.
Start measuring ↗
01 / HEIGHT Seat height Keep your feet supported. 02 / DEPTH Seat depth Leave room behind your knees. 03 / WIDTH Seat width Give your hips enough space. 04 / LUMBAR Lumbar range Position your lower-back support. Fit basics Compare models Measure yourself Choose your chair Limitations Final checklist FAQs Sources
Which measurements decide office chair fit?
Fit is not one number. People of the same height can have different lower-leg lengths, thigh lengths and torso proportions. The chair's adjustment ranges need to work with those differences.
Seat height affects how your feet meet the floor. Seat depth determines how much of your thighs the seat supports. Seat width provides space for your hips. Lumbar range helps position support against the inward curve of your lower back.
These measurements narrow your options. Armrest spacing, desk height and how the seat feels under your weight also matter. An ergonomic chair can support a more comfortable working position, but it is not a medical treatment.
01
Seat height: start from the floor.
Seat height is the distance from the floor to the top of the seat. The height you experience while sitting may differ slightly from an unloaded measurement because the surface can compress or flex.
Start with your feet supported and your thighs approximately level. Check that you can reach your keyboard with relaxed shoulders rather than raising them to meet the desk.
The HBADA X7 lists a seat-height range of 44.5–53 cm, approximately 17.5–20.9 inches. Check other models individually; do not assume the minimum height is the same across a series.
Feet not reaching the floor? A stable under-desk footrest can help when you need to raise the chair to suit your desk. It is different from an extendable chair footrest used while reclining. HSE workstation guidance recommends providing a footrest where needed.
02
Seat depth: support without pressure.
Seat depth describes the front-to-back seating space. Manufacturers may use different reference points, so look at the dimension diagram rather than the chair's overall depth.
Sit fully back against the backrest. About two to three finger widths between the front edge and the backs of your knees is a useful starting check, not a precise measurement rule.
Too deep, and you may slide forward to avoid pressure behind your knees, losing back support. Too shallow, and you may feel that too little of your thighs is supported.
X7 lists a depth range of 40.5–45.5 cm. E3 Pro 2026 lists a 50 mm seat-depth slide. Travel alone does not tell you the minimum usable depth; confirm that dimension before ordering.
03
Seat width: room to sit naturally.
Seat width is the usable space across the seat, not the overall chair width. Your hips need room without pressure from the seat frame or armrests.
X7 lists a seat width of 52 cm, approximately 20.5 inches. When comparing another chair, check the usable seat width and the clearance between the armrests.
A wider seat is not automatically a better fit. If the armrests are too far apart, you may have to move your elbows outward to reach them.
Width and weight capacity answer different questions. A chair can support your weight while still being too narrow, too deep or too tall for you.
04
Lumbar range: height is only half the story.
Vertical adjustment changes where support sits. Front-to-back movement changes how it meets your back. Start with the support at the small of your back. It should feel supportive, not push you forward or press into one uncomfortable point.
X7: powered tracking, manual height
X7 lists 45 mm of manual lumbar-height adjustment, 50 mm of powered front-to-back travel and 10 tracking-intensity levels. Automatic tracking does not replace the manual height setting.
E3 Pro 2026: mechanical adaptability
E3 Pro 2026 lists 60 mm of independent lumbar-height adjustment and 80 mm of backrest-height adjustment. Its mechanical lumbar system also offers adaptive movement; it is not simply a fixed pad.
HBADA fit measurements, side by side.
Use confirmed adjustment details as a starting point. Where an absolute dimension is not confirmed below, consult the current product diagram or request the measurement before buying.
Swipe sideways to see the full comparison.
HBADA X7 and E3 Pro 2026: fit reference
Measurement
HBADA X7
HBADA E3 Pro 2026
Seat height
44.5–53 cm
Confirm the minimum and maximum for your configuration
Seat depth
40.5–45.5 cm; 50 mm travel
50 mm travel; confirm minimum usable depth
Seat width
52 cm
Confirm usable seat width, not overall chair width
Lumbar height
45 mm, manually adjusted
60 mm independent adjustment
Lumbar movement
50 mm powered travel; 10 tracking levels
Mechanical adaptive support
Backrest height adjustment
Check the model guide; lumbar travel is separate
80 mm
Recommended user height
150–195 cm
155–195 cm
Maximum load
150 kg / 330 lb
150 kg / 330 lb
Specifications are model-specific and may change. Recommended height is a screening guide, not a guarantee of comfort. Confirm the exact edition and configuration on the product page.
One tape measure. Six simple checks.
Use a firm seat and the footwear you normally wear at your desk. Having someone help can make the measurements easier.
Measure lower-leg height → seat height
With your feet supported, measure from the floor to the crease behind your knee. Use this as a starting reference, then check your actual seated position.
Measure thigh length → seat depth
Measure horizontally from the back of your buttocks to the crease behind your knee. Allow knee clearance rather than choosing a seat that fills the entire distance.
Measure seated hip width → seat width
Measure the widest part of your hips while seated. Allow some room on both sides and check armrest clearance too.
Find your lower-back contact point → lumbar height
Sit back and position the support against the inward curve of your lower back. Contact and comfort matter more than a universal height setting.
Relax your shoulders → armrests and desk
Keep the keyboard close enough that you do not have to reach forward. Adjust the armrests so they support your arms without lifting your shoulders.
Try everyday tasks → fine-tune the setup
Type, use the mouse and lean back. A position that feels fine for a minute may need small changes during normal work. Change position and take breaks throughout the day.
Which HBADA chair fits you best?
Start with dimensions, then compare how the adjustments work. Neither automatic support nor a longer feature list can compensate for a seat that does not fit your body.
Prefer powered lumbar tracking?
Consider X7 if you prefer powered front-to-back lumbar tracking. Check the seat fit first, then set the manual lumbar height and tracking intensity.
Explore HBADA X7 →
Prefer mechanical adjustability?
E3 Pro 2026 combines a sliding seat with separate backrest and lumbar-height adjustments. Confirm the seat dimensions before choosing a configuration.
Explore E3 Pro 2026 →
For other E3 options, explore the HBADA E3 Series. Compare each model individually instead of applying one model's measurements to the whole range.
What measurements cannot tell you.
Dimensions do not guarantee comfort. Check the applicable return policy and test normal work tasks after assembly.
A footrest has a specific role. It can support your feet when the chair is raised for desk access, but it does not fix an excessively deep or narrow seat.
Desk height matters. A height-adjustable desk may let you bring the work surface closer to your preferred seated position.
Configurations can differ. Confirm the model year, seat dimensions, armrest clearance and selected footrest option.
Do not push through pain as a fit test. Seek qualified healthcare advice for severe, persistent or radiating pain. A chair is not a medical treatment.
Measure first. Choose second.
Before buying, check that your feet can be supported, there is clearance behind your knees, your hips have enough room and the lumbar support can meet your lower back. Then consider the desk, armrests and adjustment method.
X7 offers powered lumbar tracking; E3 Pro 2026 offers mechanical adaptive support and separate height adjustments. Choose the model that matches your body and working setup, rather than relying on height recommendations alone.
Frequently asked questions
What is the correct seat height for an office chair?
There is no single correct height for everyone. Start with your feet supported, thighs approximately level and shoulders relaxed while reaching the desk. Your lower-leg measurement is a starting point; check the position while actually sitting.
How do I know if my seat depth is right?
Sit fully back. The seat should support your thighs without pressing behind your knees. About two to three finger widths is a practical starting clearance, not an exact rule for every body.
Does seat width matter?
Yes. Your hips need room without pressure from the frame, and the armrests should be reachable without spreading your elbows uncomfortably. Check usable seat width and armrest clearance, not just overall chair width.
Does automatic lumbar tracking still need manual adjustment?
Different directions of adjustment serve different purposes. On X7, powered front-to-back tracking does not replace the manual lumbar-height setting. Set the height to match your lower back first.
Can one office chair fit different body sizes at home?
Often, provided each person fits within the usable dimensions and adjustment ranges. Each user should reset the seat, lumbar support and armrests. Check the shortest and tallest users separately before buying a shared chair.
Sources
Health and Safety Executive: Working with Display Screen Equipment — general workstation and footrest guidance from the UK regulator.
HBADA X7 product page — model dimensions and adjustment details.
HBADA E3 Pro 2026 product page — model-specific adjustments and recommended user range.
This article provides general product-selection guidance. Refer to the current product information and assembly instructions for your exact chair.
Sep 19, 2026
How HBADA Measures Office Chair Fit: Height, Depth, Width and Lumbar
HBADA A better fit starts with you.
Dark mode
Don't fit the chair.Find the chair that fits.
How to measure office chair fit: height, depth, width and lumbar support.
Two people of the same height can need very different chairs. Start with four measurements to check whether your feet, thighs, hips and lower back will get the support they need.
4
Measurements. One personal fit.
Match seat height, seat depth, seat width and lumbar adjustment to your body. A recommended height range is a starting point, not a comfort guarantee.
Start measuring ↗
01 / HEIGHT Seat height Keep your feet supported. 02 / DEPTH Seat depth Leave room behind your knees. 03 / WIDTH Seat width Give your hips enough space. 04 / LUMBAR Lumbar range Position your lower-back support. Fit basics Compare models Measure yourself Choose your chair Limitations Final checklist FAQs Sources
Which measurements decide office chair fit?
Fit is not one number. People of the same height can have different lower-leg lengths, thigh lengths and torso proportions. The chair's adjustment ranges need to work with those differences.
Seat height affects how your feet meet the floor. Seat depth determines how much of your thighs the seat supports. Seat width provides space for your hips. Lumbar range helps position support against the inward curve of your lower back.
These measurements narrow your options. Armrest spacing, desk height and how the seat feels under your weight also matter. An ergonomic chair can support a more comfortable working position, but it is not a medical treatment.
01
Seat height: start from the floor.
Seat height is the distance from the floor to the top of the seat. The height you experience while sitting may differ slightly from an unloaded measurement because the surface can compress or flex.
Start with your feet supported and your thighs approximately level. Check that you can reach your keyboard with relaxed shoulders rather than raising them to meet the desk.
The HBADA X7 lists a seat-height range of 44.5–53 cm, approximately 17.5–20.9 inches. Check other models individually; do not assume the minimum height is the same across a series.
Feet not reaching the floor? A stable under-desk footrest can help when you need to raise the chair to suit your desk. It is different from an extendable chair footrest used while reclining. HSE workstation guidance recommends providing a footrest where needed.
02
Seat depth: support without pressure.
Seat depth describes the front-to-back seating space. Manufacturers may use different reference points, so look at the dimension diagram rather than the chair's overall depth.
Sit fully back against the backrest. About two to three finger widths between the front edge and the backs of your knees is a useful starting check, not a precise measurement rule.
Too deep, and you may slide forward to avoid pressure behind your knees, losing back support. Too shallow, and you may feel that too little of your thighs is supported.
X7 lists a depth range of 40.5–45.5 cm. E3 Pro 2026 lists a 50 mm seat-depth slide. Travel alone does not tell you the minimum usable depth; confirm that dimension before ordering.
03
Seat width: room to sit naturally.
Seat width is the usable space across the seat, not the overall chair width. Your hips need room without pressure from the seat frame or armrests.
X7 lists a seat width of 52 cm, approximately 20.5 inches. When comparing another chair, check the usable seat width and the clearance between the armrests.
A wider seat is not automatically a better fit. If the armrests are too far apart, you may have to move your elbows outward to reach them.
Width and weight capacity answer different questions. A chair can support your weight while still being too narrow, too deep or too tall for you.
04
Lumbar range: height is only half the story.
Vertical adjustment changes where support sits. Front-to-back movement changes how it meets your back. Start with the support at the small of your back. It should feel supportive, not push you forward or press into one uncomfortable point.
X7: powered tracking, manual height
X7 lists 45 mm of manual lumbar-height adjustment, 50 mm of powered front-to-back travel and 10 tracking-intensity levels. Automatic tracking does not replace the manual height setting.
E3 Pro 2026: mechanical adaptability
E3 Pro 2026 lists 60 mm of independent lumbar-height adjustment and 80 mm of backrest-height adjustment. Its mechanical lumbar system also offers adaptive movement; it is not simply a fixed pad.
HBADA fit measurements, side by side.
Use confirmed adjustment details as a starting point. Where an absolute dimension is not confirmed below, consult the current product diagram or request the measurement before buying.
Swipe sideways to see the full comparison.
HBADA X7 and E3 Pro 2026: fit reference
Measurement
HBADA X7
HBADA E3 Pro 2026
Seat height
44.5–53 cm
Confirm the minimum and maximum for your configuration
Seat depth
40.5–45.5 cm; 50 mm travel
50 mm travel; confirm minimum usable depth
Seat width
52 cm
Confirm usable seat width, not overall chair width
Lumbar height
45 mm, manually adjusted
60 mm independent adjustment
Lumbar movement
50 mm powered travel; 10 tracking levels
Mechanical adaptive support
Backrest height adjustment
Check the model guide; lumbar travel is separate
80 mm
Recommended user height
150–195 cm
155–195 cm
Maximum load
150 kg / 330 lb
150 kg / 330 lb
Specifications are model-specific and may change. Recommended height is a screening guide, not a guarantee of comfort. Confirm the exact edition and configuration on the product page.
One tape measure. Six simple checks.
Use a firm seat and the footwear you normally wear at your desk. Having someone help can make the measurements easier.
Measure lower-leg height → seat height
With your feet supported, measure from the floor to the crease behind your knee. Use this as a starting reference, then check your actual seated position.
Measure thigh length → seat depth
Measure horizontally from the back of your buttocks to the crease behind your knee. Allow knee clearance rather than choosing a seat that fills the entire distance.
Measure seated hip width → seat width
Measure the widest part of your hips while seated. Allow some room on both sides and check armrest clearance too.
Find your lower-back contact point → lumbar height
Sit back and position the support against the inward curve of your lower back. Contact and comfort matter more than a universal height setting.
Relax your shoulders → armrests and desk
Keep the keyboard close enough that you do not have to reach forward. Adjust the armrests so they support your arms without lifting your shoulders.
Try everyday tasks → fine-tune the setup
Type, use the mouse and lean back. A position that feels fine for a minute may need small changes during normal work. Change position and take breaks throughout the day.
Which HBADA chair fits you best?
Start with dimensions, then compare how the adjustments work. Neither automatic support nor a longer feature list can compensate for a seat that does not fit your body.
Prefer powered lumbar tracking?
Consider X7 if you prefer powered front-to-back lumbar tracking. Check the seat fit first, then set the manual lumbar height and tracking intensity.
Explore HBADA X7 →
Prefer mechanical adjustability?
E3 Pro 2026 combines a sliding seat with separate backrest and lumbar-height adjustments. Confirm the seat dimensions before choosing a configuration.
Explore E3 Pro 2026 →
For other E3 options, explore the HBADA E3 Series. Compare each model individually instead of applying one model's measurements to the whole range.
What measurements cannot tell you.
Dimensions do not guarantee comfort. Check the applicable return policy and test normal work tasks after assembly.
A footrest has a specific role. It can support your feet when the chair is raised for desk access, but it does not fix an excessively deep or narrow seat.
Desk height matters. A height-adjustable desk may let you bring the work surface closer to your preferred seated position.
Configurations can differ. Confirm the model year, seat dimensions, armrest clearance and selected footrest option.
Do not push through pain as a fit test. Seek qualified healthcare advice for severe, persistent or radiating pain. A chair is not a medical treatment.
Measure first. Choose second.
Before buying, check that your feet can be supported, there is clearance behind your knees, your hips have enough room and the lumbar support can meet your lower back. Then consider the desk, armrests and adjustment method.
X7 offers powered lumbar tracking; E3 Pro 2026 offers mechanical adaptive support and separate height adjustments. Choose the model that matches your body and working setup, rather than relying on height recommendations alone.
Frequently asked questions
What is the correct seat height for an office chair?
There is no single correct height for everyone. Start with your feet supported, thighs approximately level and shoulders relaxed while reaching the desk. Your lower-leg measurement is a starting point; check the position while actually sitting.
How do I know if my seat depth is right?
Sit fully back. The seat should support your thighs without pressing behind your knees. About two to three finger widths is a practical starting clearance, not an exact rule for every body.
Does seat width matter?
Yes. Your hips need room without pressure from the frame, and the armrests should be reachable without spreading your elbows uncomfortably. Check usable seat width and armrest clearance, not just overall chair width.
Does automatic lumbar tracking still need manual adjustment?
Different directions of adjustment serve different purposes. On X7, powered front-to-back tracking does not replace the manual lumbar-height setting. Set the height to match your lower back first.
Can one office chair fit different body sizes at home?
Often, provided each person fits within the usable dimensions and adjustment ranges. Each user should reset the seat, lumbar support and armrests. Check the shortest and tallest users separately before buying a shared chair.
Sources
Health and Safety Executive: Working with Display Screen Equipment — general workstation and footrest guidance from the UK regulator.
HBADA X7 product page — model dimensions and adjustment details.
HBADA E3 Pro 2026 product page — model-specific adjustments and recommended user range.
This article provides general product-selection guidance. Refer to the current product information and assembly instructions for your exact chair.
Sep 19, 2026


