

Blog

New Product Launch: HBADA E3 Air vs E3 Pro 2026 Edition — Full Breakdown

New Product Launch: HBADA E3 Air vs E3 Pro 2026 Edition — Full Breakdown

Introduction

Picking the right ergonomic chair can be tough. Many chairs claim to be comfortable but don’t hold up during long hours of sitting. The new HBADA E3 Air and E3 Pro 2026 models address these issues with precise ergonomics, adaptive support, and a design that saves space. This guide will help you decide which model is best for you.

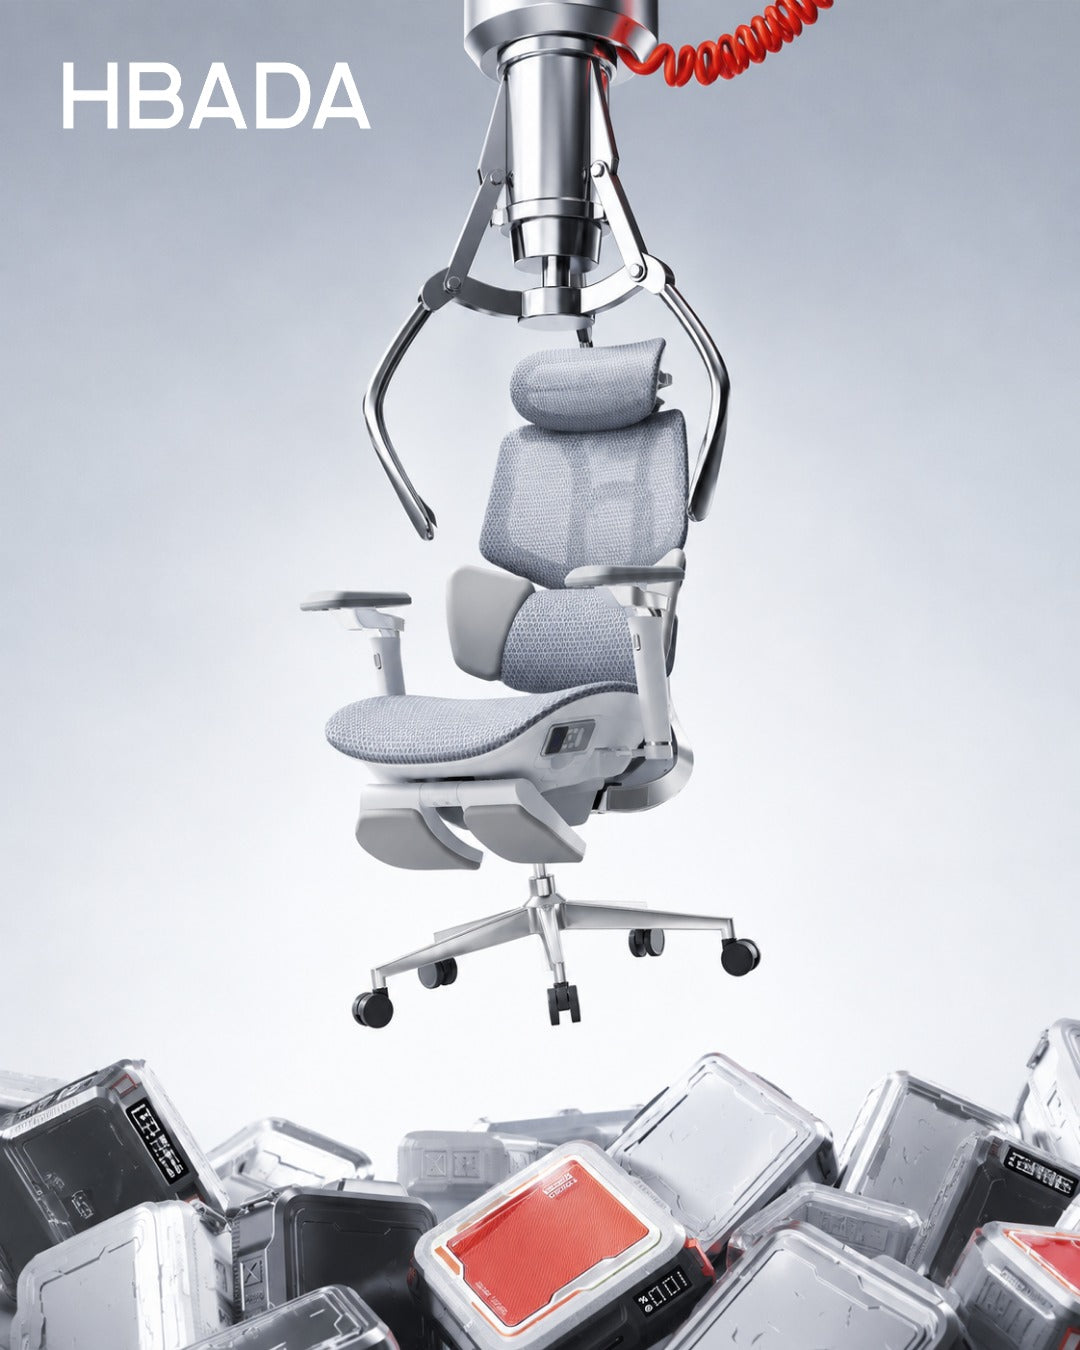
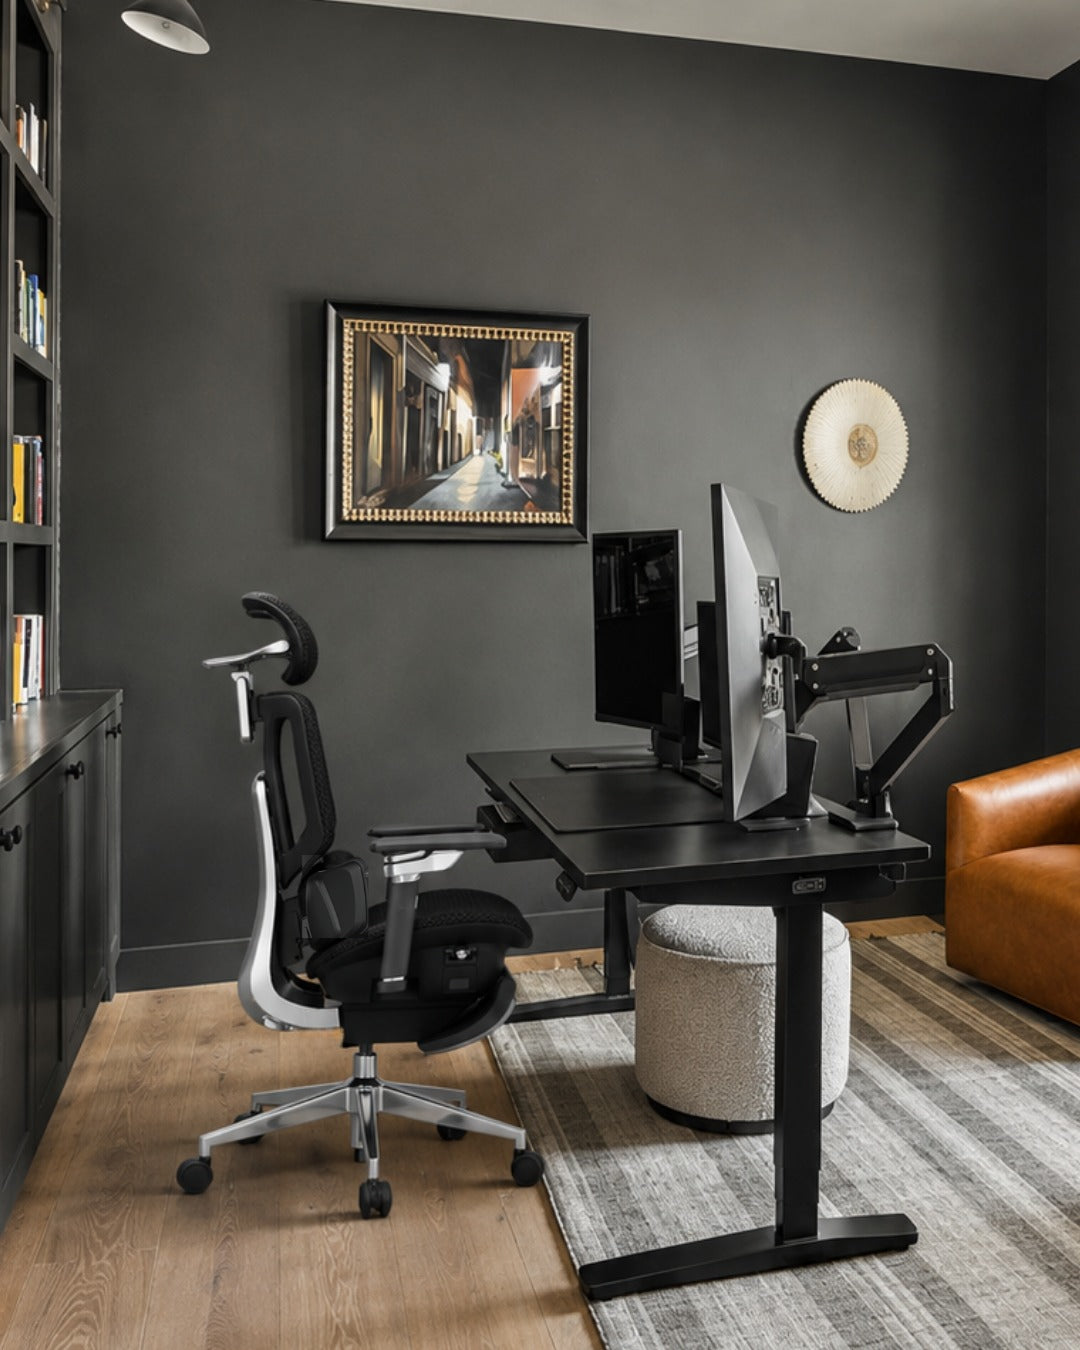
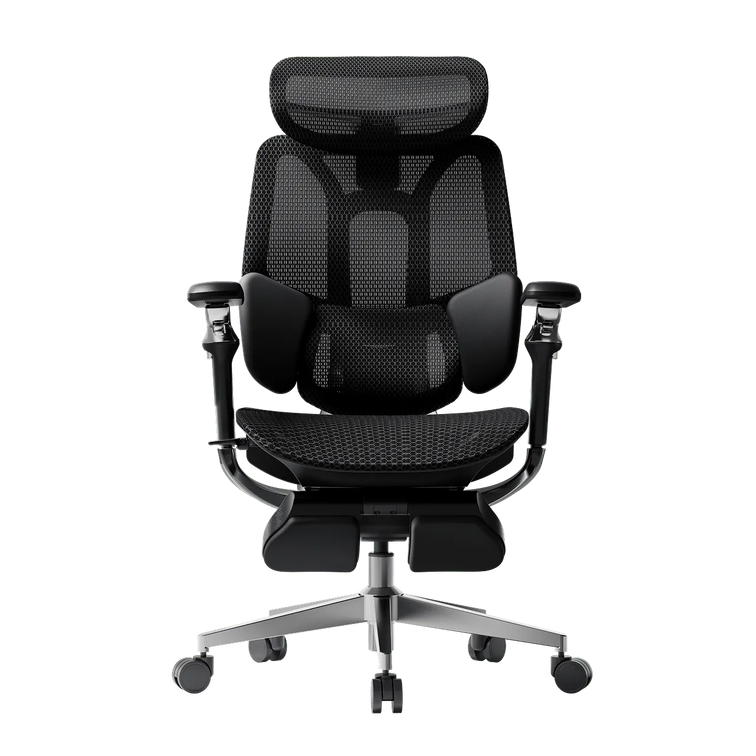
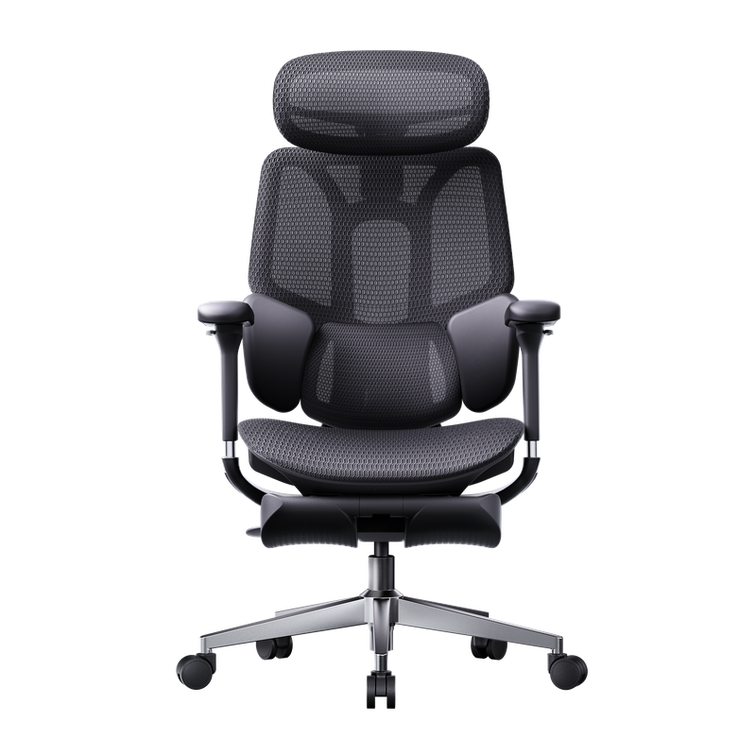
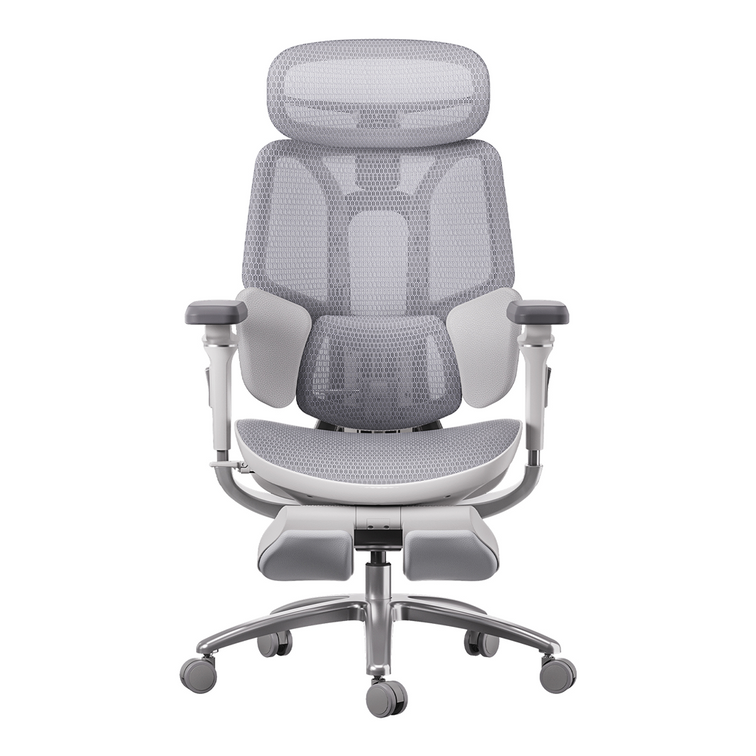
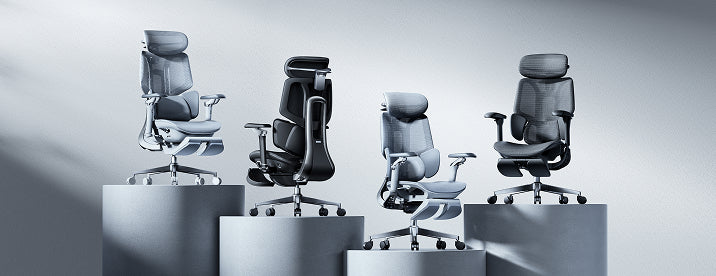
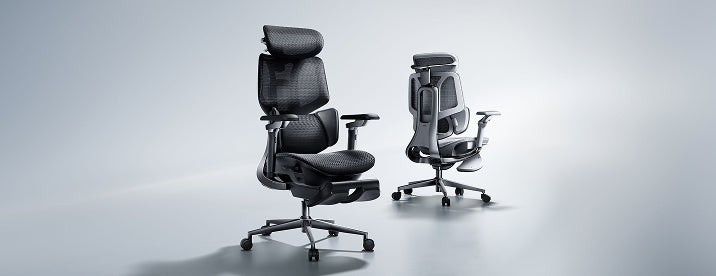
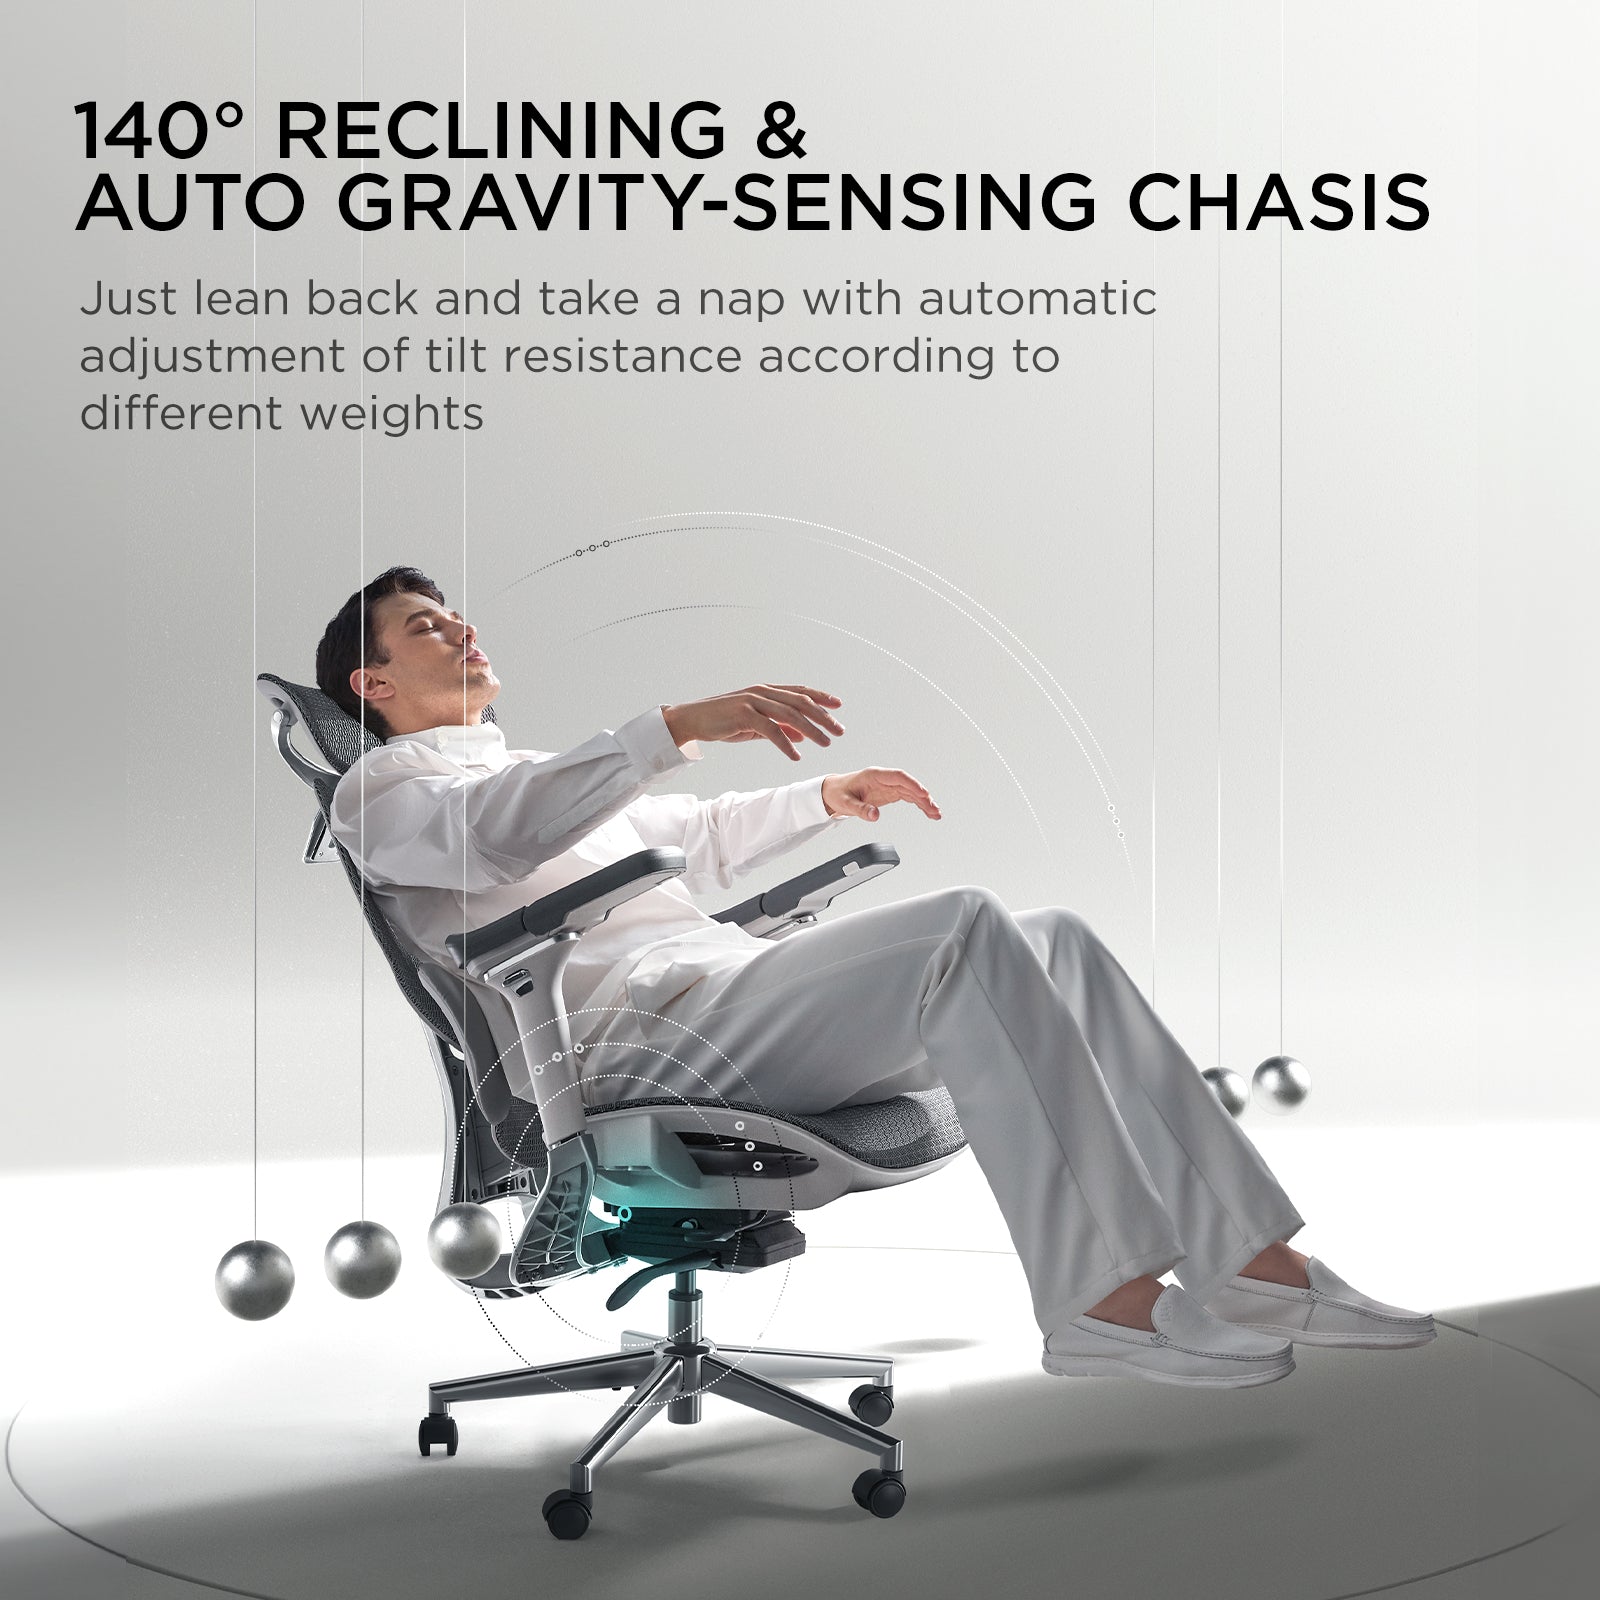
 HBADA E3 Pro Ergonomic Chair with Footrest for rest~scene

Overview of the HBADA 2026 New Product Line

In 2026, HBADA is focusing on posture correction and spinal health. They use AI-driven ergonomics and designs that move with your body. Both the E3 Air and E3 Pro offer strong lumbar support, but each is made for a different kind of user.

· E3 Pro 2026: Premium performance with advanced ergonomic features

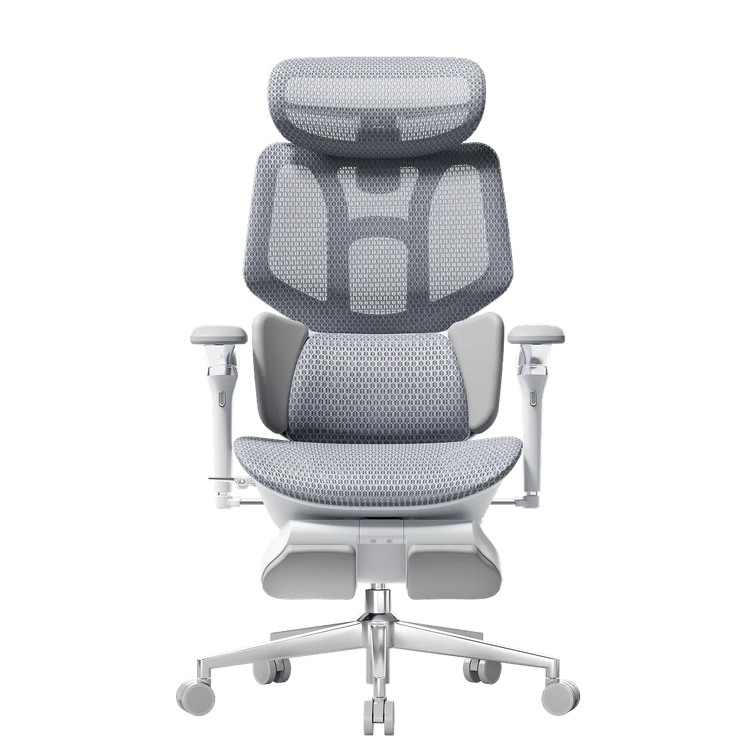
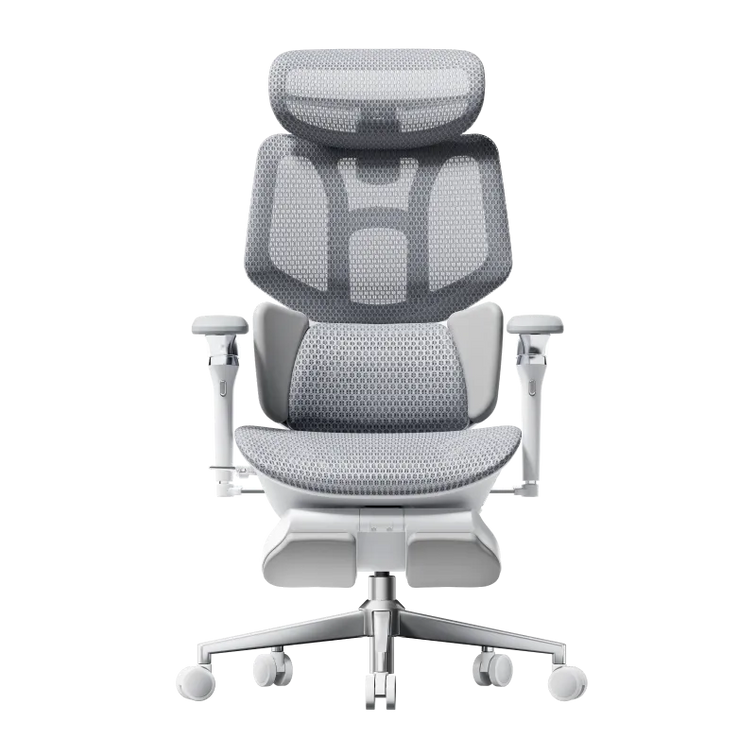
· E3 Air 2026: Lightweight, compact ergonomic chair for small apartments

Both chairs are made to support you during long hours at your computer. However, they differ in how adjustable they are and how much ergonomic support they offer.


Core Differences at a Glance

Product Comparison Table

Target User

Home office, students

Professionals, long-hour users

Lumbar System

Elastic lumbar support

3-zone dynamic lumbar support chair

Adjustment Level

Essential adjustments

Full adaptive system

Armrests

4D adjustable

720° omni-adjustable armrests chair

Weight & Size

Lightweight, compact

Larger, premium build

Smart Features

Manual + assisted

Adaptive lumbar tracking ergonomic chair

Best Use

Small apartments

Long sitting duration (6–10 hours)


Lumbar Support Technology Breakdown

E3 Pro — 3-Zone Dynamic Precision

The E3 Pro stands out for its 3-zone lumbar support system, which means it provides targeted support for your upper, middle, and lower back. This approach helps keep your spine aligned throughout the day rather than focusing on just one area.

Key benefits:

· Continuous spinal alignment

· Reduced lower back pressure

· Adaptive response to posture shifts

With that said, the E3 Pro is a great choice if you spend 8+ hours at your desk each day, such as remote workers or professionals who need reliable support for extended periods.

E3 Air — Essential Ergonomic Support

The E3 Air takes a simpler approach. Instead of multiple adjustment zones, it uses elastic lumbar support to help you maintain good posture without fiddling with many settings.

It performs well for:

· Short to medium work sessions

· Students and remote workers

· Users who prefer minimal setup

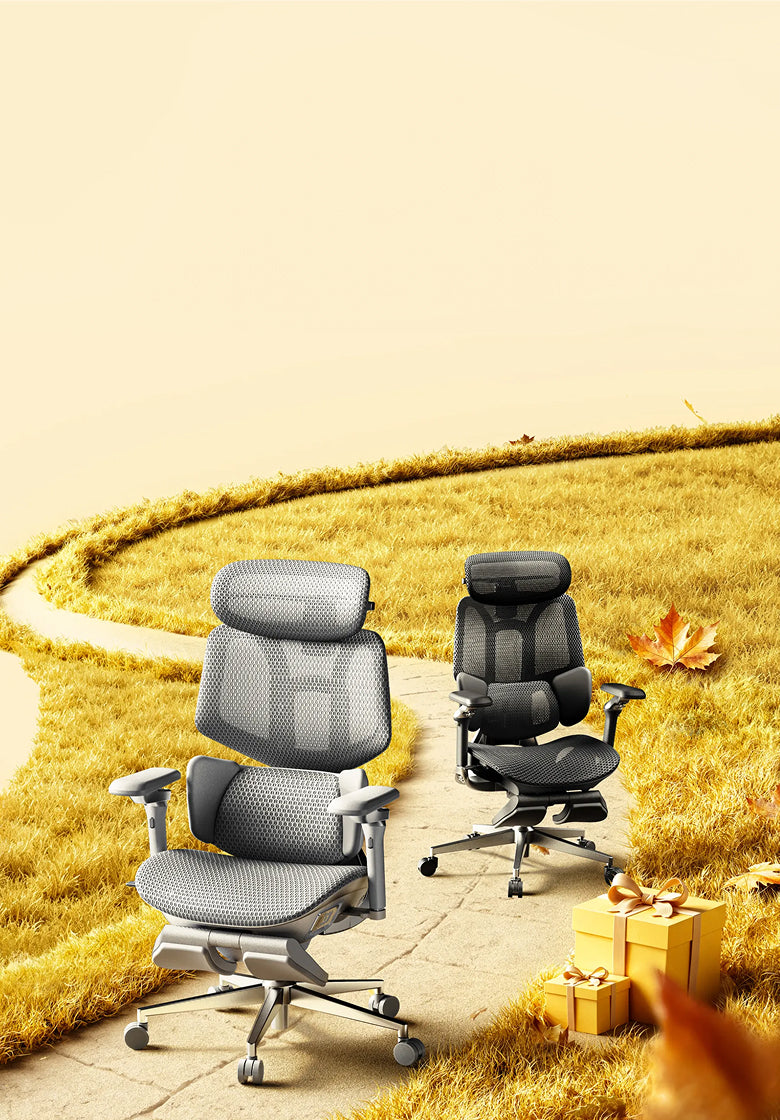
 HBADA E3 Air Ergonomic Office Chair without footrest gray armrests

Armrest Engineering and Upper Body Support

720° Omni-Adjustable Armrests (E3 Pro)

The E3 Pro features a 720° omni-adjustable armrest chair system. This allows:

· Vertical, horizontal, and rotational movement

· Precise elbow positioning

· Reduced shoulder tension

These ergonomic armrests are especially helpful for reducing shoulder tension and maintaining proper posture, which can make a big difference when you’re typing or using a mouse for hours at a time.

Functional Armrests (E3 Air)

The E3 Air includes 4D adjustable armrests. While less complex, they still support:

· Basic height and depth adjustment

· Comfortable typing posture

· Balanced arm positioning

If you want a practical chair that lets you adjust your armrests for comfortable typing, the E3 Air covers the basics without making things complicated.


Space Efficiency and Design Philosophy

Compact Ergonomic Chair for Small Apartments

If you don’t have much space, the E3 Air has a small footprint. It’s easy to slide under most desks and move around in tight rooms.

· Easy placement under desks

· Better mobility in limited rooms

· Reduced visual clutter

If you live in a U.S. apartment with limited space, this model fits seamlessly into your setup.

Premium Structure for Stability (E3 Pro)

The E3 Pro prioritizes performance over compactness. Its structure supports:

· Enhanced durability

· Full-body ergonomic alignment

· Stability during reclining

The E3 Pro is better if you have a dedicated home office or workspace with enough room for a larger, sturdier chair.


Smart Ergonomics and Adaptive Technology

Adaptive Lumbar Tracking (E3 Pro)

The E3 Pro introduces adaptive lumbar tracking ergonomic chair technology. It automatically adjusts based on your posture.

This results in:

· Continuous support without manual changes

· Improved posture correction and spinal health

· Reduced fatigue over long sessions

Assisted Ergonomics (E3 Air)

The E3 Air, by comparison, relies on manual adjustments. While it doesn’t have the same level of automation, you can still get solid ergonomic support as long as you take a few minutes to set it up to fit your body.


Which Is the Best Ergonomic Chair for Your Needs?

Choose E3 Pro If You Need:

· The best ergonomic chair for long hours

· Advanced posture correction

· Premium / advanced ergonomic features

· Full adjustability and automation

This model is built for users who prioritize performance and long-term spinal health.

Choose E3 Air If You Need:

· A compact ergonomic chair for small apartments

· Lightweight and easy-to-move design

· Reliable ergonomic support without complexity

· A straightforward solution for your home and office


Practical Setup Tips for Maximum Benefit

To get the most from either chair:

· Adjust the seat height so your feet stay flat on the floor.

· Align lumbar support with your lower back.

· Set armrests to keep elbows at 90 degrees.

· Position your screen at eye level.

Following these steps will help you get the most out of your chair and maintain proper posture, no matter which model you choose.


Common Buying Mistakes to Avoid

· Choosing based on appearance instead of ergonomics

· Ignoring lumbar support quality

· Overlooking armrest adjustability

· Buying oversized chairs for small spaces

· Not adjusting the chair after purchase.

Even the best chair will fail if improperly selected or configured.


FAQ

Q: What is the main difference between HBADA E3 Air vs E3 Pro?

A: The E3 Pro offers advanced features such as 3-zone lumbar support and adaptive tracking, while the E3 Air focuses on simplicity and a compact design. The Pro is better for long hours, while the Air suits smaller spaces and lighter use.

Q: Is the E3 Pro worth it for long sitting durations?

A: Yes. Its adaptive lumbar system and advanced adjustability provide continuous support. This reduces fatigue and improves posture during extended work sessions, making it suitable for users who sit for 6–10 hours daily.

Q: Which chair is better for small apartments?

A: The E3 Air is the better choice. Its compact design and lightweight structure make it ideal for limited spaces while still delivering reliable ergonomic support.

Q: Do both chairs support proper posture?

A: Yes. Both models are designed as ergonomic chairs for a correct sitting posture. The difference lies in the support system's level of advancement, with the E3 Pro offering more dynamic adjustments.


Conclusion

The new launch of the HBADA E3 Air vs E3 Pro 2026 delivers two clear paths. One focuses on compact efficiency, the other on advanced ergonomic precision.

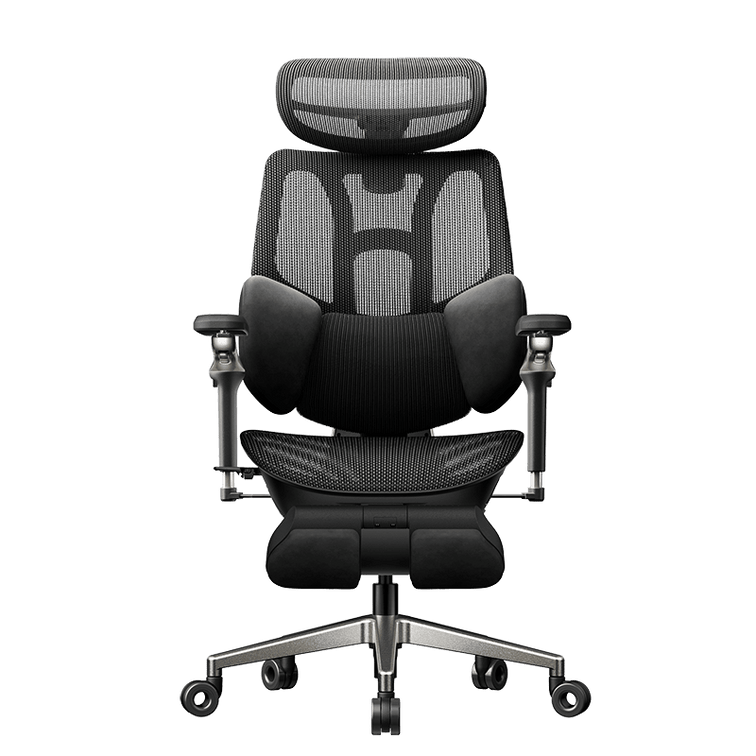
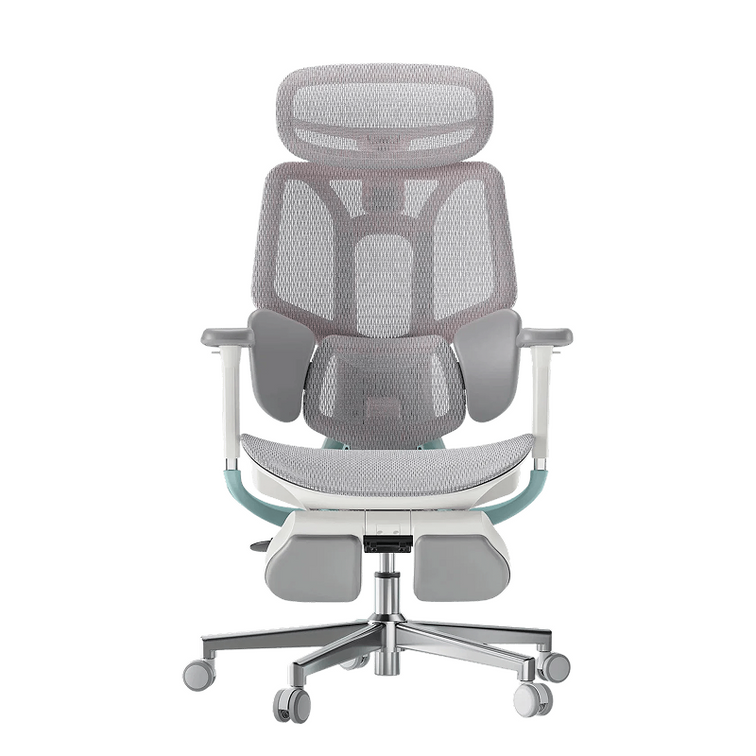
If you value simplicity and need to make the most of a small space, the E3 Air is a solid pick. On the other hand, if you’re after maximum support for long workdays, the E3 Pro is worth considering. Moreover, we also specially provide pink version!

HBADA E3 Pro office Chair with Footrest-pink~2-3

Ultimately, think about your daily routine and how you actually use your chair-choosing based on your habits will help you get the most comfort and value out of your investment.
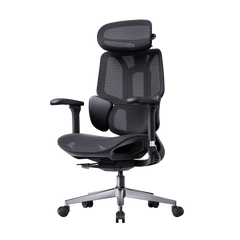
 

Relevant Product

You May Also Like

What Makes a Good Ergonomic Chair? 6 Features Every HBADA Buyer Should Know What Makes a Good Ergonomic Chair? 6 Features Every HBADA Buyer Should Know Updated: August 2026 | Reviewed against current HBADA product information and OSHA computer workstation guidance. Shopping for a new chair can become confusing quickly. Almost every product listing uses the word “ergonomic,” but that label alone does not show whether a chair will fit your body, desk or daily routine. A good ergonomic chair is defined by practical support and useful adjustment—not by the number of features in its specification sheet. This guide explains the six features that matter most and how to evaluate them before buying. Quick Answer A good ergonomic chair should fit the user and the task. It should provide adjustable lumbar support, suitable seat height and depth, breathable and supportive materials, adjustable armrests, controlled recline and a stable five-point base. These features are most useful when the chair is adjusted correctly and allows the user to change position throughout the day. Table of Contents Adjustable Lumbar Support Adjustable Seat Height and Depth Breathable and Supportive Material Adjustable Multi-Directional Armrests Smooth Adjustable Recline Stable and Durable Base Quick Reference Table Choosing a HBADA Chair Buyer Checklist Features That Matter Less Frequently Asked Questions 1. Adjustable Lumbar Support Lumbar support is one of the most important features to check. A well-designed backrest should follow the natural curve of the lower back instead of forcing every user into the same fixed position. Look for lumbar support that can be adjusted in height, depth or firmness. These controls help position the support where it feels most natural for your body. Dynamic lumbar systems can also move as you shift or recline. For example, the HBADA X7 Smart Ergonomic Chair uses intelligent lumbar tracking designed to respond to changes in sitting position. The HBADA E3 Pro provides adjustable three-zone lumbar support for users who prefer more direct manual control. Fit check: The lumbar support should contact your lower back without creating a sharp pressure point or pushing you too far forward. 2. Adjustable Seat Height and Depth Fit matters more than most people realise. A chair with advanced features can still feel uncomfortable when the seat is too high, too low, too deep or too shallow for the user. Seat height should normally allow your feet to rest flat on the floor or on a stable footrest. Your knees should feel comfortable, without concentrated pressure under your thighs. Seat-depth adjustment is especially useful when several people share a chair. As a practical starting point, leave approximately two to three fingers of space between the front edge of the seat and the back of your knees. After choosing a chair, follow this ergonomic chair adjustment guide to set the seat, backrest and armrests in the right order. 3. Breathable and Supportive Material Sitting for long periods can generate heat, particularly in warmer rooms. Breathable mesh allows more airflow around the back and seat than many dense, non-breathable materials. Material choice should not be judged by airflow alone. Check whether the seat distributes pressure comfortably, whether the mesh tension feels supportive and whether the frame edges contact your legs or back. Some chairs add active cooling. The HBADA X7, for example, includes a ventilated seat system with adjustable dual fans. This may suit users who work in warm environments or prefer additional airflow. Important: Mesh is not automatically better than foam for every person. Seat shape, tension, padding density and individual preference all affect comfort. 4. Adjustable Multi-Directional Armrests Armrests should support your forearms while allowing your shoulders to remain relaxed. Armrests that are too high can raise the shoulders, while armrests that are too low may provide little useful support. Useful adjustments include height, forward-and-backward movement, pad rotation and width or lateral positioning. Greater movement can be helpful when switching between typing, reading, gaming and mobile-device use. Selected HBADA X7 and E3 models use multi-directional armrest systems that allow users to reposition the pads for different desk setups. The number of available directions matters less than whether the armrests can support your actual working position. Fit check: Position your elbows close to your body and keep your shoulders relaxed. Your wrists should remain neutral rather than bending upward to reach the desk. 5. A Smooth, Adjustable Recline A good ergonomic chair should not force you to remain in one rigid position. A controlled recline allows you to vary your posture, while tilt tension helps prevent the backrest from feeling either too stiff or too loose. OSHA guidance recommends a backrest that supports the natural curve of the spine and can recline from an upright position. There is no single perfect angle for every person or task, so adjustable tension and multiple usable positions are more important than one advertised degree. Users who want a deeper recline for short breaks can consider the HBADA E3 Ultra Ergonomic Chair with Footrest. It combines a deeper recline range with a retractable footrest. Current specifications, colour availability and stock should always be checked on the product page. Best practice: Use recline to change position periodically. A chair should support movement, not encourage one fixed posture for the entire day. 6. A Stable and Durable Base A chair should remain stable as you sit, turn and recline. Look for a five-point base, suitable casters, a gas lift rated for the intended user and a frame that does not wobble during normal movement. Check the manufacturer's stated maximum load and recommended user dimensions before purchasing. A high weight rating alone does not guarantee a good fit; seat width, seat depth, backrest height and adjustment range must also suit the user. If a product lists BIFMA, SGS or another certification, check that the certification applies to the specific model rather than assuming it covers every chair sold by the brand. Quick Reference: Six Features of a Good Ergonomic Chair Feature What to Look For Why It Matters Lumbar support Height, depth or firmness adjustment; dynamic movement where useful Helps the backrest fit the natural lower-back curve Seat height and depth Feet supported and a small gap behind the knees Helps the seat fit different leg lengths and desk heights Seat and back material Breathable, supportive material without hard pressure points Supports thermal comfort and pressure distribution Armrests Height, depth and rotation adjustment Helps keep the shoulders relaxed and forearms supported Recline Adjustable tension and useful upright and reclined positions Allows users to vary posture during the day Base and frame Five-point base, suitable gas lift and appropriate weight rating Provides stability during sitting, turning and reclining How This Applies to Choosing a HBADA Chair Different HBADA chairs emphasise different types of support. Start with your body dimensions, working habits and preferred adjustment style before comparing extra features. If You Want Model to Consider Reason to Compare It Automatic lumbar response and smart functions HBADA X7 Intelligent lumbar tracking, multi-directional adjustments and active seat ventilation Strong manual adjustability HBADA E3 Pro Adjustable three-zone lumbar support and extensive headrest, armrest and seat controls Deep recline and a built-in footrest HBADA E3 Ultra Designed for users who want adjustable support during work and short reclining breaks A broader selection of fit and feature options All HBADA ergonomic chairs Compare dimensions, lumbar systems, armrests, footrests and current availability Product specifications can change between models and variants. Always review the dimensions, recommended user range, included accessories and current product-page information before ordering. Ergonomic Chair Buyer Checklist Can the lumbar support reach the correct area of your lower back? Can your feet rest flat on the floor or a footrest? Does the seat depth leave space behind your knees? Can the armrests support your forearms without raising your shoulders? Can you recline and change position smoothly? Does the chair fit your height and weight range? Are the warranty, returns and replacement-part terms clearly stated? Have you compared the chair’s dimensions with your desk and workspace? Features That Sound Good but Matter Less Flashy colours, oversized headrests and long feature lists do not automatically make a chair more ergonomic. A feature only adds value when it helps the chair fit your body or makes adjustment easier. Before choosing based on a specification count, review this ergonomic office chair buying guide and compare seat dimensions, lumbar position, adjustment range and user capacity. Final Thoughts What makes a good ergonomic chair? It comes down to six features working together: adjustable lumbar support, a seat that fits your legs, supportive breathable material, useful armrest movement, controlled recline and a stable base. No single chair is ideal for every person. The best option is the one that fits your dimensions, supports your common tasks and can be adjusted without unnecessary effort. Correct setup and regular changes in position remain important even when using a highly adjustable chair. Frequently Asked Questions What is the most important feature in a good ergonomic chair? Adjustable lumbar support is one of the most important features because it helps the backrest fit the user’s lower-back curve. Seat height and depth are equally important when evaluating overall fit. Does a good ergonomic chair need to be expensive? No. Price alone does not guarantee comfort or fit. Prioritise useful adjustment, suitable dimensions, stable construction, clear warranty terms and lumbar support that matches your body. Is mesh better than foam for an office chair? Mesh generally provides more airflow, while foam may provide a softer sitting feel. Neither material is automatically better for everyone. Comfort depends on material quality, seat shape, tension, density and personal preference. What recline angle should an ergonomic chair support? There is no universal best angle. Look for controlled recline, adjustable tilt tension and positions that support both focused work and changes in posture. OSHA recommends a backrest that supports the spine and can recline from upright. How do I know whether the armrests are adjustable enough? The armrests should let your forearms rest comfortably while your shoulders remain relaxed. Height, depth and rotation controls are especially useful for matching different desk heights and working positions. Can an ergonomic chair fix back pain? No chair is a medical treatment. A properly fitted ergonomic chair may support comfort and posture, but persistent, severe or worsening pain should be assessed by a qualified healthcare professional. Sources and Review Notes OSHA Computer Workstations: Chairs OSHA Computer Workstations Purchasing Guide This article provides general ergonomic information and is not medical advice. Product specifications and availability should be confirmed on the relevant product page before purchase. Compare HBADA Ergonomic Chairs Review lumbar support, seat dimensions, armrest adjustment, recline and footrest options before choosing your chair. Explore Ergonomic Chairs How to Adjust Lumbar Support on a HBADA Office Chair Correctly How to Adjust Lumbar Support on a HBADA Office Chair Correctly Updated: August 2026 You have a supportive ergonomic chair, but your lower back still feels uncomfortable by the afternoon. One possible reason is that the lumbar support is not aligned with your body. Even well-designed office chair lumbar support may feel ineffective when it is positioned too high, too low or too far forward. This guide explains how to adjust lumbar height, depth and tension so the support follows the inward curve of your lower back without forcing your posture. For a complete chair setup, also read our guide on how to adjust an ergonomic chair for better comfort . Quick answer To adjust office chair lumbar support correctly, sit fully against the backrest and place the centre of the lumbar support in the inward curve of your lower back, usually just above the belt line. Increase the depth or tension until it maintains gentle contact without pushing your torso forward. Test the position while upright and reclined, then make small adjustments if necessary. Table of Contents Why lumbar support matters Static vs. dynamic lumbar support How to adjust lumbar support Signs the setting is correct Signs the setting is wrong HBADA lumbar systems compared Quick adjustment checklist Common adjustment mistakes What lumbar support can and cannot do Frequently asked questions Sources and further reading Why Lumbar Support Matters The lumbar region is the lower portion of the spine. It naturally curves inward, but that curve can become harder to maintain when you sit for long periods, especially if the pelvis rolls backwards or the upper body leans away from the backrest. A properly positioned lumbar support fills the space between your lower back and the chair. It can help you maintain a more neutral seated posture and reduce the effort required to hold the torso upright. The US Occupational Safety and Health Administration recommends a backrest that supports the natural curvature of the spine and provides adequate support for the lumbar region. More pressure is not necessarily better. The goal is steady contact and balanced support—not a hard point pressing into one part of your back. Static vs. Dynamic Lumbar Support Static or manually adjustable lumbar support A static lumbar system stays in the position selected by the user. Depending on the chair, you may be able to adjust its height, depth or tension. Once configured correctly, it provides consistent support in that position. Dynamic or adaptive lumbar support A dynamic system is designed to maintain closer contact as your seated position changes. For example, the HBADA X7 Smart Ergonomic Office Chair uses smart lumbar tracking, while the HBADA E3 Pro Ergonomic Office Chair uses a mechanically adaptive three-zone lumbar system. Adaptive movement can reduce the need for repeated manual adjustments, but the initial chair setup still matters. Seat height, seat depth and backrest position all affect how the lumbar system meets your body. How to Adjust Office Chair Lumbar Support Step by Step Sit fully back in the chair Slide your hips toward the rear of the seat until your pelvis and lower back are in contact with the backrest. Avoid testing the lumbar support while sitting on the front edge of the seat. Find the inward curve of your lower back Place one hand behind your waist and locate the natural inward curve above your belt line. This is the area the lumbar support should fill. It should not press against the tailbone or the middle of the rib cage. Adjust the lumbar height Move the support up or down until its most prominent area sits inside the inward curve of your lower back. If it touches your pelvis, it is probably too low. If it presses into the lower ribs, it is probably too high. Adjust the depth or tension gradually Start with a low or medium setting. Increase the depth or tension in small increments until the support maintains contact without pushing your hips or upper body forward. Check your overall sitting position Your shoulders should remain relaxed, your pelvis should stay near the backrest and your torso should not feel forced into an exaggerated arch. If the lumbar support changes your posture too aggressively, reduce the depth or tension. Test the setting during normal work Use the chair for approximately 20 to 30 minutes while typing, reading or joining a meeting. A setting that feels noticeable for a few seconds may become too firm during longer use. Recheck the support while reclining Recline slightly and confirm that the backrest still follows your lower back. Dynamic systems may move with you, while manual systems may need a small adjustment when you change your preferred recline angle. Signs Your Lumbar Support Is Adjusted Correctly Good signs The support fills the natural curve of your lower back. Contact feels broad and even rather than sharp or concentrated. Your pelvis stays near the rear of the seat. You can sit upright without excessive muscular effort. Your shoulders and upper back remain relaxed. The support continues to meet your back when you recline slightly. Warning signs You feel pressure against the tailbone or top of the pelvis. The support presses into your ribs or mid-back. Your lower back feels pushed into an exaggerated arch. You keep sliding forward to escape the pressure. You cannot place your hips fully against the backrest. The support loses contact as soon as you recline. Comparing Lumbar Support Systems Across HBADA Chairs HBADA chairs use different lumbar-support designs. The most appropriate adjustment method depends on the model and its available controls. Chair Lumbar system Main adjustment approach Setup guidance HBADA X7 Smart lumbar tracking Automatic posture-based tracking with adjustable intensity Sit fully back, select a comfortable support intensity and test the response while upright and reclined. HBADA E3 Pro Three-zone adaptive lumbar support Up to 60 mm vertical adjustment, 32 mm depth locking, 40° side-wing rotation and adaptive movement Set the height first, then adjust the depth and side wings to create broad contact around the lower back. HBADA E3 Ultra Three-zone elastic lumbar system Adjustable height, depth and side-wing positioning Align the central support with the lumbar curve, then adjust the side wings so they support without squeezing the torso. Other HBADA models Model-dependent manual, fixed or adaptive support Controls vary by product Check the product page and user manual before making adjustments. Product features can vary by model or configuration. Always confirm the controls available on your specific chair before adjusting it. Quick Lumbar Adjustment Checklist Before you begin working, check that: Your hips are positioned against the rear of the seat. The lumbar support sits in the inward curve above your belt line. The pressure feels broad, gentle and evenly distributed. The support does not force your torso forward. Your seat depth leaves comfortable space behind your knees. Your feet are supported by the floor or a suitable footrest. The backrest continues supporting you when you recline. Common Lumbar Support Adjustment Mistakes Using the firmest possible setting Maximum pressure is not automatically the most supportive setting. Excessive depth can force the lower back forward and make it difficult to remain against the backrest. Adjusting the support while sitting forward Lumbar height and depth should be tested with your hips fully back. Otherwise, the support may be aligned to a position you do not maintain during normal work. Ignoring seat depth If the seat is too deep, you may slide forward to avoid pressure behind the knees. This creates a gap between your lower back and the lumbar support, even when the backrest itself is correctly adjusted. Keeping one position all day Ergonomic support does not remove the need for movement. Change position periodically and take short standing or walking breaks during extended work sessions. Changing several controls at once Adjust one setting at a time. Start with seat height and depth, then set lumbar height, followed by lumbar depth or tension. This makes it easier to identify which change improves comfort. What Lumbar Support Can and Cannot Do Proper lumbar support may help improve seated comfort and encourage a more neutral working posture. Results vary according to body shape, chair setup, working habits and any existing health conditions. Important: An ergonomic chair cannot diagnose or treat a spinal condition. Persistent, severe or worsening back pain should be assessed by a qualified healthcare professional. This article provides general ergonomic information and is not medical advice. The most effective workstation setup combines a supportive chair with appropriate desk height, monitor placement and regular movement. OSHA also recommends changing seated positions frequently and standing or walking periodically during the working day. Final Thoughts Correct lumbar adjustment is usually a process of small changes rather than one dramatic setting. Sit fully back, align the support with the inward curve of your lower back and increase the depth only until you feel steady, comfortable contact. If your posture changes throughout the day, an adaptive system such as the HBADA E3 Pro or a smart tracking system such as the HBADA X7 may make it easier to maintain consistent support. However, the rest of the chair and workstation must still be adjusted for your body. Frequently Asked Questions How do I know whether my lumbar support is positioned correctly? It should fill the inward curve of your lower back with broad, gentle contact. It should not press into your tailbone, ribs or mid-back, and it should not force your torso away from the backrest. Where should office chair lumbar support sit? The centre of the support should normally sit in the small of the back, slightly above the belt line. The exact position varies with torso length and body proportions, so use comfort and even contact as the final guide. How firm should lumbar support feel? It should feel supportive but not aggressive. Start with a low or medium setting and increase it gradually. Reduce the pressure if it causes you to arch excessively or slide forward. What is the difference between static and dynamic lumbar support? Static support stays in the position selected by the user. Dynamic support is designed to move or adapt as the user changes posture or reclines, helping it maintain contact with the lower back. Should I readjust lumbar support during the day? You may need a small adjustment if you change your recline angle, footwear, desk setup or working activity. You should not need to make constant large adjustments once the chair is correctly configured. Can lumbar support help with existing back pain? Correctly positioned support may improve seated comfort or reduce some postural strain, but it does not treat the underlying cause of back pain. Seek professional medical advice for persistent, severe or worsening symptoms. Which HBADA chair has the most advanced lumbar adjustment? The HBADA X7 uses smart lumbar tracking that responds to changes in seated posture. The HBADA E3 Pro provides a mechanical three-zone system with adjustable height, depth and side wings. The better option depends on whether you prefer automatic tracking or detailed manual control. Sources and Further Reading OSHA Computer Workstations eTool: Chairs OSHA Computer Workstations eTool: Good Working Positions HBADA: How to Adjust an Ergonomic Chair for Better Comfort Find the Right Ergonomic Support Compare adjustable lumbar systems, seat dimensions and reclining features across HBADA ergonomic office chairs. Explore Ergonomic Office Chairs How to Set Up an Ergonomic Home Office with a HBADA Chair How to Set Up an Ergonomic Home Office with a HBADA Chair Working remotely seems like a breeze. No commute. No dress code. You, your laptop, and your favorite seat on the couch. It starts off easy. It looks like no one is monitoring your sitting posture. No one is saying to push your shoulders back or not to slouch over your computer. However, this arrangement doesn't last long. By mid-morning you may feel tension in your neck. Your back can become stiff at the end of a phone call. By lunchtime your wrists may feel tight. By the end of the day, you may not have moved much, yet you can still feel tired from sitting in an unsupported position for hours. It is rarely one big mistake. Typically, it is a combination of small everyday habits: a couch that is too soft, a laptop display set too low, or a dining chair used as a desk chair. None of these seem like much by themselves, but they can make your workspace feel less comfortable over time. But it is not a complicated fix. It starts with a practical ergonomic home office setup. There is no need for a complete office overhaul or a box of gadgets. A few important things simply need to be in place, in the correct sequence. The key is a good, properly adjusted ergonomic chair. The rest of your workspace should work around it. Let's walk through it step by step. ☰Table of Contents Why Your Ergonomic Home Office Setup Matters Step 1: Start With the Chair Step 2: Position Your Keyboard and Mouse Step 3: Set Your Monitor Height Quick Reference: Ergonomic Home Office Setup Basics Choosing the Right HBADA Chair for Your Home Office Bringing Your Chair and Workspace Together as a System Daily Habits That Support Your Ergonomic Setup Final Thoughts Frequently Asked Questions Why Your Ergonomic Home Office Setup Matters Your body is built to move. When you sit for long stretches, your posture and workstation setup become important. When your chair, desk, and monitor are not aligned correctly, your muscles may compensate to help keep you balanced and upright. Maybe your monitor sits a little too low, so your neck tilts down without you noticing. Maybe your armrests sit too high, so your shoulders creep up toward your ears during every call. These small adjustments can feel subtle in the moment, which is exactly why they are easy to overlook. Over time, these small compensations can add up to everyday discomfort in your neck, lower back, shoulders, or wrists. A practical ergonomic home office setup is not about buying every gadget on the market. It is about aligning a few key elements—your chair, desk, monitor, keyboard, and mouse—so your body is not working against your workspace all day. When everything lines up, you stop noticing your setup entirely. That is the goal: comfort that fades into the background so you can focus on your work. Step 1: Start With the Chair Everything else in your setup is built around your chair. Get this part right first. Raise or lower the seat so your feet sit flat on the floor and your knees are near a 90-degree angle. Sit fully back in the seat and set the seat depth so there is a small gap—about two to three fingers wide—behind your knees. Position the lumbar support so it fills the natural curve of your lower back. Adjust the armrests so your forearms rest level and your shoulders stay relaxed instead of hunched. Set your backrest recline somewhere between 95 and 110 degrees. A slight recline can feel more comfortable than sitting completely upright for long periods. Depending on the model, HBADA chairs offer adjustable armrests, lumbar support, and recline settings to help you find a more comfortable working position. For example, the HBADA X7 and E3 Pro offer multiple adjustment options for long workdays and seated breaks. Step 2: Position Your Keyboard and Mouse Once your chair is set, your hands come next. Keep your keyboard flat, or tilted slightly away from you, so your wrists stay straight instead of bending upward. Place your mouse right next to your keyboard at the same height. Move your mouse using your whole arm, not just your wrist. If your desk sits too high, raise your chair and use a stable footrest rather than lifting your shoulders to reach. Step 3: Set Your Monitor Height Your neck can feel the effects of a poorly placed monitor quickly. Position your screen so you do not need to bend your neck forward for hours at a time. Position your eyes about 2 to 3 inches below the top edge of your screen. Keep the monitor roughly an arm's length away. If you use a laptop, consider a stand paired with an external keyboard and mouse. Quick Reference: Ergonomic Home Office Setup Basics Element Target Position Why It Matters Seat Height Feet flat, knees near 90° Helps reduce pressure on the thighs and supports a stable seated position. Seat Depth 2–3 finger gap behind knees Supports comfortable thigh contact without pressing behind the knees. Lumbar Support Fills the lower-back curve Helps support the natural curve of your lower back. Armrests Forearms level, shoulders relaxed Helps reduce unnecessary shoulder and wrist strain. Backrest Recline 95° to 110° Offers a comfortable starting range for desk work and short breaks. Monitor Height Eyes 2–3 inches below top of screen Helps avoid looking down at the screen for long periods. Monitor Distance About an arm's length away Supports a comfortable viewing distance. Keyboard Flat or slightly tilted away Helps keep wrists in a more neutral position. Mouse Same height as keyboard, close by Helps reduce reaching and wrist bending. Choosing the Right HBADA Chair for Your Home Office Not every home office needs the same chair. Here is a simple breakdown to help you decide. Model Best For Standout Feature HBADA X7 Long, intensive workdays AI lumbar tracking HBADA E3 Pro Reclining breaks and footrest comfort 3-zone elastic lumbar support and 140° recline HBADA E3 Air Everyday home-office use 4D armrests and breathable mesh design Whichever model you choose, the setup principles stay the same. Your chair supports your posture best when it is adjusted to fit your body and workspace. Bringing Your Chair and Workspace Together as a System Here is the part people often miss: a well-adjusted chair can still leave you straining if your monitor or keyboard are not lined up properly. Your chair and workstation need to work as one system, not as separate pieces. If your desk forces you to reach forward, raise your shoulders, or lean toward your screen, even a strong chair setup gets undone. Once your chair is adjusted, check the whole picture. Sit down, relax your shoulders, and notice whether your eyes, wrists, and hips all land in a comfortable, neutral position. Daily Habits That Support Your Ergonomic Setup Even the best ergonomic home office setup benefits from a few simple habits. Take a short break to stand or stretch every hour. Shift your recline angle throughout the day instead of holding one fixed position. Keep your most-used items, such as your keyboard and mouse, close enough that you are not reaching. Recheck your setup occasionally. Your ideal position can shift slightly depending on your task, such as typing or joining a video call. Final Thoughts Creating a well-designed home office does not require a total room makeover. It is a few key changes done in the right order. Start with the chair. Adjust your seat height, seat depth, lumbar support, armrests, and recline. Then arrange your keyboard, mouse, and monitor around that foundation. A HBADA chair such as the X7, E3 Pro, or E3 Air provides adjustable features that can help you tailor your seating position. Combine this with thoughtful desk and monitor placement, and your home office can work more comfortably for you throughout the day. Frequently Asked Questions What's the first step in an ergonomic home office setup? Begin with your chair. Adjust the seat height, seat depth, lumbar support, armrests, and recline before making other adjustments in your workspace. How high should my monitor be for an ergonomic setup? Position your eyes approximately 2 to 3 inches below the top of the monitor, with the screen about an arm's length away. What backrest angle works best for a home office chair? A slight recline of around 95–110 degrees is a comfortable starting point for many people. Adjust it based on your task and personal comfort. Do I need a special desk for an ergonomic home office setup? Not necessarily. If your desk is too high, you may be able to raise your chair and use a stable footrest instead of replacing the desk. Which HBADA chair is best for a home office? It depends on your needs. The X7 suits long, demanding workdays with AI lumbar tracking. The E3 Pro offers lumbar support and a deeper recline. The E3 Air is a practical option for everyday home-office use. How often should I adjust my setup throughout the day? Small shifts help. Change your recline angle occasionally, stand up periodically, and recheck your position when switching between tasks such as typing and video calls.