
Cart
Your shopping cart is empty
Continue Shopping
Every Order, Backed by HBADA
30-day in-home Trial
Free 2-5 Business-Day Shipping
5-Year Hassle-Free Warranty
24/7 Customer Support


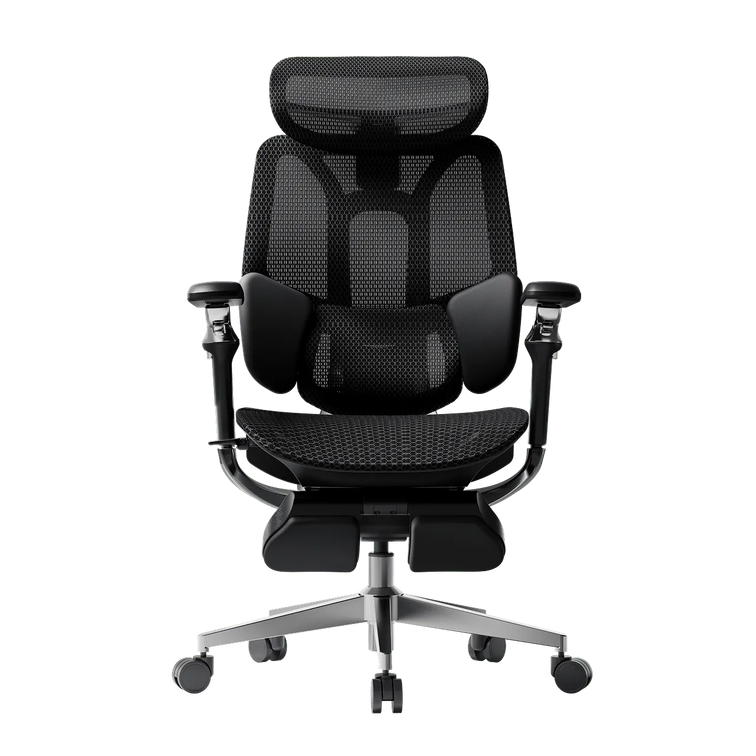
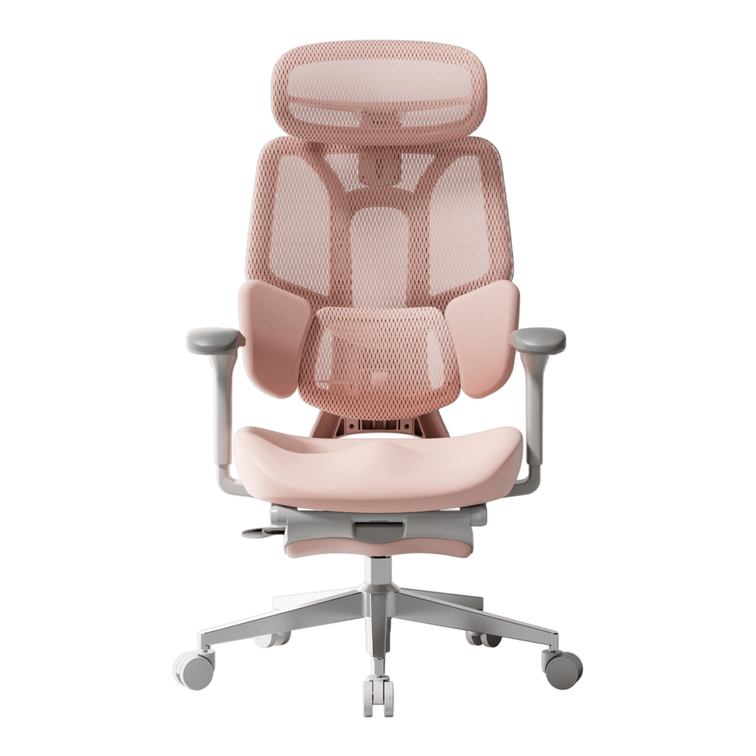
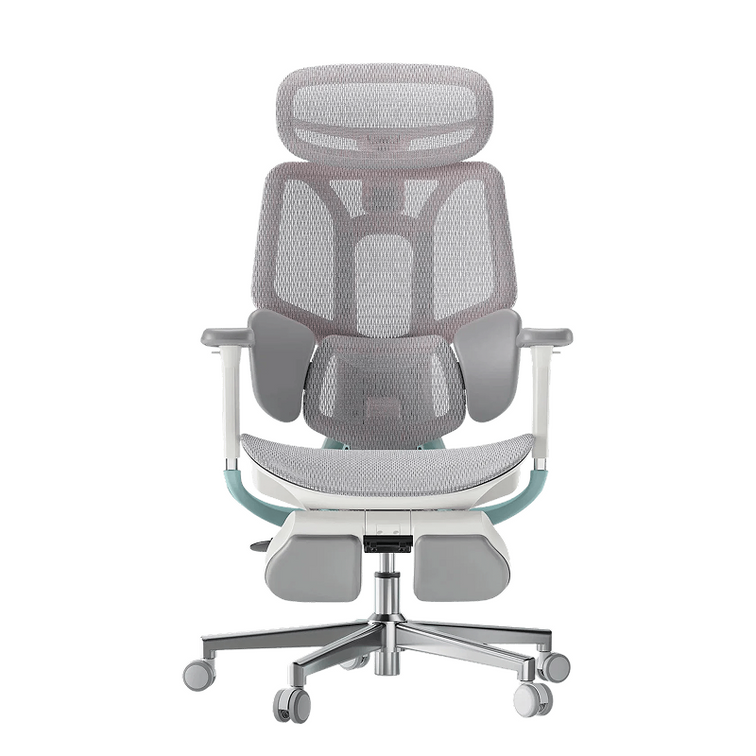
HBADA E3 Ultra Ergonomic Office Chair

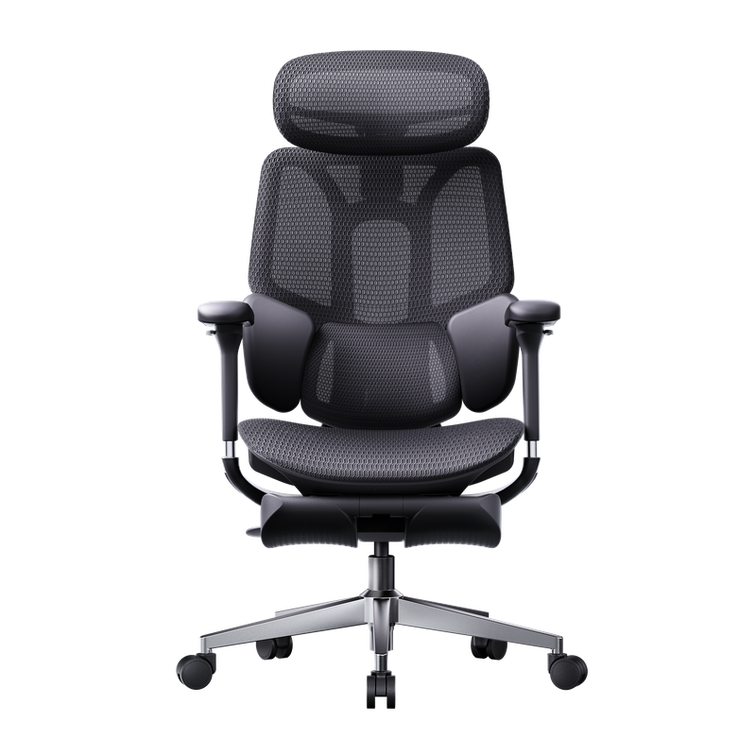
HBADA X7 Smart Ergonomic Office Chair with AI Lumbar Support

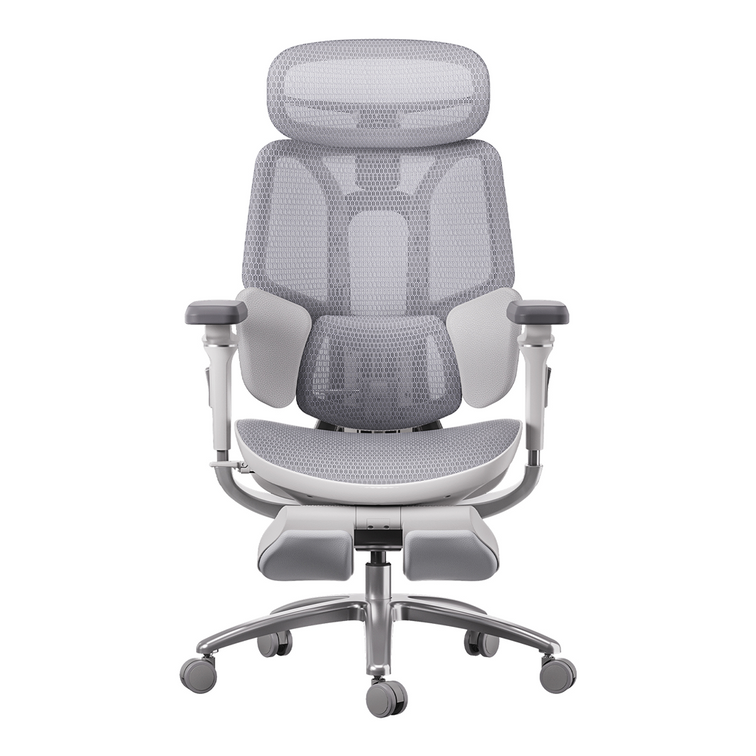
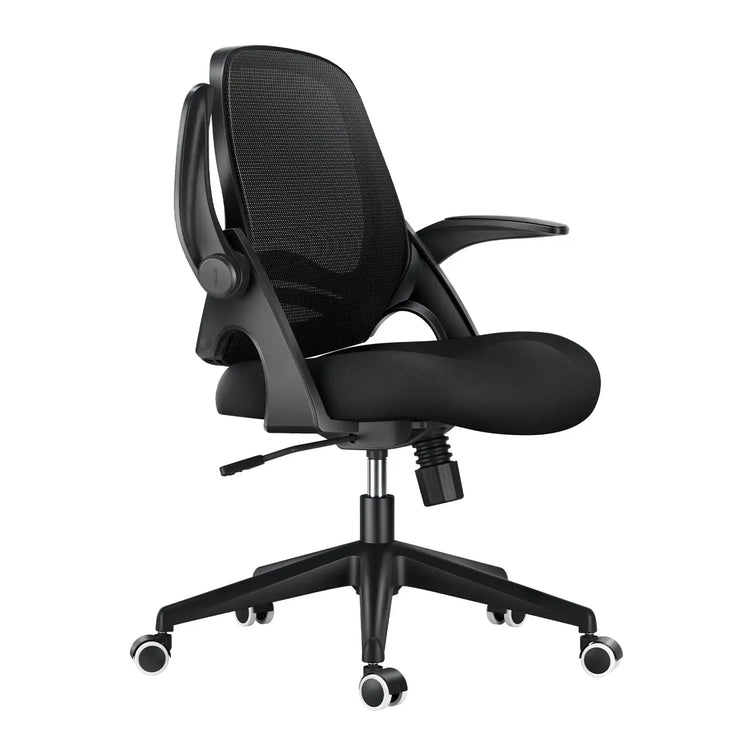
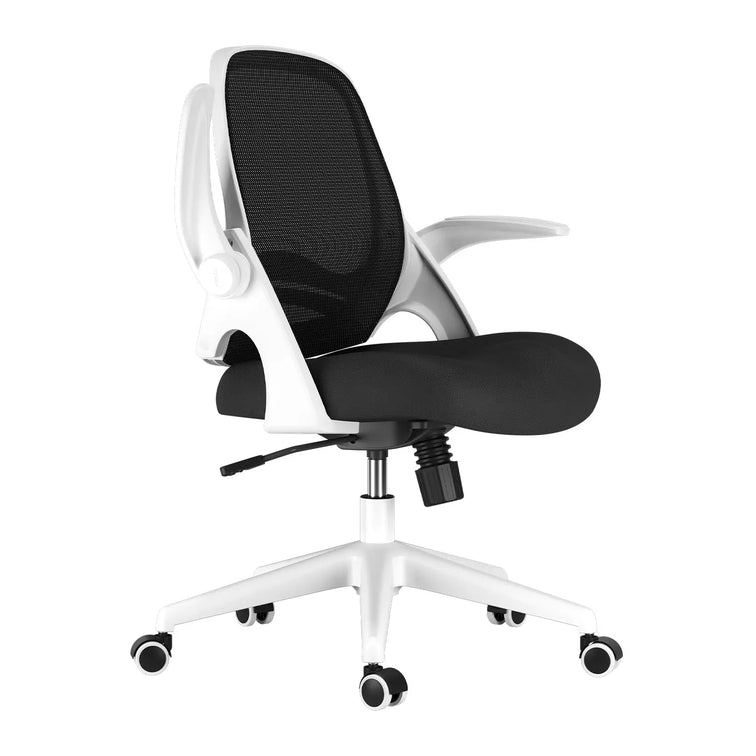
HBADA E3 Pro Ergonomic Office Chair 2026 Edition

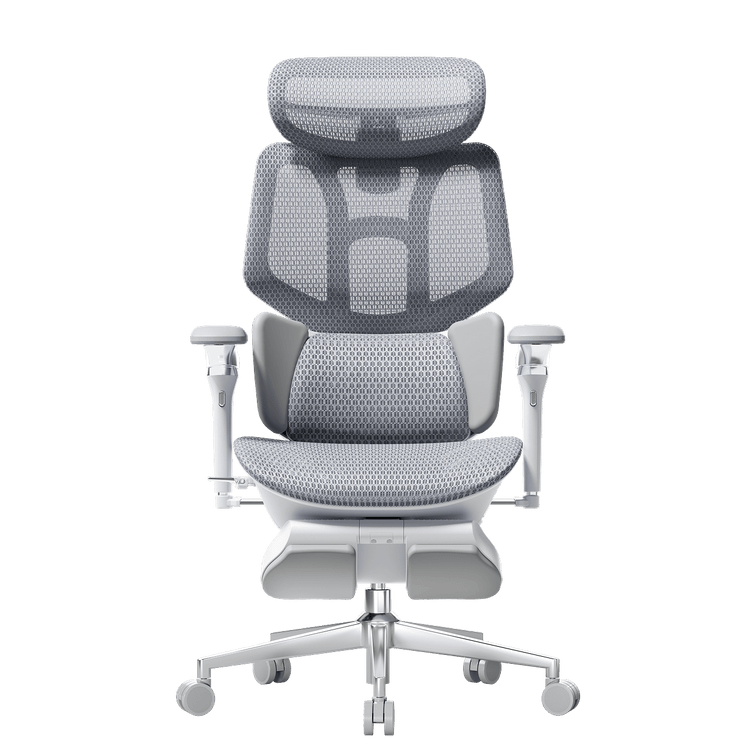
HBADA E3 Air Ergonomic Office Chair 2026 Edition
Remove this item from your cart?
Cart
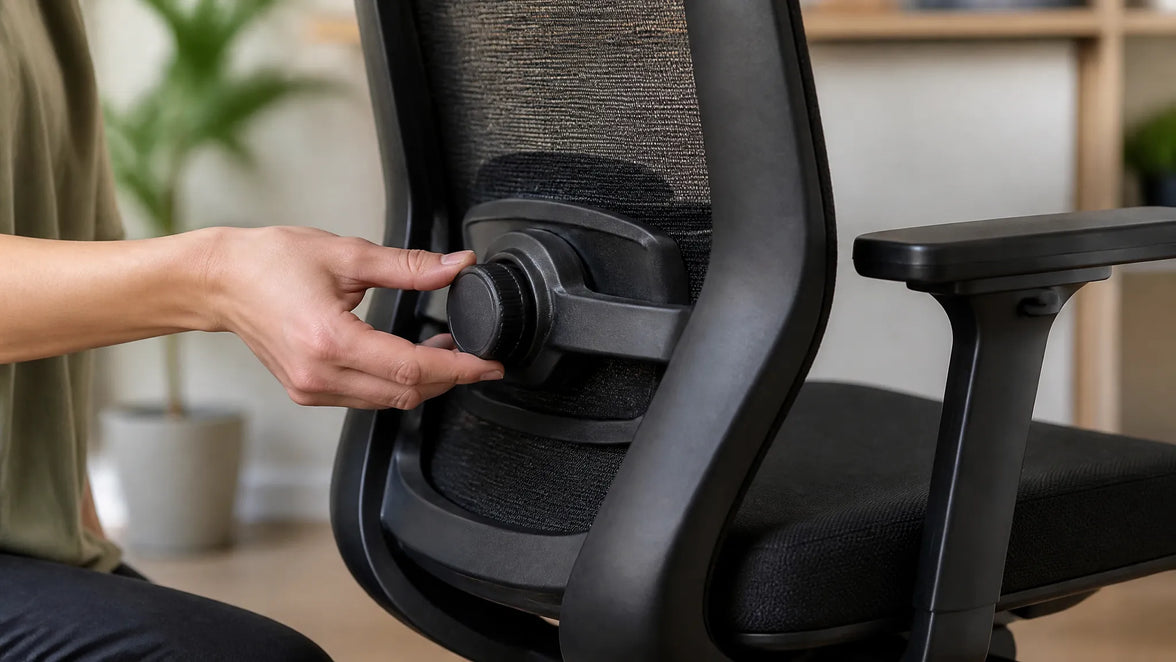 How to Adjust Lumbar Support on an Office Chair
That familiar twinge in your lower back around 3 PM isn't just fatigue. Often it's the price of sitting for hours with your spine out of alignment. Lumbar support, when adjusted well, helps preserve the natural curve in your lower back and reduces the strain that leads to that end-of-day ache. But simply having a lumbar support isn't enough—you need to set it up to match your body's shape and the way you work.
Getting it right involves more than twisting a knob. It means understanding how the support interacts with your own posture, the angle you recline, and even the depth of your seat. The following guide walks through why lumbar support matters, how to identify your chair's adjustment type, and a step-by-step method to dial in the right height, depth, and firmness for all-day comfort.
Why Lumbar Support Matters
Your spine has a natural S-curve—an inward dip at the lower back called lumbar lordosis. When you slouch, that curve flattens or even reverses, increasing pressure on spinal discs. According to HBADA's ergonomic chair adjustment guide, maintaining the spine's natural lordotic curve helps distribute pressure evenly across the discs, reducing strain on surrounding muscles and ligaments.
The World Health Organization recommends reducing sedentary time and taking regular movement breaks to avoid static loading of the spine. The U.S. Occupational Safety and Health Administration echoes this, noting that poorly supported sitting can contribute to musculoskeletal discomfort. A well-adjusted lumbar support fills the gap between your lower back and the chair, encouraging a posture that fights the slump and lessens that familiar afternoon ache.
Know Your Chair's Lumbar Mechanism Before Adjusting
Before you adjust anything, locate the controls. Lumbar systems vary widely—some use a firm plastic insert with a tension dial, others rely on a removable pillow, and a few offer multi-point tracking. Identifying yours sets the stage for a meaningful adjustment. A chair with a dynamic lumbar mechanism feels different than a fixed pillow: one moves with you, the other you reposition manually.
Built-in Adjustable Lumbar (Height and Depth)
Many ergonomic chairs hide a tension knob on the side of the backrest or a lever under the seat. Turning the knob changes how firmly the support presses into your back—often referred to as depth or firmness. A separate slider or ratchet system moves the entire support up and down to match the curve of your lower spine. Height adjustment raises or lowers the bulge; depth tweaks how much it protrudes.
External Lumbar Pillow
Chairs with fixed backrests often rely on a removable cushion. Pillows lack depth adjustment, but you can shift them higher or lower to match your spine. Place one at the small of the back—just above the belt line—so it centers on the inward curve. Too high and it crowds the ribcage; too low and it presses on the tailbone. Even a modestly thick pillow can make a noticeable difference if positioned correctly.
Chairs with Multi-Point Lumbar Adjustment
Some designs combine height and depth in a single mechanism for finer control. For example, the HBADA E3 Pro Ergonomic Office Chair offers both height and depth lumbar adjustment. A knob behind the mesh backrest lets you raise or lower the lumbar cradle, while a tension dial adjusts how aggressively it pushes forward. Set the height so the support rests at the belt line, then dial the depth until it gently fills the hollow of your back without forcing your pelvis into an exaggerated tilt.
Step-by-Step Lumbar Support Adjustment Guide
A systematic approach helps you tune the support to your body rather than guessing. These steps align with Newtral's lumbar support adjustment guidance and common ergonomic frameworks like the 90-90-90 rule. Start from a baseline posture, then work through height, depth, and movement testing. Spine shape varies, so trust what feels supportive without causing new pressure.
Start with a Neutral Sitting Posture
Before touching the lumbar mechanism, set the rest of the chair. Adjust seat height so thighs are parallel to the floor and feet rest flat. Leave a two- to three-finger gap between the front edge of the seat and the back of your knees—this prevents pressure on the popliteal fold. Position armrests so your elbows form a 90° angle and your shoulders stay relaxed. This baseline ensures the lumbar support works with your whole body, not against it.
Set the Lumbar Height
Find the height adjustment control—typically a knob, lever, or ratchet on the backrest. Move the lumbar piece up or down until it sits squarely in the hollow of your lower back, roughly at belt-line or navel level. You'll know it's correct when the support matches the natural inward curve without digging into the upper pelvis or floating up near your ribs. Many chair backs have markings, but you can also run your hand along the backrest to feel where the bulge peaks.
Adjust Lumbar Depth or Firmness
Turn the depth knob or tension dial to fine-tune how firmly the support pushes into your back. The goal is gentle, continuous contact that encourages the spine's lordotic curve without forcing an arch. If you feel a hard shelf pressing your spine forward, reduce the tension. If the support barely touches your back, it likely won't prevent slouching. Small tweaks—a quarter turn—can make the difference between just sitting there and sitting supported.
Test While Reclining and Moving
Recline to your usual working angle, typically between 95° and 110°, and note whether the lumbar support stays in contact. Some chairs shift the support point when you lean back; the Eureka Ergonomic posture integration guide suggests rechecking alignment after changing the tilt tension. Roll your shoulders, stretch your arms forward as if typing, and see if the support maintains its position. Readjust if it slides up or loses touch.
Common Mistakes When Adjusting Lumbar Support
Even with the right steps, small errors can turn a comfortable chair into a source of irritation. A support placed too high presses on the ribcage and encourages a forward-leaning posture. Set too low, it pushes into the tailbone and flattens the lumbar curve. Dialing in excessive depth can create an anterior pelvic tilt that strains the lower back, while a seat pan that's too deep often scoots you forward, leaving the lumbar support behind. The following table highlights these common pitfalls:
Mistake
What Happens
Quick Fix
Lumbar too high
Pressure on ribcage, forward lean
Lower support to belt-line level
Lumbar too low
Tailbone pressure, flattened curve
Raise support until it fills the hollow
Depth too aggressive
Anterior pelvic tilt, new pain
Reduce tension slightly
Seat depth blocking pelvis
Can't reach backrest, slumping
Adjust seat depth or add back cushion
Recheck your lumbar setting after adjusting other chair features—changing the recline angle or armrest height can alter your sitting geometry enough to require a re-tune.
Troubleshooting: Lumbar Support Still Uncomfortable?
If you've followed the steps and still feel discomfort, step back and look at the whole chair. A seat that's too deep often prevents your pelvis from reaching the backrest, so the lumbar support hits your mid-back instead. Check that you maintain a two- to three-finger gap behind your knees. If the built-in support can't be dialed in well enough, an external lumbar pillow or a rolled towel placed at the small of the back often provides a simple workaround. The World Health Organization emphasizes that even well-adjusted seated posture benefits from movement breaks—stand or stretch for a couple of minutes every half hour to relieve static load on the spine.
Frequently Asked Questions
How high should lumbar support be?
Align the support with the natural inward curve of your lower spine, roughly at belt-line height or just above the hip bones. The bulge should fill the hollow, not press on the ribs or tailbone.
Can I use a pillow instead of built-in lumbar support?
Yes, an external pillow can work well if you position it carefully. Built-in systems offer more precise height and depth control, but a pillow placed at the small of the back can still help you avoid slouching.
How often should I readjust lumbar support?
Recheck the setting whenever you change desk height, alter the chair's recline angle, or if you feel renewed lower back discomfort. A quick re-tune takes seconds and can prevent hours of strain.
Sep 16, 2026
How to Adjust Lumbar Support on an Office Chair
That familiar twinge in your lower back around 3 PM isn't just fatigue. Often it's the price of sitting for hours with your spine out of alignment. Lumbar support, when adjusted well, helps preserve the natural curve in your lower back and reduces the strain that leads to that end-of-day ache. But simply having a lumbar support isn't enough—you need to set it up to match your body's shape and the way you work.
Getting it right involves more than twisting a knob. It means understanding how the support interacts with your own posture, the angle you recline, and even the depth of your seat. The following guide walks through why lumbar support matters, how to identify your chair's adjustment type, and a step-by-step method to dial in the right height, depth, and firmness for all-day comfort.
Why Lumbar Support Matters
Your spine has a natural S-curve—an inward dip at the lower back called lumbar lordosis. When you slouch, that curve flattens or even reverses, increasing pressure on spinal discs. According to HBADA's ergonomic chair adjustment guide, maintaining the spine's natural lordotic curve helps distribute pressure evenly across the discs, reducing strain on surrounding muscles and ligaments.
The World Health Organization recommends reducing sedentary time and taking regular movement breaks to avoid static loading of the spine. The U.S. Occupational Safety and Health Administration echoes this, noting that poorly supported sitting can contribute to musculoskeletal discomfort. A well-adjusted lumbar support fills the gap between your lower back and the chair, encouraging a posture that fights the slump and lessens that familiar afternoon ache.
Know Your Chair's Lumbar Mechanism Before Adjusting
Before you adjust anything, locate the controls. Lumbar systems vary widely—some use a firm plastic insert with a tension dial, others rely on a removable pillow, and a few offer multi-point tracking. Identifying yours sets the stage for a meaningful adjustment. A chair with a dynamic lumbar mechanism feels different than a fixed pillow: one moves with you, the other you reposition manually.
Built-in Adjustable Lumbar (Height and Depth)
Many ergonomic chairs hide a tension knob on the side of the backrest or a lever under the seat. Turning the knob changes how firmly the support presses into your back—often referred to as depth or firmness. A separate slider or ratchet system moves the entire support up and down to match the curve of your lower spine. Height adjustment raises or lowers the bulge; depth tweaks how much it protrudes.
External Lumbar Pillow
Chairs with fixed backrests often rely on a removable cushion. Pillows lack depth adjustment, but you can shift them higher or lower to match your spine. Place one at the small of the back—just above the belt line—so it centers on the inward curve. Too high and it crowds the ribcage; too low and it presses on the tailbone. Even a modestly thick pillow can make a noticeable difference if positioned correctly.
Chairs with Multi-Point Lumbar Adjustment
Some designs combine height and depth in a single mechanism for finer control. For example, the HBADA E3 Pro Ergonomic Office Chair offers both height and depth lumbar adjustment. A knob behind the mesh backrest lets you raise or lower the lumbar cradle, while a tension dial adjusts how aggressively it pushes forward. Set the height so the support rests at the belt line, then dial the depth until it gently fills the hollow of your back without forcing your pelvis into an exaggerated tilt.
Step-by-Step Lumbar Support Adjustment Guide
A systematic approach helps you tune the support to your body rather than guessing. These steps align with Newtral's lumbar support adjustment guidance and common ergonomic frameworks like the 90-90-90 rule. Start from a baseline posture, then work through height, depth, and movement testing. Spine shape varies, so trust what feels supportive without causing new pressure.
Start with a Neutral Sitting Posture
Before touching the lumbar mechanism, set the rest of the chair. Adjust seat height so thighs are parallel to the floor and feet rest flat. Leave a two- to three-finger gap between the front edge of the seat and the back of your knees—this prevents pressure on the popliteal fold. Position armrests so your elbows form a 90° angle and your shoulders stay relaxed. This baseline ensures the lumbar support works with your whole body, not against it.
Set the Lumbar Height
Find the height adjustment control—typically a knob, lever, or ratchet on the backrest. Move the lumbar piece up or down until it sits squarely in the hollow of your lower back, roughly at belt-line or navel level. You'll know it's correct when the support matches the natural inward curve without digging into the upper pelvis or floating up near your ribs. Many chair backs have markings, but you can also run your hand along the backrest to feel where the bulge peaks.
Adjust Lumbar Depth or Firmness
Turn the depth knob or tension dial to fine-tune how firmly the support pushes into your back. The goal is gentle, continuous contact that encourages the spine's lordotic curve without forcing an arch. If you feel a hard shelf pressing your spine forward, reduce the tension. If the support barely touches your back, it likely won't prevent slouching. Small tweaks—a quarter turn—can make the difference between just sitting there and sitting supported.
Test While Reclining and Moving
Recline to your usual working angle, typically between 95° and 110°, and note whether the lumbar support stays in contact. Some chairs shift the support point when you lean back; the Eureka Ergonomic posture integration guide suggests rechecking alignment after changing the tilt tension. Roll your shoulders, stretch your arms forward as if typing, and see if the support maintains its position. Readjust if it slides up or loses touch.
Common Mistakes When Adjusting Lumbar Support
Even with the right steps, small errors can turn a comfortable chair into a source of irritation. A support placed too high presses on the ribcage and encourages a forward-leaning posture. Set too low, it pushes into the tailbone and flattens the lumbar curve. Dialing in excessive depth can create an anterior pelvic tilt that strains the lower back, while a seat pan that's too deep often scoots you forward, leaving the lumbar support behind. The following table highlights these common pitfalls:
Mistake
What Happens
Quick Fix
Lumbar too high
Pressure on ribcage, forward lean
Lower support to belt-line level
Lumbar too low
Tailbone pressure, flattened curve
Raise support until it fills the hollow
Depth too aggressive
Anterior pelvic tilt, new pain
Reduce tension slightly
Seat depth blocking pelvis
Can't reach backrest, slumping
Adjust seat depth or add back cushion
Recheck your lumbar setting after adjusting other chair features—changing the recline angle or armrest height can alter your sitting geometry enough to require a re-tune.
Troubleshooting: Lumbar Support Still Uncomfortable?
If you've followed the steps and still feel discomfort, step back and look at the whole chair. A seat that's too deep often prevents your pelvis from reaching the backrest, so the lumbar support hits your mid-back instead. Check that you maintain a two- to three-finger gap behind your knees. If the built-in support can't be dialed in well enough, an external lumbar pillow or a rolled towel placed at the small of the back often provides a simple workaround. The World Health Organization emphasizes that even well-adjusted seated posture benefits from movement breaks—stand or stretch for a couple of minutes every half hour to relieve static load on the spine.
Frequently Asked Questions
How high should lumbar support be?
Align the support with the natural inward curve of your lower spine, roughly at belt-line height or just above the hip bones. The bulge should fill the hollow, not press on the ribs or tailbone.
Can I use a pillow instead of built-in lumbar support?
Yes, an external pillow can work well if you position it carefully. Built-in systems offer more precise height and depth control, but a pillow placed at the small of the back can still help you avoid slouching.
How often should I readjust lumbar support?
Recheck the setting whenever you change desk height, alter the chair's recline angle, or if you feel renewed lower back discomfort. A quick re-tune takes seconds and can prevent hours of strain.
Sep 16, 2026
 How to Test an Ergonomic Office Chair During a 30-Day Home Trial
The quick answer
To test an ergonomic office chair during a 30-day home trial, use it for your real work each day and check fit, lumbar support, breathability, recline, armrests and noise. Keep the packaging, avoid damage, and decide before the window closes. If the chair does not suit you, contact support early enough to complete the required return steps within your return window.
Table of Contents
Jump to the part of the trial you need.
01. What is a 30-day home trial?
02. How should you set up the chair?
03. What should you test in week one?
04. What should you test in weeks two to four?
05. How do you protect return eligibility?
06. What should you check before returning?
07. Which HBADA chairs can you test?
08. Your 30-day test plan
09. Limitations and when to get help
10. Conclusion
11. Frequently asked questions
12. Sources and useful links
What Is a 30-Day Home Trial and How Does It Work?
A home trial is a return window that lets you use the chair in your real setup before you commit. HBADA’s current return and refund policy allows returns within 30 days of receipt, subject to its condition and return requirements.
This gives you time to judge an adjustable ergonomic chair at your own desk, not in a showroom. Testing may help you find a more comfortable sitting position, but it is not a medical treatment.
How Should You Set Up the Chair for Testing?
Start well, because a fair test needs a proper setup. Assemble the chair using the HBADA user manual and assembly guide, and keep every part of the packaging, including the box, foam and spare hardware. Then set it to your body before you judge it.
Set the seat height so your feet rest flat on the floor or a suitable footrest.
Set the seat depth so two to three fingers fit behind your knees.
Set the lumbar support to meet your lower back.
Set the armrests so your forearms are supported and your shoulders stay relaxed.
Check that you can reach your keyboard and mouse comfortably.
Only after this setup should you decide how the chair feels.
What Should You Test in the First Week?
Your first week is about first impressions and daily fit.
Fit: Check you can reach a feet-flat, back-supported position within the chair’s adjustment ranges.
Lumbar support: Notice whether the support meets your lower back through your normal workday.
Breathability: Watch for heat build-up and check whether the mesh and seat feel comfortable in your room.
Noise and casters: Roll across your floor and listen for creaks or scuffs. Check that the casters are suitable for the surface.
What Should You Test in Weeks Two to Four?
Later weeks reveal how the chair holds up over real work.
Now test the chair as an office chair for long hours. Work a normal week, keeping your usual movement breaks, and notice whether early comfort lasts into the afternoon. Move through the available recline positions and check that the locks hold. Use the armrests while you type, write and relax.
Give yourself time to learn the controls and fine-tune the settings, but do not treat pain as a required adjustment phase. If discomfort eases after a setting change, note what helped. If it persists after reasonable adjustments, the chair may not fit you.
A Quick Test-and-Decide Table
Use this table to turn each check into a clear next step.
What to test
How to test it
Keep or return signal
Fit
Set seat height, depth and lumbar support to your body, then sit back fully.
Consider a return if you cannot achieve supported feet and back within the adjustment ranges.
Lumbar support
Use it during a normal working day and note lower-back comfort.
Consider a return if the support cannot meet your lower back comfortably after adjustment.
Breathability
Check for heat build-up during ordinary work sessions.
Consider another material or model if the seat consistently feels too warm for you.
Recline and lock
Try the recline settings according to the manual.
Stop using the chair and contact support if the recline is unstable or a lock fails.
Armrests
Type, write and relax while checking forearm support.
Consider a return if the armrests prevent a relaxed working position or access to your desk.
Noise and casters
Roll gently across a suitable floor surface and listen for persistent noise.
Contact support about recurring creaks or floor marking before continuing use.
Long-session comfort
Work a normal week in the chair, with movement breaks.
Reassess the fit if discomfort persists after you fine-tune the settings.
How Do You Protect Your Return Eligibility?
Test thoroughly, but keep the chair returnable while you decide.
Keep the original box, foam and hardware for the whole trial.
Keep the chair clean and unmarked, and use a suitable floor mat if needed.
Note your delivery date and the last day of the return window.
Contact support early if you are unsure, rather than on the final day.
HBADA requires returns in their original condition and recommends keeping the original packaging. Missing packaging or damage from improper packing may lead to fees.
What Should You Check Before Returning the Chair?
Review the return instructions for your order before arranging collection. For change-of-mind returns, customers pay part of the return shipping cost; HBADA may provide a discounted prepaid label deducted from the refund. For damaged, defective or incorrectly supplied items, contact support for the appropriate process.
Ask support to confirm the required steps and deadline. A return window is separate from warranty coverage, so check the HBADA warranty and service information if a fault appears later.
Which HBADA Chairs Can You Test at Home?
The HBADA X7 and E3 Pro 2026 product pages advertise a 30-day home trial. Confirm the current terms for your chosen model and order before purchasing.
Use the same testing checklist for either chair, but pay attention to the features that make each model different.
What to compare
HBADA X7
HBADA E3 Pro 2026
Lumbar support
Test how the AI lumbar-tracking system responds when you change position.
Test how the three-zone adaptive lumbar support fits your lower back.
Seat fit
Check the selected model’s seat dimensions and adjustment range against your body and desk.
Check the selected model’s seat dimensions and adjustment range against your body and desk.
Recline and armrests
Check support and control access while typing, leaning back and relaxing.
Check the headrest, armrest and recline adjustments during your usual tasks.
Additional features
Try the comfort functions included with your selected version, following its manual.
Focus on mechanical adjustments, mesh comfort and any optional footrest.
Before ordering
Confirm the exact configuration, return conditions and warranty.
Confirm the exact configuration, return conditions and warranty.
If you want automatic lumbar tracking, explore the HBADA X7 smart ergonomic chair and check the comfort features included with your selected version.
If you want a mechanically adjustable chair to test for long workdays, compare the HBADA E3 Pro 2026. You can also browse the HBADA ergonomic office chair collection before your trial begins.
Your 30-Day Test Plan
Follow this simple plan so nothing is missed before the window closes. Adjust the timing to leave enough time for the return process required for your order.
Day 1
Assemble and Adjust
Assemble by the manual, keep all packaging, and set the chair to your body.
Days 2–7
Check Daily Fit
Test daily fit, lumbar support, breathability, noise and casters.
Days 8–21
Test Your Normal Work Routine
Work your usual schedule and test recline, armrests and long-session comfort. Keep taking movement breaks.
Days 22–27
Fine-Tune and Decide
Fine-tune settings and review your notes. If the chair is not right, contact support now to confirm the return steps and deadline.
Days 28–30
Complete Your Decision
Keep the chair if it fits your needs, or complete the return steps within the applicable deadline. Do not assume contacting support on day 30 automatically extends the window.
Limitations and When to Get Help
A trial answers many questions, but not every one.
A trial checks comfort and fit for you; it cannot promise a health outcome.
Thirty days cannot establish the chair’s lifespan or long-term durability.
Keep the chair and packaging in good condition while deciding.
Trial terms, return shipping and warranty can vary by market and order, so check the applicable policy.
If you have severe, persistent or radiating pain, consult a qualified healthcare professional. A chair is not a medical treatment.
Conclusion
The best way to judge an ergonomic office chair is to test it where you actually work. Assemble it, set it to your body, use it for real tasks, and keep the packaging until you are sure. Compare the X7 if you want automatic lumbar tracking, or the E3 Pro if you prefer mechanical adjustments. Make your decision before the return deadline, and keep the chair that fits you.
Frequently Asked Questions
How long is the HBADA home trial?
The current .com policy states 30 days from receipt. Confirm the terms and required return steps for your order before testing.
Can you return an office chair after using it?
Home testing does not remove the policy’s condition requirements. Keep the chair clean, avoid damage, and ask support if you are unsure whether its condition qualifies.
How long does it take to get used to a new ergonomic chair?
There is no fixed adjustment period for everyone. You may need several sessions to learn the controls and fine-tune the seat height, depth, lumbar support and armrests. Change one setting at a time. Do not keep sitting through pain in the hope that you will eventually adapt.
Who pays for return shipping?
It depends on the return reason. Check the shipping-cost section of the return policy and confirm any label charge with support before booking a courier.
What should you check before the trial ends?
Confirm the essentials: fit, long-session comfort, lumbar support, breathability, recline, armrests and noise. Also check that the chair suits your desk height and floor. Decide early enough to complete any required return steps before the deadline.
Sources and Useful Links
HBADA Return and Refund Policy
HBADA Warranty and Service
HBADA User Manuals and Assembly Guides
HBADA X7 Product Details
HBADA E3 Pro 2026 Product Details
Sep 16, 2026
How to Test an Ergonomic Office Chair During a 30-Day Home Trial
The quick answer
To test an ergonomic office chair during a 30-day home trial, use it for your real work each day and check fit, lumbar support, breathability, recline, armrests and noise. Keep the packaging, avoid damage, and decide before the window closes. If the chair does not suit you, contact support early enough to complete the required return steps within your return window.
Table of Contents
Jump to the part of the trial you need.
01. What is a 30-day home trial?
02. How should you set up the chair?
03. What should you test in week one?
04. What should you test in weeks two to four?
05. How do you protect return eligibility?
06. What should you check before returning?
07. Which HBADA chairs can you test?
08. Your 30-day test plan
09. Limitations and when to get help
10. Conclusion
11. Frequently asked questions
12. Sources and useful links
What Is a 30-Day Home Trial and How Does It Work?
A home trial is a return window that lets you use the chair in your real setup before you commit. HBADA’s current return and refund policy allows returns within 30 days of receipt, subject to its condition and return requirements.
This gives you time to judge an adjustable ergonomic chair at your own desk, not in a showroom. Testing may help you find a more comfortable sitting position, but it is not a medical treatment.
How Should You Set Up the Chair for Testing?
Start well, because a fair test needs a proper setup. Assemble the chair using the HBADA user manual and assembly guide, and keep every part of the packaging, including the box, foam and spare hardware. Then set it to your body before you judge it.
Set the seat height so your feet rest flat on the floor or a suitable footrest.
Set the seat depth so two to three fingers fit behind your knees.
Set the lumbar support to meet your lower back.
Set the armrests so your forearms are supported and your shoulders stay relaxed.
Check that you can reach your keyboard and mouse comfortably.
Only after this setup should you decide how the chair feels.
What Should You Test in the First Week?
Your first week is about first impressions and daily fit.
Fit: Check you can reach a feet-flat, back-supported position within the chair’s adjustment ranges.
Lumbar support: Notice whether the support meets your lower back through your normal workday.
Breathability: Watch for heat build-up and check whether the mesh and seat feel comfortable in your room.
Noise and casters: Roll across your floor and listen for creaks or scuffs. Check that the casters are suitable for the surface.
What Should You Test in Weeks Two to Four?
Later weeks reveal how the chair holds up over real work.
Now test the chair as an office chair for long hours. Work a normal week, keeping your usual movement breaks, and notice whether early comfort lasts into the afternoon. Move through the available recline positions and check that the locks hold. Use the armrests while you type, write and relax.
Give yourself time to learn the controls and fine-tune the settings, but do not treat pain as a required adjustment phase. If discomfort eases after a setting change, note what helped. If it persists after reasonable adjustments, the chair may not fit you.
A Quick Test-and-Decide Table
Use this table to turn each check into a clear next step.
What to test
How to test it
Keep or return signal
Fit
Set seat height, depth and lumbar support to your body, then sit back fully.
Consider a return if you cannot achieve supported feet and back within the adjustment ranges.
Lumbar support
Use it during a normal working day and note lower-back comfort.
Consider a return if the support cannot meet your lower back comfortably after adjustment.
Breathability
Check for heat build-up during ordinary work sessions.
Consider another material or model if the seat consistently feels too warm for you.
Recline and lock
Try the recline settings according to the manual.
Stop using the chair and contact support if the recline is unstable or a lock fails.
Armrests
Type, write and relax while checking forearm support.
Consider a return if the armrests prevent a relaxed working position or access to your desk.
Noise and casters
Roll gently across a suitable floor surface and listen for persistent noise.
Contact support about recurring creaks or floor marking before continuing use.
Long-session comfort
Work a normal week in the chair, with movement breaks.
Reassess the fit if discomfort persists after you fine-tune the settings.
How Do You Protect Your Return Eligibility?
Test thoroughly, but keep the chair returnable while you decide.
Keep the original box, foam and hardware for the whole trial.
Keep the chair clean and unmarked, and use a suitable floor mat if needed.
Note your delivery date and the last day of the return window.
Contact support early if you are unsure, rather than on the final day.
HBADA requires returns in their original condition and recommends keeping the original packaging. Missing packaging or damage from improper packing may lead to fees.
What Should You Check Before Returning the Chair?
Review the return instructions for your order before arranging collection. For change-of-mind returns, customers pay part of the return shipping cost; HBADA may provide a discounted prepaid label deducted from the refund. For damaged, defective or incorrectly supplied items, contact support for the appropriate process.
Ask support to confirm the required steps and deadline. A return window is separate from warranty coverage, so check the HBADA warranty and service information if a fault appears later.
Which HBADA Chairs Can You Test at Home?
The HBADA X7 and E3 Pro 2026 product pages advertise a 30-day home trial. Confirm the current terms for your chosen model and order before purchasing.
Use the same testing checklist for either chair, but pay attention to the features that make each model different.
What to compare
HBADA X7
HBADA E3 Pro 2026
Lumbar support
Test how the AI lumbar-tracking system responds when you change position.
Test how the three-zone adaptive lumbar support fits your lower back.
Seat fit
Check the selected model’s seat dimensions and adjustment range against your body and desk.
Check the selected model’s seat dimensions and adjustment range against your body and desk.
Recline and armrests
Check support and control access while typing, leaning back and relaxing.
Check the headrest, armrest and recline adjustments during your usual tasks.
Additional features
Try the comfort functions included with your selected version, following its manual.
Focus on mechanical adjustments, mesh comfort and any optional footrest.
Before ordering
Confirm the exact configuration, return conditions and warranty.
Confirm the exact configuration, return conditions and warranty.
If you want automatic lumbar tracking, explore the HBADA X7 smart ergonomic chair and check the comfort features included with your selected version.
If you want a mechanically adjustable chair to test for long workdays, compare the HBADA E3 Pro 2026. You can also browse the HBADA ergonomic office chair collection before your trial begins.
Your 30-Day Test Plan
Follow this simple plan so nothing is missed before the window closes. Adjust the timing to leave enough time for the return process required for your order.
Day 1
Assemble and Adjust
Assemble by the manual, keep all packaging, and set the chair to your body.
Days 2–7
Check Daily Fit
Test daily fit, lumbar support, breathability, noise and casters.
Days 8–21
Test Your Normal Work Routine
Work your usual schedule and test recline, armrests and long-session comfort. Keep taking movement breaks.
Days 22–27
Fine-Tune and Decide
Fine-tune settings and review your notes. If the chair is not right, contact support now to confirm the return steps and deadline.
Days 28–30
Complete Your Decision
Keep the chair if it fits your needs, or complete the return steps within the applicable deadline. Do not assume contacting support on day 30 automatically extends the window.
Limitations and When to Get Help
A trial answers many questions, but not every one.
A trial checks comfort and fit for you; it cannot promise a health outcome.
Thirty days cannot establish the chair’s lifespan or long-term durability.
Keep the chair and packaging in good condition while deciding.
Trial terms, return shipping and warranty can vary by market and order, so check the applicable policy.
If you have severe, persistent or radiating pain, consult a qualified healthcare professional. A chair is not a medical treatment.
Conclusion
The best way to judge an ergonomic office chair is to test it where you actually work. Assemble it, set it to your body, use it for real tasks, and keep the packaging until you are sure. Compare the X7 if you want automatic lumbar tracking, or the E3 Pro if you prefer mechanical adjustments. Make your decision before the return deadline, and keep the chair that fits you.
Frequently Asked Questions
How long is the HBADA home trial?
The current .com policy states 30 days from receipt. Confirm the terms and required return steps for your order before testing.
Can you return an office chair after using it?
Home testing does not remove the policy’s condition requirements. Keep the chair clean, avoid damage, and ask support if you are unsure whether its condition qualifies.
How long does it take to get used to a new ergonomic chair?
There is no fixed adjustment period for everyone. You may need several sessions to learn the controls and fine-tune the seat height, depth, lumbar support and armrests. Change one setting at a time. Do not keep sitting through pain in the hope that you will eventually adapt.
Who pays for return shipping?
It depends on the return reason. Check the shipping-cost section of the return policy and confirm any label charge with support before booking a courier.
What should you check before the trial ends?
Confirm the essentials: fit, long-session comfort, lumbar support, breathability, recline, armrests and noise. Also check that the chair suits your desk height and floor. Decide early enough to complete any required return steps before the deadline.
Sources and Useful Links
HBADA Return and Refund Policy
HBADA Warranty and Service
HBADA User Manuals and Assembly Guides
HBADA X7 Product Details
HBADA E3 Pro 2026 Product Details
Sep 16, 2026
 HBADA E3 Pro vs. Hinomi H1 Pro V2: Which Ergonomic Chair Fits You Better
Ergonomic Chair Comparison
Put the feature lists aside for a moment. Before comparing adjustment counts, measure your desk height, the seat depth you actually need, and the range of sitting positions you use during a normal workday. More adjustments do not automatically mean a better fit.
Comparison note: This article compares publicly available manufacturer information for the HBADA E3 Pro 2026 Edition and Hinomi H1 Pro V2. Product configurations, prices, delivery, warranty terms and regional availability may change. Check the current product page and policy for your location before ordering.
Contents
Start with fit, not feature count
How the support systems differ
Published specifications compared
Which chair should you investigate first?
What to measure before buying
Frequently asked questions
Start With Fit, Not Feature Count
An ergonomic chair only works when its useful adjustment range matches your body and workspace. A chair can have a long list of features, but that list matters less if the seat sits too high, the lumbar support reaches the wrong area, or the armrests cannot work with your desk.
The key question is not “Which chair has more adjustments?” It is “Which chair gives me the adjustments I will actually use?”
More adjustment points do not automatically equal a better fit. The useful range matters more than the feature count.
That distinction is especially relevant here. Hinomi markets the H1 Pro V2 around 16 adjustable points and multiple size options. HBADA publishes detailed adjustment ranges for the E3 Pro 2026 Edition, including seat depth, backrest height, lumbar position, headrest and armrest adjustments.
How the Support Systems Differ
HBADA E3 Pro 2026 Edition
The HBADA E3 Pro 2026 Edition uses a three-zone adaptive lumbar-support design. HBADA lists a 50 mm seat-depth slide, 80 mm backrest-height adjustment, 60 mm independent lumbar lift, 40 mm headrest-height adjustment and 70 mm headrest depth adjustment.
HBADA also lists a recommended user-height range of approximately 5'1"–6'5" (155–195 cm). Those figures are not a promise of fit for every person, but they give shoppers useful dimensions to compare with their own measurements.
Hinomi H1 Pro V2
The Hinomi H1 Pro V2 product page lists 16 adjustable points, 3D lumbar support, flip-up 5D armrests, a 3D headrest, a retractable leg rest and a foldable frame. Its lumbar system is described as having five height levels and four forward-support levels.
Hinomi offers S, M and L height guidance. Its current product page states that the primary difference between those sizes is the seat-height adjustment range, while the other listed dimensions remain the same. That is useful for shoppers who prefer to begin with a height-based size recommendation.
HBADA E3 Pro 2026 vs. Hinomi H1 Pro V2: Published Information Compared
Comparison Area
HBADA E3 Pro 2026 Edition
Hinomi H1 Pro V2
Primary fit approach
Published adjustment ranges across seat depth, backrest, lumbar support, headrest and armrests.
Published S, M and L height guidance, with seat-height range identified as the main size difference.
Lumbar support
Three-zone adaptive lumbar-support system with independent lift adjustment listed by HBADA.
Lumbar support with five height levels and four forward-support levels listed by Hinomi.
Seat-depth information
HBADA lists a 50 mm / approximately 2-inch seat-depth slide.
Review current product specifications and fit guidance for the selected H1 Pro V2 configuration.
Head and arm support
HBADA lists a dual-axis headrest and 720° OmniMechanical armrests.
Hinomi lists a 3D headrest and flip-up 5D armrests.
Recline and space-saving features
HBADA lists four recline positions: 105°, 115°, 130° and 140°.
Hinomi lists a maximum 136° recline, retractable leg rest and foldable frame.
Published warranty terms
E3 Series core load-bearing components are covered for 5 years; other covered components are covered for 3 years under HBADA's current policy.
Subject to its current terms and regional policy.
These features are not one-to-one equivalents. For example, a published count of adjustment points cannot be directly compared with a specific seat-depth or lumbar-travel measurement. Use the table as a starting point, then compare the features that affect your own work setup.
Which Chair Should You Investigate First?
Start with HBADA E3 Pro if:
You want to compare specific adjustment ranges before purchasing.
Seat depth, backrest height, lumbar position and headrest position are important to you.
You move between focused work and reclined breaks during the day.
Your height falls within HBADA’s published 5'1"–6'5" guidance and the chair dimensions suit your desk setup.
Start with Hinomi H1 Pro V2 if:
You prefer to narrow options first through S, M and L height guidance.
A foldable frame, retractable leg rest or flip-up armrests are priorities for your space.
Hinomi’s seat-height range and support adjustments match your body measurements.
You have reviewed the current policy and product configuration for your market.
This is not a winner-and-loser comparison. It is a practical way to decide which product page you should study first. The final decision should come after checking current dimensions, configuration, delivery, return eligibility and warranty terms.
What to Measure Before Buying
Measure your desk height and check whether the armrests can sit at a useful working height.
Check seat depth against your leg length; you should be able to sit back without the front edge pressing into the back of your knees.
Compare the chair's minimum and maximum seat height with your ability to place your feet flat on the floor.
Consider whether you need a headrest, flip-up armrests, recline support or a footrest for your normal routine.
Read the current return and warranty terms for the exact model and market where you will purchase.
Frequently Asked Questions
Is HBADA better than Hinomi?
There is no universal answer. The better chair depends on your body measurements, desk setup, preferred adjustments, available configuration, delivered price and the current purchase terms in your location.
How should I compare lumbar support between ergonomic chairs?
Look beyond the feature name. Compare where the support contacts your lower back, how it adjusts, whether the seat depth and backrest height fit you, and whether you can comfortably use the controls during your workday.
Sources and Disclosure
HBADA E3 Pro Ergonomic Office Chair 2026 Edition
HBADA Warranty & Service Policy
Hinomi H1 Pro V2 Product Page
Last reviewed: September 14, 2026. Hinomi is a trademark of its respective owner. This article is an independent comparison based on publicly available manufacturer information. HBADA is not affiliated with or endorsed by Hinomi.
Sep 13, 2026
HBADA E3 Pro vs. Hinomi H1 Pro V2: Which Ergonomic Chair Fits You Better
Ergonomic Chair Comparison
Put the feature lists aside for a moment. Before comparing adjustment counts, measure your desk height, the seat depth you actually need, and the range of sitting positions you use during a normal workday. More adjustments do not automatically mean a better fit.
Comparison note: This article compares publicly available manufacturer information for the HBADA E3 Pro 2026 Edition and Hinomi H1 Pro V2. Product configurations, prices, delivery, warranty terms and regional availability may change. Check the current product page and policy for your location before ordering.
Contents
Start with fit, not feature count
How the support systems differ
Published specifications compared
Which chair should you investigate first?
What to measure before buying
Frequently asked questions
Start With Fit, Not Feature Count
An ergonomic chair only works when its useful adjustment range matches your body and workspace. A chair can have a long list of features, but that list matters less if the seat sits too high, the lumbar support reaches the wrong area, or the armrests cannot work with your desk.
The key question is not “Which chair has more adjustments?” It is “Which chair gives me the adjustments I will actually use?”
More adjustment points do not automatically equal a better fit. The useful range matters more than the feature count.
That distinction is especially relevant here. Hinomi markets the H1 Pro V2 around 16 adjustable points and multiple size options. HBADA publishes detailed adjustment ranges for the E3 Pro 2026 Edition, including seat depth, backrest height, lumbar position, headrest and armrest adjustments.
How the Support Systems Differ
HBADA E3 Pro 2026 Edition
The HBADA E3 Pro 2026 Edition uses a three-zone adaptive lumbar-support design. HBADA lists a 50 mm seat-depth slide, 80 mm backrest-height adjustment, 60 mm independent lumbar lift, 40 mm headrest-height adjustment and 70 mm headrest depth adjustment.
HBADA also lists a recommended user-height range of approximately 5'1"–6'5" (155–195 cm). Those figures are not a promise of fit for every person, but they give shoppers useful dimensions to compare with their own measurements.
Hinomi H1 Pro V2
The Hinomi H1 Pro V2 product page lists 16 adjustable points, 3D lumbar support, flip-up 5D armrests, a 3D headrest, a retractable leg rest and a foldable frame. Its lumbar system is described as having five height levels and four forward-support levels.
Hinomi offers S, M and L height guidance. Its current product page states that the primary difference between those sizes is the seat-height adjustment range, while the other listed dimensions remain the same. That is useful for shoppers who prefer to begin with a height-based size recommendation.
HBADA E3 Pro 2026 vs. Hinomi H1 Pro V2: Published Information Compared
Comparison Area
HBADA E3 Pro 2026 Edition
Hinomi H1 Pro V2
Primary fit approach
Published adjustment ranges across seat depth, backrest, lumbar support, headrest and armrests.
Published S, M and L height guidance, with seat-height range identified as the main size difference.
Lumbar support
Three-zone adaptive lumbar-support system with independent lift adjustment listed by HBADA.
Lumbar support with five height levels and four forward-support levels listed by Hinomi.
Seat-depth information
HBADA lists a 50 mm / approximately 2-inch seat-depth slide.
Review current product specifications and fit guidance for the selected H1 Pro V2 configuration.
Head and arm support
HBADA lists a dual-axis headrest and 720° OmniMechanical armrests.
Hinomi lists a 3D headrest and flip-up 5D armrests.
Recline and space-saving features
HBADA lists four recline positions: 105°, 115°, 130° and 140°.
Hinomi lists a maximum 136° recline, retractable leg rest and foldable frame.
Published warranty terms
E3 Series core load-bearing components are covered for 5 years; other covered components are covered for 3 years under HBADA's current policy.
Subject to its current terms and regional policy.
These features are not one-to-one equivalents. For example, a published count of adjustment points cannot be directly compared with a specific seat-depth or lumbar-travel measurement. Use the table as a starting point, then compare the features that affect your own work setup.
Which Chair Should You Investigate First?
Start with HBADA E3 Pro if:
You want to compare specific adjustment ranges before purchasing.
Seat depth, backrest height, lumbar position and headrest position are important to you.
You move between focused work and reclined breaks during the day.
Your height falls within HBADA’s published 5'1"–6'5" guidance and the chair dimensions suit your desk setup.
Start with Hinomi H1 Pro V2 if:
You prefer to narrow options first through S, M and L height guidance.
A foldable frame, retractable leg rest or flip-up armrests are priorities for your space.
Hinomi’s seat-height range and support adjustments match your body measurements.
You have reviewed the current policy and product configuration for your market.
This is not a winner-and-loser comparison. It is a practical way to decide which product page you should study first. The final decision should come after checking current dimensions, configuration, delivery, return eligibility and warranty terms.
What to Measure Before Buying
Measure your desk height and check whether the armrests can sit at a useful working height.
Check seat depth against your leg length; you should be able to sit back without the front edge pressing into the back of your knees.
Compare the chair's minimum and maximum seat height with your ability to place your feet flat on the floor.
Consider whether you need a headrest, flip-up armrests, recline support or a footrest for your normal routine.
Read the current return and warranty terms for the exact model and market where you will purchase.
Frequently Asked Questions
Is HBADA better than Hinomi?
There is no universal answer. The better chair depends on your body measurements, desk setup, preferred adjustments, available configuration, delivered price and the current purchase terms in your location.
How should I compare lumbar support between ergonomic chairs?
Look beyond the feature name. Compare where the support contacts your lower back, how it adjusts, whether the seat depth and backrest height fit you, and whether you can comfortably use the controls during your workday.
Sources and Disclosure
HBADA E3 Pro Ergonomic Office Chair 2026 Edition
HBADA Warranty & Service Policy
Hinomi H1 Pro V2 Product Page
Last reviewed: September 14, 2026. Hinomi is a trademark of its respective owner. This article is an independent comparison based on publicly available manufacturer information. HBADA is not affiliated with or endorsed by Hinomi.
Sep 13, 2026
 How to Clean a Mesh Ergonomic Office Chair Without Damaging the Material
A practical guide to removing dust, spills and stains while protecting mesh, moving parts and smart-chair components.
Quick answer: Dust mesh with a soft dry cloth or a vacuum on a low setting. Blot spills with a well-wrung cloth and mild soapy water, then let the chair air-dry. Avoid bleach, hot water, solvents, abrasive cleaners and hard scrubbing.
Contents
What can damage mesh?
How to remove everyday dust
How to clean spills and stains
Frame, armrests and casters
Cleaning methods at a glance
How to clean a smart chair
Safe deep-clean routine
HBADA chair care
FAQs
What Can Damage a Mesh Chair?
Mesh is durable, but the weave can be weakened by unsuitable cleaning methods. Bleach, strong solvents, hot water and abrasive cleaners can discolor or break down the fibres. Stiff brushes and heavy scrubbing can also snag or stretch the mesh.
Keep the chair out of prolonged direct sunlight, do not soak the mesh, and avoid spraying cleaner directly onto the chair. Gentle, regular cleaning is safer than occasional aggressive cleaning.
How Do You Clean Everyday Dust?
Use a soft dry cloth
Wipe the mesh with a dry microfiber cloth to remove surface dust, lint and light debris.
Vacuum on a low setting
If dust is caught in the weave, use a vacuum with gentle suction and move across the surface without pressing into it.
A quick weekly clean helps prevent dust and skin oils from building up, especially on a chair used for long workdays.
How Do You Clean Spills and Stains?
For a fresh spill, act quickly. Dampen a soft cloth with mild soapy water and wring it out thoroughly. Blot from the outside of the mark toward the center so the stain does not spread.
Do not soak the mesh or rub hard. If a mark remains, test an alcohol wipe on a hidden area first, then dab the stain gently. Let the chair air-dry fully in a ventilated room before use.
How Do You Care for the Frame, Armrests and Casters?
Use a separate soft, damp cloth for the frame, armrests and base. Keep water away from the gas lift, recline mechanism and other moving parts. Never attempt to open the gas cylinder.
Casters collect hair, dust and debris over time. Remove anything wrapped around the wheels, then wipe them clean so the chair can roll smoothly.
Cleaning Methods at a Glance
What to Clean
Safe Method
What to Avoid
Everyday dust
Soft dry cloth or low-suction vacuum
Hard brushing or scratching the mesh
Fresh spills
Blot with mild soapy water
Soaking or rubbing the mesh
Stubborn marks
Spot-test, then dab gently
Bleach, hot water or solvents
Frame and armrests
Soft damp cloth
Abrasive or harsh cleaners
Casters
Remove hair and debris, then wipe
Forcing debris deeper into the wheel
How Do You Clean a Smart Chair With Electronics?
Important: Switch the chair off and follow its product manual before cleaning around powered components.
Use a dry cloth around controls, sensors, fans, batteries and powered adjustment areas. Never spray liquid directly onto the chair. Clean the mesh and non-electronic surfaces with the same gentle method, then allow the chair to dry completely before use.
Step by Step: A Safe Deep Clean
Switch off a smart or powered chair before cleaning.
Vacuum or dry-dust the mesh to remove loose debris.
Mix a small amount of mild soap with lukewarm water.
Dampen and thoroughly wring out a soft cloth.
Blot the mesh without soaking it.
Spot-test before treating stubborn marks.
Wipe the frame, armrests and base separately.
Remove hair and dust from the casters.
Let the chair air-dry away from direct sunlight.
Which HBADA Chairs Does This Apply To?
These steps work for HBADA mesh chairs, including the E3 Pro and X7 Smart.
For a mechanical chair such as the E3 Pro, focus on keeping the mesh clean and moisture away from the gas lift and mechanism. For a powered model such as the X7 Smart, use the same gentle mesh-cleaning routine while taking additional care around electrical and control components.
Frequently Asked Questions
Can you wash a mesh office chair?
You can clean it, but you should not soak it. Remove loose dust first, blot the mesh with mild soapy water, and allow it to air-dry completely.
What should you not use to clean mesh?
Avoid bleach, hot water, solvents, abrasive cleaners, stiff brushes and hard scrubbing. These can weaken, discolor or snag the mesh.
How often should you clean a mesh office chair?
Dust or vacuum the mesh once a week, clean spills as soon as they happen, and deep-clean the chair whenever visible dirt builds up.
Does cleaning damage mesh over time?
Gentle cleaning should not damage quality mesh. The main risks are soaking, hot water, harsh chemicals and excessive scrubbing.
Sources
HBADA Assembly, Maintenance and Troubleshooting
HBADA E3 Pro Ergonomic Office Chair
HBADA X7 Smart Ergonomic Office Chair
Sep 13, 2026
How to Clean a Mesh Ergonomic Office Chair Without Damaging the Material
A practical guide to removing dust, spills and stains while protecting mesh, moving parts and smart-chair components.
Quick answer: Dust mesh with a soft dry cloth or a vacuum on a low setting. Blot spills with a well-wrung cloth and mild soapy water, then let the chair air-dry. Avoid bleach, hot water, solvents, abrasive cleaners and hard scrubbing.
Contents
What can damage mesh?
How to remove everyday dust
How to clean spills and stains
Frame, armrests and casters
Cleaning methods at a glance
How to clean a smart chair
Safe deep-clean routine
HBADA chair care
FAQs
What Can Damage a Mesh Chair?
Mesh is durable, but the weave can be weakened by unsuitable cleaning methods. Bleach, strong solvents, hot water and abrasive cleaners can discolor or break down the fibres. Stiff brushes and heavy scrubbing can also snag or stretch the mesh.
Keep the chair out of prolonged direct sunlight, do not soak the mesh, and avoid spraying cleaner directly onto the chair. Gentle, regular cleaning is safer than occasional aggressive cleaning.
How Do You Clean Everyday Dust?
Use a soft dry cloth
Wipe the mesh with a dry microfiber cloth to remove surface dust, lint and light debris.
Vacuum on a low setting
If dust is caught in the weave, use a vacuum with gentle suction and move across the surface without pressing into it.
A quick weekly clean helps prevent dust and skin oils from building up, especially on a chair used for long workdays.
How Do You Clean Spills and Stains?
For a fresh spill, act quickly. Dampen a soft cloth with mild soapy water and wring it out thoroughly. Blot from the outside of the mark toward the center so the stain does not spread.
Do not soak the mesh or rub hard. If a mark remains, test an alcohol wipe on a hidden area first, then dab the stain gently. Let the chair air-dry fully in a ventilated room before use.
How Do You Care for the Frame, Armrests and Casters?
Use a separate soft, damp cloth for the frame, armrests and base. Keep water away from the gas lift, recline mechanism and other moving parts. Never attempt to open the gas cylinder.
Casters collect hair, dust and debris over time. Remove anything wrapped around the wheels, then wipe them clean so the chair can roll smoothly.
Cleaning Methods at a Glance
What to Clean
Safe Method
What to Avoid
Everyday dust
Soft dry cloth or low-suction vacuum
Hard brushing or scratching the mesh
Fresh spills
Blot with mild soapy water
Soaking or rubbing the mesh
Stubborn marks
Spot-test, then dab gently
Bleach, hot water or solvents
Frame and armrests
Soft damp cloth
Abrasive or harsh cleaners
Casters
Remove hair and debris, then wipe
Forcing debris deeper into the wheel
How Do You Clean a Smart Chair With Electronics?
Important: Switch the chair off and follow its product manual before cleaning around powered components.
Use a dry cloth around controls, sensors, fans, batteries and powered adjustment areas. Never spray liquid directly onto the chair. Clean the mesh and non-electronic surfaces with the same gentle method, then allow the chair to dry completely before use.
Step by Step: A Safe Deep Clean
Switch off a smart or powered chair before cleaning.
Vacuum or dry-dust the mesh to remove loose debris.
Mix a small amount of mild soap with lukewarm water.
Dampen and thoroughly wring out a soft cloth.
Blot the mesh without soaking it.
Spot-test before treating stubborn marks.
Wipe the frame, armrests and base separately.
Remove hair and dust from the casters.
Let the chair air-dry away from direct sunlight.
Which HBADA Chairs Does This Apply To?
These steps work for HBADA mesh chairs, including the E3 Pro and X7 Smart.
For a mechanical chair such as the E3 Pro, focus on keeping the mesh clean and moisture away from the gas lift and mechanism. For a powered model such as the X7 Smart, use the same gentle mesh-cleaning routine while taking additional care around electrical and control components.
Frequently Asked Questions
Can you wash a mesh office chair?
You can clean it, but you should not soak it. Remove loose dust first, blot the mesh with mild soapy water, and allow it to air-dry completely.
What should you not use to clean mesh?
Avoid bleach, hot water, solvents, abrasive cleaners, stiff brushes and hard scrubbing. These can weaken, discolor or snag the mesh.
How often should you clean a mesh office chair?
Dust or vacuum the mesh once a week, clean spills as soon as they happen, and deep-clean the chair whenever visible dirt builds up.
Does cleaning damage mesh over time?
Gentle cleaning should not damage quality mesh. The main risks are soaking, hot water, harsh chemicals and excessive scrubbing.
Sources
HBADA Assembly, Maintenance and Troubleshooting
HBADA E3 Pro Ergonomic Office Chair
HBADA X7 Smart Ergonomic Office Chair
Sep 13, 2026
 How to Set Up an Ergonomic Office Chair for Laptop Work
Laptop workspace guide
A comfortable laptop setup needs more than the right chair. Adjust the seat so you can reach the keyboard with relaxed shoulders and straight wrists. Support your feet, position the lumbar support against your lower back, and leave space behind your knees. For longer sessions, raise the laptop screen and use a separate keyboard and mouse.
In this guide
Why laptop work can feel uncomfortable
Set up your chair first
Position the screen and keyboard
Common problems and fixes
Your setup checklist
Choosing an HBADA chair
Limitations and when to get help
Final thoughts
Frequently asked questions
Sources
Why Is Laptop Work Hard on Your Body?
A laptop connects the screen and keyboard, which makes it difficult to position both comfortably. Keep the keyboard low and you may bend your neck to look at the screen. Lift the screen and the built-in keyboard can become too high to use comfortably.
Your chair provides a supported base, but it cannot separate the screen from the keyboard. For extended work at a desk, an external keyboard and mouse let you adjust screen height without changing your typing position.
A good setup can support a more comfortable sitting position. It is not a medical treatment, and it does not remove the need to move throughout the day.
How Should You Set Up the Chair First?
Work with your desk height rather than adjusting the chair in isolation. Make one change at a time, then check how it feels while typing.
Step 01
Set the seat height for your keyboard
Raise or lower the seat so your shoulders stay relaxed and your forearms are roughly level with the keyboard. Keep your elbows near your body and your wrists straight rather than angled upward.
Step 02
Give your feet a stable base
Keep your feet supported on the floor. If the height needed for your desk leaves them dangling, use a separate under-desk footrest. Do not lower the chair so far that you have to raise your shoulders to type.
Step 03
Leave room behind your knees
If your chair has seat-depth adjustment, leave roughly two to three fingers of space between the seat edge and the backs of your knees. You should be able to sit against the backrest without the front edge pressing into your legs.
Step 04
Position the lumbar support
Set the lumbar support against the curve of your lower back. It should feel supportive rather than forceful. Adjust the height or pressure if your model allows it, and check the fit again when you change posture.
Step 05
Adjust the armrests without lifting your shoulders
Use the armrests for light forearm support. Keep them low enough for relaxed shoulders and positioned so you can move close to the desk. If they push you away from the keyboard, lower or reposition them.
How Do You Fix the Screen and Keyboard Problem?
Once the chair fits your desk, place the laptop on a stable stand. Start with the top of the screen at or slightly below eye level and the display about an arm's length away. Adjust the distance and text size so you can read without leaning forward.
Put a separate keyboard in front of you, with the mouse close beside it. Keep both within easy reach so you do not have to stretch your arms or move away from the backrest.
No external keyboard yet? Do not raise the laptop so high that typing requires lifted shoulders or bent wrists. Use a temporary position that keeps the keyboard manageable, change posture often, and take breaks. For regular desk work, separating the keyboard and screen is the more adaptable option.
Common Laptop Setup Problems and Their Fixes
These are setup checks, not diagnoses. Discomfort can have more than one cause.
What you notice
What to check
Adjustment to try
You keep looking down
Screen height and text size
Raise the screen, use an external keyboard, and increase text size if needed.
Your wrists bend upward
Keyboard height
Bring the keyboard closer to elbow height and relax your shoulders.
Your feet dangle
Seat height relative to the desk
Use a footrest if lowering the seat would make the desk too high.
You lean away from the backrest
Screen distance, keyboard reach, and seat depth
Bring your equipment closer and check that you can sit back comfortably.
Your shoulders feel tense
Armrest height and mouse position
Lower overly high armrests and keep the mouse close.
You feel stiff later in the day
Time spent in one position
Take movement breaks and vary your posture and tasks.
Your Laptop Chair Setup Checklist
Set the seat height for relaxed shoulders and comfortable keyboard access.
Support both feet on the floor or a suitable footrest.
Leave a small gap between the seat edge and your knees.
Position the lumbar support against your lower-back curve.
Adjust the armrests so they do not block access to the desk.
Raise the laptop screen when using a separate keyboard and mouse.
Keep the mouse close and the screen easy to read.
Build short breaks and changes of position into your day.
Which HBADA Chair Suits Laptop Work?
Start with fit, not the number of features. Your chair should work with your desk height, let you sit back comfortably, and keep your arms close to the keyboard.
The HBADA E3 Pro Ergonomic Office Chair 2026 Edition is one model to compare. Its product page lists three-zone adaptive lumbar support, adjustable armrests, and mesh seating. Check the selected configuration carefully, including whether a footrest is included.
You can also compare X7 models and other options in the HBADA office chair range. Look at the exact model's specifications rather than assuming that all chairs in a series share the same adjustments.
Feature to check
Why it matters for laptop work
Seat-height range
The chair needs to suit your desk while allowing stable foot support.
Seat depth and width
You should be able to use the backrest without pressure behind your knees.
Lumbar adjustment
Check where the support sits and which adjustments the model provides.
Armrest range
The armrests should support your arms without stopping you from reaching the desk.
Footrest configuration
A pull-out leg rest for reclining is not the same as an under-desk footrest for upright typing.
Fit and capacity
Confirm dimensions, weight capacity, and the selected version before ordering.
Limitations and When to Get Help
A chair cannot correct screen height or eliminate prolonged sitting.
Not every chair provides independent seat-depth, lumbar, and armrest adjustments.
A headrest or reclining leg rest does not replace a suitable typing position.
If discomfort persists or becomes severe, seek advice from a qualified healthcare professional.
Final Thoughts
Set the chair for your desk, support your feet and lower back, and keep the keyboard within easy reach. Then adjust the laptop screen independently with a stand and external input devices. Recheck the setup after using it, and make room for movement throughout the day.
Frequently Asked Questions
How should you sit when using a laptop?
Sit back with your lower back supported, feet stable, and shoulders relaxed. Keep the keyboard and mouse close. For longer sessions, use a laptop stand with a separate keyboard and mouse so screen position and typing height can be adjusted independently.
Should your feet be flat when using a laptop?
Your feet should have stable support on the floor or a footrest. If your desk requires a higher seat position, add a footrest rather than leaving your feet dangling.
Can you use a laptop stand without an external keyboard?
You can, but raising the built-in keyboard may make typing uncomfortable. For regular desk work, pair the stand with a separate keyboard and mouse. This lets you position the screen without lifting your arms to reach the keys.
Does a reclining chair footrest work for upright laptop use?
A pull-out chair footrest is generally intended to support the legs while reclining. For upright desk work, a separate under-desk footrest may be more suitable when your feet cannot reach the floor. Check the chair instructions and your working position.
How often should you take breaks during laptop work?
Take short breaks regularly rather than waiting until you feel uncomfortable. Change tasks, stand, or walk when possible. The right pattern depends on the work you do; no chair makes it necessary or desirable to stay still all day.
Sources and Product Information
HSE: Working with display screen equipment — UK workstation guidance used as a general reference, not a statement of US legal requirements.
HBADA US: E3 Pro product information
HBADA US: Current office chair range
Product specifications and availability vary by model and configuration. Confirm the details on the relevant product page before purchasing.
Sep 10, 2026
How to Set Up an Ergonomic Office Chair for Laptop Work
Laptop workspace guide
A comfortable laptop setup needs more than the right chair. Adjust the seat so you can reach the keyboard with relaxed shoulders and straight wrists. Support your feet, position the lumbar support against your lower back, and leave space behind your knees. For longer sessions, raise the laptop screen and use a separate keyboard and mouse.
In this guide
Why laptop work can feel uncomfortable
Set up your chair first
Position the screen and keyboard
Common problems and fixes
Your setup checklist
Choosing an HBADA chair
Limitations and when to get help
Final thoughts
Frequently asked questions
Sources
Why Is Laptop Work Hard on Your Body?
A laptop connects the screen and keyboard, which makes it difficult to position both comfortably. Keep the keyboard low and you may bend your neck to look at the screen. Lift the screen and the built-in keyboard can become too high to use comfortably.
Your chair provides a supported base, but it cannot separate the screen from the keyboard. For extended work at a desk, an external keyboard and mouse let you adjust screen height without changing your typing position.
A good setup can support a more comfortable sitting position. It is not a medical treatment, and it does not remove the need to move throughout the day.
How Should You Set Up the Chair First?
Work with your desk height rather than adjusting the chair in isolation. Make one change at a time, then check how it feels while typing.
Step 01
Set the seat height for your keyboard
Raise or lower the seat so your shoulders stay relaxed and your forearms are roughly level with the keyboard. Keep your elbows near your body and your wrists straight rather than angled upward.
Step 02
Give your feet a stable base
Keep your feet supported on the floor. If the height needed for your desk leaves them dangling, use a separate under-desk footrest. Do not lower the chair so far that you have to raise your shoulders to type.
Step 03
Leave room behind your knees
If your chair has seat-depth adjustment, leave roughly two to three fingers of space between the seat edge and the backs of your knees. You should be able to sit against the backrest without the front edge pressing into your legs.
Step 04
Position the lumbar support
Set the lumbar support against the curve of your lower back. It should feel supportive rather than forceful. Adjust the height or pressure if your model allows it, and check the fit again when you change posture.
Step 05
Adjust the armrests without lifting your shoulders
Use the armrests for light forearm support. Keep them low enough for relaxed shoulders and positioned so you can move close to the desk. If they push you away from the keyboard, lower or reposition them.
How Do You Fix the Screen and Keyboard Problem?
Once the chair fits your desk, place the laptop on a stable stand. Start with the top of the screen at or slightly below eye level and the display about an arm's length away. Adjust the distance and text size so you can read without leaning forward.
Put a separate keyboard in front of you, with the mouse close beside it. Keep both within easy reach so you do not have to stretch your arms or move away from the backrest.
No external keyboard yet? Do not raise the laptop so high that typing requires lifted shoulders or bent wrists. Use a temporary position that keeps the keyboard manageable, change posture often, and take breaks. For regular desk work, separating the keyboard and screen is the more adaptable option.
Common Laptop Setup Problems and Their Fixes
These are setup checks, not diagnoses. Discomfort can have more than one cause.
What you notice
What to check
Adjustment to try
You keep looking down
Screen height and text size
Raise the screen, use an external keyboard, and increase text size if needed.
Your wrists bend upward
Keyboard height
Bring the keyboard closer to elbow height and relax your shoulders.
Your feet dangle
Seat height relative to the desk
Use a footrest if lowering the seat would make the desk too high.
You lean away from the backrest
Screen distance, keyboard reach, and seat depth
Bring your equipment closer and check that you can sit back comfortably.
Your shoulders feel tense
Armrest height and mouse position
Lower overly high armrests and keep the mouse close.
You feel stiff later in the day
Time spent in one position
Take movement breaks and vary your posture and tasks.
Your Laptop Chair Setup Checklist
Set the seat height for relaxed shoulders and comfortable keyboard access.
Support both feet on the floor or a suitable footrest.
Leave a small gap between the seat edge and your knees.
Position the lumbar support against your lower-back curve.
Adjust the armrests so they do not block access to the desk.
Raise the laptop screen when using a separate keyboard and mouse.
Keep the mouse close and the screen easy to read.
Build short breaks and changes of position into your day.
Which HBADA Chair Suits Laptop Work?
Start with fit, not the number of features. Your chair should work with your desk height, let you sit back comfortably, and keep your arms close to the keyboard.
The HBADA E3 Pro Ergonomic Office Chair 2026 Edition is one model to compare. Its product page lists three-zone adaptive lumbar support, adjustable armrests, and mesh seating. Check the selected configuration carefully, including whether a footrest is included.
You can also compare X7 models and other options in the HBADA office chair range. Look at the exact model's specifications rather than assuming that all chairs in a series share the same adjustments.
Feature to check
Why it matters for laptop work
Seat-height range
The chair needs to suit your desk while allowing stable foot support.
Seat depth and width
You should be able to use the backrest without pressure behind your knees.
Lumbar adjustment
Check where the support sits and which adjustments the model provides.
Armrest range
The armrests should support your arms without stopping you from reaching the desk.
Footrest configuration
A pull-out leg rest for reclining is not the same as an under-desk footrest for upright typing.
Fit and capacity
Confirm dimensions, weight capacity, and the selected version before ordering.
Limitations and When to Get Help
A chair cannot correct screen height or eliminate prolonged sitting.
Not every chair provides independent seat-depth, lumbar, and armrest adjustments.
A headrest or reclining leg rest does not replace a suitable typing position.
If discomfort persists or becomes severe, seek advice from a qualified healthcare professional.
Final Thoughts
Set the chair for your desk, support your feet and lower back, and keep the keyboard within easy reach. Then adjust the laptop screen independently with a stand and external input devices. Recheck the setup after using it, and make room for movement throughout the day.
Frequently Asked Questions
How should you sit when using a laptop?
Sit back with your lower back supported, feet stable, and shoulders relaxed. Keep the keyboard and mouse close. For longer sessions, use a laptop stand with a separate keyboard and mouse so screen position and typing height can be adjusted independently.
Should your feet be flat when using a laptop?
Your feet should have stable support on the floor or a footrest. If your desk requires a higher seat position, add a footrest rather than leaving your feet dangling.
Can you use a laptop stand without an external keyboard?
You can, but raising the built-in keyboard may make typing uncomfortable. For regular desk work, pair the stand with a separate keyboard and mouse. This lets you position the screen without lifting your arms to reach the keys.
Does a reclining chair footrest work for upright laptop use?
A pull-out chair footrest is generally intended to support the legs while reclining. For upright desk work, a separate under-desk footrest may be more suitable when your feet cannot reach the floor. Check the chair instructions and your working position.
How often should you take breaks during laptop work?
Take short breaks regularly rather than waiting until you feel uncomfortable. Change tasks, stand, or walk when possible. The right pattern depends on the work you do; no chair makes it necessary or desirable to stay still all day.
Sources and Product Information
HSE: Working with display screen equipment — UK workstation guidance used as a general reference, not a statement of US legal requirements.
HBADA US: E3 Pro product information
HBADA US: Current office chair range
Product specifications and availability vary by model and configuration. Confirm the details on the relevant product page before purchasing.
Sep 10, 2026
 Working and Reclining in a Footrest Office Chair: A Daily Guide
Everyday Ergonomics · Work & Breaks
An ergonomic office chair with a footrest works best when you match your position to the task—not when you stay reclined all day.
Quick answer: Use a supported upright or slightly reclined position for typing. Try a gentle recline for audio calls and reading, provided you can still see your screen comfortably. Extend the leg rest for a seated break if your chair is designed for it. Change positions throughout the day, and include time away from the chair.
01 · Focus
Keep your keyboard close, shoulders relaxed, and feet supported.
02 · Read & Listen
Try a light recline without reaching forward or straining to see.
03 · Take a Break
Rest briefly, then make room for standing, walking, or another task.
In this guide
Why match your posture to the task?
Reclining for calls and video
Reclining for reading and reviewing
Using short recovery breaks
Task, recline, and footrest guide
Your daily reclining rhythm
Which HBADA chair fits this routine?
Limitations and safety notes
Conclusion
Frequently asked questions
Sources
Why Match Your Posture to the Task?
Answering emails, reading a proposal, and listening to a call do not ask the same things of your body. Your chair setup can change with them.
For typing, choose a position that lets you reach the keyboard and mouse with relaxed shoulders and without leaning away from the backrest. That may be upright or slightly reclined, depending on your desk and chair. For listening or reading, you may prefer to lean back a little further.
The important part is variation. The UK Health and Safety Executive recommends changing position and breaking up screen work rather than holding one posture for long periods. Its guidance on breaks and activity changes is useful here as general workstation advice, not as a prescribed schedule for a particular chair.
Two different kinds of foot support: a pull-out chair leg rest supports your legs while reclining. A separate under-desk footrest supports your feet during seated desk work. If your feet cannot reach the floor at the correct working height, do not assume the chair’s pull-out leg rest is a suitable substitute.
How Should You Recline for Calls and Video?
An audio call is a good opportunity to change position. If you do not need to type or handle documents, try a small recline and let the backrest support you. Use the leg rest if it feels comfortable and is permitted by your chair’s instructions.
Adjust the headrest so it supports you without pushing your head forward. If you start taking notes, bring the backrest closer to your working position instead of stretching toward the keyboard.
For video calls, check your camera preview after moving the chair. A light recline may work well, but a deeper position can leave you looking up at the screen or sitting too low in the frame. Adjust the chair or camera until you can look ahead comfortably.
There is no universal “video-call angle.” Screen height, camera position, and the need to type matter more than matching a number.
How Should You Recline for Reading and Reviewing?
Reading a long document often gives you more freedom to lean back than writing one. Try a gentle recline while keeping the text easy to see and your back supported.
If you find yourself lifting your chin, craning your neck, or leaning forward again, adjust the screen position or reduce the recline. Increasing text size may help you read comfortably without moving your face closer.
For a tablet or printed document, use a stand or another suitable support rather than holding it low in your lap for a long period. Return to a position with comfortable keyboard access when reviewing turns into sustained editing.
A breathable mesh seat is another feature to consider, but it does not remove the need to change position or take a break.
How Should You Use Recovery Breaks?
A short reclined pause can be a comfortable way to stop working for a moment. Move away from the desk, check the space behind the chair, and use the recline controls as directed in the manual. Extend the leg rest if your model includes one.
You do not need to reach the chair’s maximum angle. Choose a position that feels supported, look away from the screen, and leave the keyboard alone.
A few minutes of seated rest can fit into your day, but it is not the same as a movement break. Alternate it with getting up, walking, or switching to a task away from the screen when you can.
A break is not another working position. Leaning back while continuing to answer messages may change your posture, but it does not give you the same change of activity as stepping away from screen work.
Task, Recline, and Footrest Guide
Use these as practical starting points. The right position depends on your fit, workstation, and the adjustment options on your chair. The angle markings on a product page are chair settings—not universal ergonomic targets.
On a phone, swipe the table sideways to view all columns.
Match the chair setup to what you are doing
Task
Backrest position
Foot or leg support
What to check
Typing and focused work
Supported upright or slight recline
Feet on the floor or a suitable under-desk footrest
Keyboard and mouse remain close; shoulders stay relaxed
Audio calls and thinking
A comfortable light recline
Optional pull-out leg rest, used as instructed
No stretching forward to reach notes or controls
Video calls
Upright or lightly reclined
Stable, comfortable foot support
Screen and camera remain at a comfortable viewing position
Reading and reviewing
A gentle recline that preserves screen visibility
Leg rest optional, depending on fit
No chin lifting, neck bending, or forward reaching
Short seated break
A supported recline within the chair’s permitted range
Leg rest extended if appropriate for the model
Clear space around the chair; include movement breaks too
Your Daily Reclining Rhythm
You do not need a complicated schedule. Use changes in your work as a reminder to check how you are sitting.
Start work
Set the seat height, lumbar support, and armrests for comfortable keyboard access. Keep your feet supported.
Take a call
Try a light recline when listening. Come forward again if the conversation turns into a typing session.
Read or review
Lean back a little if the screen remains easy to see. Adjust the display rather than holding your neck at an awkward angle.
Pause
Stop screen work for a short break. A seated recline is one option; standing, walking, or doing another task provides a different kind of change.
Return to work
Retract the leg rest before moving back to the desk. Reset the backrest and check that the lumbar support still fits comfortably.
Which HBADA Footrest Chair Fits This Routine?
The HBADA X7 and E3 Pro 2026 both offer recline adjustments. The main distinction for this routine is the support system: the X7 uses powered lumbar tracking, while the E3 Pro combines mechanical adaptive support with manual adjustments.
Powered Lumbar Tracking
HBADA X7
Consider the X7 if powered lumbar tracking is a feature you want alongside reclining. Check the selected configuration and its leg-rest features before ordering.
Explore the HBADA X7
Mechanical Adaptive Support
HBADA E3 Pro 2026
Consider the E3 Pro if you prefer adjustable mechanical support. Select the “With Footrest” option if you want a pull-out leg rest; the product page also lists a version without one.
Explore the HBADA E3 Pro
The following specifications are manufacturer-listed settings, not posture recommendations.
HBADA U.S. product comparison
Feature
HBADA X7
HBADA E3 Pro 2026
Listed recline angles
105°, 116°, 128°, 140°
105°, 115°, 130°, 140°
Lumbar support
AI-powered lumbar tracking
3-zone mechanical adaptive support with manual adjustments
Headrest
4D dual-axis headrest
4D dual-axis headrest
Listed chair capacity
330 lb (150 kg)
330 lb (150 kg)
Product details checked against the linked U.S. pages on September 8, 2026. Confirm the selected model, configuration, manual, and warranty terms before purchasing. A chair’s maximum user weight is not the load rating of its extended leg rest.
Limitations and Safety Notes
Use the controls as instructed. Learn how your chair’s recline, tension, and locking mechanism work before leaning back. Do not force a control or move beyond the permitted range.
Keep the area clear. Use a stable, level surface and leave enough room behind the backrest and in front of the extended leg rest.
Do not sit or stand on the leg rest. Use it only for its intended purpose. Retract it before getting out of the chair.
Check fit as well as capacity. Your seat depth, foot support, and reach to the desk matter alongside the chair’s stated maximum user weight.
Stop if the chair feels unstable. Do not continue reclining if the mechanism slips, a component is damaged, or the chair develops unusual movement.
Do not treat reclining as medical care. If a position causes discomfort, change it. Persistent pain, numbness, or other concerning symptoms warrant advice from a qualified healthcare professional.
The Takeaway
Let the Task Decide
A reclining office chair with a footrest gives you more ways to sit, but you do not need to use every setting for every task. Keep typing comfortable and within reach, lean back when reading or listening allows it, and use the leg rest for supported seated pauses.
Choose the X7 if powered lumbar tracking suits your preferences, or the E3 Pro with-footrest variant if you prefer mechanical adaptive support. Whichever chair you use, keep changes of position and time away from the screen in your routine.
Frequently Asked Questions
Should you recline during video calls?
A slight recline is fine if you can see the screen comfortably and remain well framed by the camera. If you need to raise your chin, bend your neck, or reach forward to type, adjust the screen or return to a more upright position.
Is reclining useful for reading long documents?
A gentle recline can offer a comfortable change from your typing position. Keep the document or screen easy to see, and support a tablet or book rather than holding it low in your lap. Reduce the recline if you find yourself leaning forward again.
How long should a reclined recovery break be?
Treat it as a brief pause rather than a fixed-duration treatment. You might rest for a few minutes, then change activity. There is no single recline duration that suits everyone, and seated rest should not replace opportunities to stand or move.
Does reclining with a footrest help your legs?
A leg rest can provide a different supported position that some people find comfortable. It should not press uncomfortably against your legs or leave you feeling numb. Do not rely on a chair leg rest to treat swelling, circulation problems, or persistent pain.
Can you use a footrest chair with a sit-stand desk?
Yes. For seated work, adjust the desk and chair so your keyboard is within easy reach and your feet are supported. Use a separate under-desk footrest if needed. Retract the chair’s pull-out leg rest and move the chair clear before switching to standing.
What recline angle should you use for typing?
There is no single angle that fits every workstation. Start upright or slightly reclined, with your back supported and keyboard close. If leaning back makes you reach forward or lift your shoulders, change the chair or desk setup. Product angle markings describe available settings, not required working postures.
Sources and Product Notes
General workstation guidance and manufacturer specifications serve different purposes. The sources below do not establish that a particular recline angle prevents or treats a medical condition.
HSE: Workstation setup and comfortable posture — general guidance from the UK Health and Safety Executive, not a statement of U.S. legal requirements.
HSE: Breaks and changes of activity — guidance on varying screen-based work.
HBADA U.S.: X7 Smart Ergonomic Chair — manufacturer-listed features and specifications.
HBADA U.S.: E3 Pro Ergonomic Office Chair 2026 Edition — manufacturer-listed adjustments and footrest options.
Sep 07, 2026
Working and Reclining in a Footrest Office Chair: A Daily Guide
Everyday Ergonomics · Work & Breaks
An ergonomic office chair with a footrest works best when you match your position to the task—not when you stay reclined all day.
Quick answer: Use a supported upright or slightly reclined position for typing. Try a gentle recline for audio calls and reading, provided you can still see your screen comfortably. Extend the leg rest for a seated break if your chair is designed for it. Change positions throughout the day, and include time away from the chair.
01 · Focus
Keep your keyboard close, shoulders relaxed, and feet supported.
02 · Read & Listen
Try a light recline without reaching forward or straining to see.
03 · Take a Break
Rest briefly, then make room for standing, walking, or another task.
In this guide
Why match your posture to the task?
Reclining for calls and video
Reclining for reading and reviewing
Using short recovery breaks
Task, recline, and footrest guide
Your daily reclining rhythm
Which HBADA chair fits this routine?
Limitations and safety notes
Conclusion
Frequently asked questions
Sources
Why Match Your Posture to the Task?
Answering emails, reading a proposal, and listening to a call do not ask the same things of your body. Your chair setup can change with them.
For typing, choose a position that lets you reach the keyboard and mouse with relaxed shoulders and without leaning away from the backrest. That may be upright or slightly reclined, depending on your desk and chair. For listening or reading, you may prefer to lean back a little further.
The important part is variation. The UK Health and Safety Executive recommends changing position and breaking up screen work rather than holding one posture for long periods. Its guidance on breaks and activity changes is useful here as general workstation advice, not as a prescribed schedule for a particular chair.
Two different kinds of foot support: a pull-out chair leg rest supports your legs while reclining. A separate under-desk footrest supports your feet during seated desk work. If your feet cannot reach the floor at the correct working height, do not assume the chair’s pull-out leg rest is a suitable substitute.
How Should You Recline for Calls and Video?
An audio call is a good opportunity to change position. If you do not need to type or handle documents, try a small recline and let the backrest support you. Use the leg rest if it feels comfortable and is permitted by your chair’s instructions.
Adjust the headrest so it supports you without pushing your head forward. If you start taking notes, bring the backrest closer to your working position instead of stretching toward the keyboard.
For video calls, check your camera preview after moving the chair. A light recline may work well, but a deeper position can leave you looking up at the screen or sitting too low in the frame. Adjust the chair or camera until you can look ahead comfortably.
There is no universal “video-call angle.” Screen height, camera position, and the need to type matter more than matching a number.
How Should You Recline for Reading and Reviewing?
Reading a long document often gives you more freedom to lean back than writing one. Try a gentle recline while keeping the text easy to see and your back supported.
If you find yourself lifting your chin, craning your neck, or leaning forward again, adjust the screen position or reduce the recline. Increasing text size may help you read comfortably without moving your face closer.
For a tablet or printed document, use a stand or another suitable support rather than holding it low in your lap for a long period. Return to a position with comfortable keyboard access when reviewing turns into sustained editing.
A breathable mesh seat is another feature to consider, but it does not remove the need to change position or take a break.
How Should You Use Recovery Breaks?
A short reclined pause can be a comfortable way to stop working for a moment. Move away from the desk, check the space behind the chair, and use the recline controls as directed in the manual. Extend the leg rest if your model includes one.
You do not need to reach the chair’s maximum angle. Choose a position that feels supported, look away from the screen, and leave the keyboard alone.
A few minutes of seated rest can fit into your day, but it is not the same as a movement break. Alternate it with getting up, walking, or switching to a task away from the screen when you can.
A break is not another working position. Leaning back while continuing to answer messages may change your posture, but it does not give you the same change of activity as stepping away from screen work.
Task, Recline, and Footrest Guide
Use these as practical starting points. The right position depends on your fit, workstation, and the adjustment options on your chair. The angle markings on a product page are chair settings—not universal ergonomic targets.
On a phone, swipe the table sideways to view all columns.
Match the chair setup to what you are doing
Task
Backrest position
Foot or leg support
What to check
Typing and focused work
Supported upright or slight recline
Feet on the floor or a suitable under-desk footrest
Keyboard and mouse remain close; shoulders stay relaxed
Audio calls and thinking
A comfortable light recline
Optional pull-out leg rest, used as instructed
No stretching forward to reach notes or controls
Video calls
Upright or lightly reclined
Stable, comfortable foot support
Screen and camera remain at a comfortable viewing position
Reading and reviewing
A gentle recline that preserves screen visibility
Leg rest optional, depending on fit
No chin lifting, neck bending, or forward reaching
Short seated break
A supported recline within the chair’s permitted range
Leg rest extended if appropriate for the model
Clear space around the chair; include movement breaks too
Your Daily Reclining Rhythm
You do not need a complicated schedule. Use changes in your work as a reminder to check how you are sitting.
Start work
Set the seat height, lumbar support, and armrests for comfortable keyboard access. Keep your feet supported.
Take a call
Try a light recline when listening. Come forward again if the conversation turns into a typing session.
Read or review
Lean back a little if the screen remains easy to see. Adjust the display rather than holding your neck at an awkward angle.
Pause
Stop screen work for a short break. A seated recline is one option; standing, walking, or doing another task provides a different kind of change.
Return to work
Retract the leg rest before moving back to the desk. Reset the backrest and check that the lumbar support still fits comfortably.
Which HBADA Footrest Chair Fits This Routine?
The HBADA X7 and E3 Pro 2026 both offer recline adjustments. The main distinction for this routine is the support system: the X7 uses powered lumbar tracking, while the E3 Pro combines mechanical adaptive support with manual adjustments.
Powered Lumbar Tracking
HBADA X7
Consider the X7 if powered lumbar tracking is a feature you want alongside reclining. Check the selected configuration and its leg-rest features before ordering.
Explore the HBADA X7
Mechanical Adaptive Support
HBADA E3 Pro 2026
Consider the E3 Pro if you prefer adjustable mechanical support. Select the “With Footrest” option if you want a pull-out leg rest; the product page also lists a version without one.
Explore the HBADA E3 Pro
The following specifications are manufacturer-listed settings, not posture recommendations.
HBADA U.S. product comparison
Feature
HBADA X7
HBADA E3 Pro 2026
Listed recline angles
105°, 116°, 128°, 140°
105°, 115°, 130°, 140°
Lumbar support
AI-powered lumbar tracking
3-zone mechanical adaptive support with manual adjustments
Headrest
4D dual-axis headrest
4D dual-axis headrest
Listed chair capacity
330 lb (150 kg)
330 lb (150 kg)
Product details checked against the linked U.S. pages on September 8, 2026. Confirm the selected model, configuration, manual, and warranty terms before purchasing. A chair’s maximum user weight is not the load rating of its extended leg rest.
Limitations and Safety Notes
Use the controls as instructed. Learn how your chair’s recline, tension, and locking mechanism work before leaning back. Do not force a control or move beyond the permitted range.
Keep the area clear. Use a stable, level surface and leave enough room behind the backrest and in front of the extended leg rest.
Do not sit or stand on the leg rest. Use it only for its intended purpose. Retract it before getting out of the chair.
Check fit as well as capacity. Your seat depth, foot support, and reach to the desk matter alongside the chair’s stated maximum user weight.
Stop if the chair feels unstable. Do not continue reclining if the mechanism slips, a component is damaged, or the chair develops unusual movement.
Do not treat reclining as medical care. If a position causes discomfort, change it. Persistent pain, numbness, or other concerning symptoms warrant advice from a qualified healthcare professional.
The Takeaway
Let the Task Decide
A reclining office chair with a footrest gives you more ways to sit, but you do not need to use every setting for every task. Keep typing comfortable and within reach, lean back when reading or listening allows it, and use the leg rest for supported seated pauses.
Choose the X7 if powered lumbar tracking suits your preferences, or the E3 Pro with-footrest variant if you prefer mechanical adaptive support. Whichever chair you use, keep changes of position and time away from the screen in your routine.
Frequently Asked Questions
Should you recline during video calls?
A slight recline is fine if you can see the screen comfortably and remain well framed by the camera. If you need to raise your chin, bend your neck, or reach forward to type, adjust the screen or return to a more upright position.
Is reclining useful for reading long documents?
A gentle recline can offer a comfortable change from your typing position. Keep the document or screen easy to see, and support a tablet or book rather than holding it low in your lap. Reduce the recline if you find yourself leaning forward again.
How long should a reclined recovery break be?
Treat it as a brief pause rather than a fixed-duration treatment. You might rest for a few minutes, then change activity. There is no single recline duration that suits everyone, and seated rest should not replace opportunities to stand or move.
Does reclining with a footrest help your legs?
A leg rest can provide a different supported position that some people find comfortable. It should not press uncomfortably against your legs or leave you feeling numb. Do not rely on a chair leg rest to treat swelling, circulation problems, or persistent pain.
Can you use a footrest chair with a sit-stand desk?
Yes. For seated work, adjust the desk and chair so your keyboard is within easy reach and your feet are supported. Use a separate under-desk footrest if needed. Retract the chair’s pull-out leg rest and move the chair clear before switching to standing.
What recline angle should you use for typing?
There is no single angle that fits every workstation. Start upright or slightly reclined, with your back supported and keyboard close. If leaning back makes you reach forward or lift your shoulders, change the chair or desk setup. Product angle markings describe available settings, not required working postures.
Sources and Product Notes
General workstation guidance and manufacturer specifications serve different purposes. The sources below do not establish that a particular recline angle prevents or treats a medical condition.
HSE: Workstation setup and comfortable posture — general guidance from the UK Health and Safety Executive, not a statement of U.S. legal requirements.
HSE: Breaks and changes of activity — guidance on varying screen-based work.
HBADA U.S.: X7 Smart Ergonomic Chair — manufacturer-listed features and specifications.
HBADA U.S.: E3 Pro Ergonomic Office Chair 2026 Edition — manufacturer-listed adjustments and footrest options.
Sep 07, 2026


