





Blog

How to Use an HBADA Gift Card: A Step-by-Step Guide

How to Use an HBADA Gift Card: A Step-by-Step Guide

The HBADA gift card guide

Your next chair.
Already on your mind?

Put your gift-card balance to work. This guide explains how to buy a card, redeem it at checkout and check the expiry date before you shop.

View HBADA gift cards →

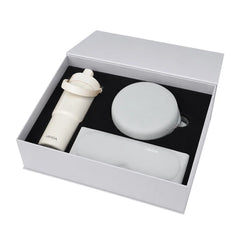
Illustrative design. Your card details arrive by email.

Before you start

Which gift card do you have?

Check how you received your card. Purchased gift cards and promotional gifts have different validity periods.

Purchased card

Bought by you or given by someone who purchased it

5years

Valid for five years from the date of issue. Keep the original gift-card email for future use.

Promotional card

Received as a gift through an eligible offer

3months

Valid for three months. Check the expiry information in your gift-card email.

Follow the expiry information supplied with your particular card. If anything is unclear, contact us before placing your order.

Need a card first?

Buy the card, then place your chair order.

Open the HBADA gift card page and choose the value you want. Before paying, check the card value and the amount you will be charged.

If you are buying it for your own chair, complete the gift-card purchase separately. Once you have the code, you can use it when placing the chair order.

Already have your card? Keep the email open and continue with the steps below.
Your checkout guide

How to use your HBADA gift card

Have your code ready before checking out. You can review the deduction before completing payment.

  1. Find the code in your email

    Open your gift-card email and locate the code. Use the link in the email to check the available balance. For a promotional card, review the expiry information too.

  2. Choose your chair and configuration

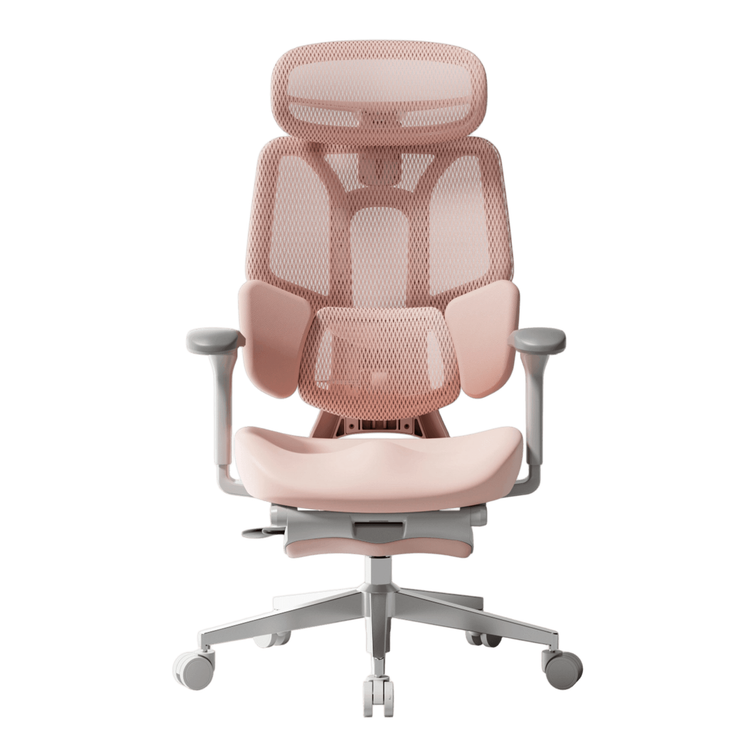
    Select the model and color, then check the footrest option where available. Add your chosen chair to the cart.

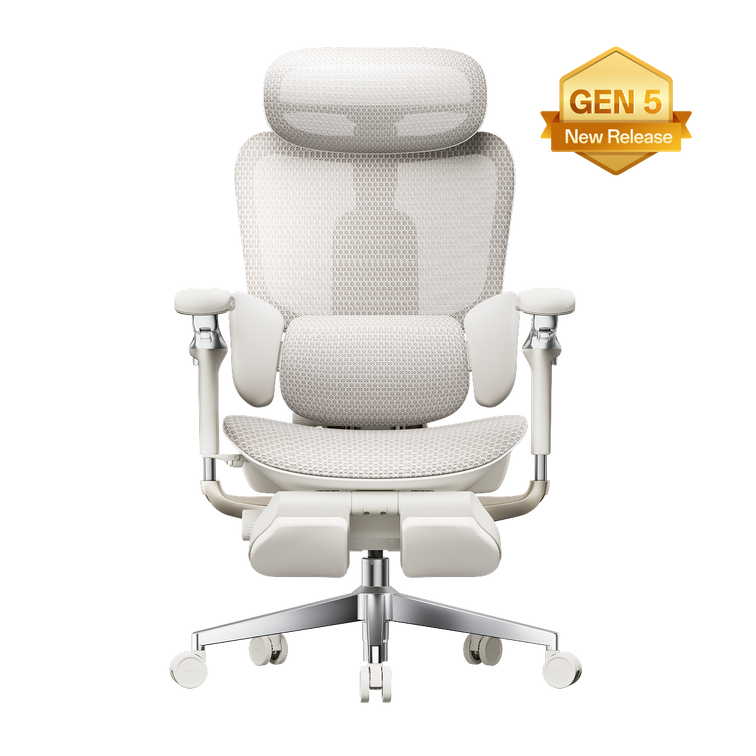
    Still deciding? Take a closer look at the E3 Pro or E3 Ultra Gen 5 . Return to your gift-card email when you are ready to pay.

  3. Apply the card at checkout

    Enter the code in the gift-card field and apply it. Check the order summary to confirm that the balance has been deducted.

    Review the chair configuration once more before continuing, especially if you changed options while browsing.

  4. Pay the amount left over

    If the balance does not cover your order, use another available payment method for the difference. Any unused funds remain on the original card, subject to its expiry date.

Use your savings together

Yes, your gift card works with all our store discounts.

Your HBADA gift card is applied toward your order total as payment. You can use it alongside all discounts on hbada.com, including personal discount offers available to you.

You can also combine multiple gift cards in the same order. Apply your discounts and gift-card codes at checkout, then check the remaining amount before paying.

Shopping our  Black Friday offers. You can pay with your gift-card balance while enjoying the discounts available for your order.


Gift cards reduce the amount you need to pay. They cannot be exchanged for cash
E3 Ultra Gen 5 Black Friday offer

Your new chair comes with something extra.

$50

Promotional gift card

+6 months

Additional warranty coverage

Purchase the HBADA E3 Ultra Gen 5 through the qualifying Black Friday offer and receive a $50 gift card plus an additional six months of warranty coverage.

Keep the promotional card for a subsequent purchase. It is valid for three months, so check the expiry information when your email arrives.

Offer eligibility and warranty-extension conditions apply. Review the details supplied with your qualifying purchase.

View E3 Ultra Gen 5 →
A few useful details

What your gift-card balance can cover

  • Use it towards products, shipping charges and applicable taxes.
  • Multiple gift cards can be applied to one order. Gift cards cannot be used to buy another gift card.
  • Redeem your card on hbada.com. It cannot be used through a third-party marketplace.

Keep your code private. Avoid showing it in public screenshots or social posts, since someone with access to the code may be able to spend the balance.

Questions and help

A little help before you pay

Where can I check my remaining balance?

Open the link in your original gift-card email to view the available balance and card details. Keep that email after your first purchase.

My code is not working. What should I check?

Copy it again from the email and check for extra spaces. Review the balance and expiry information, then confirm that you are shopping on hbada.com. If it still fails, contact us with the error message. Do not share your complete code publicly.

Can I give my purchased card to someone else?

Yes. Share the code privately with the intended recipient and remind them to keep it secure. For promotional cards, check the offer terms before transferring the code.

What happens if I return an order paid with a gift card?

Eligible refunds generally return to the original card. For split-payment orders, the allocation depends on how the refund is processed. Review our return and refund policy or contact us about your order.

Does every gift card last five years?

Purchased cards are valid for five years from issue. Promotional gift cards are valid for three months. Follow the expiry information supplied with your card.

I cannot find the gift-card email. What should I do?

Search your inbox and spam folder for “HBADA” and “gift card”. If you still cannot find it, email service@hbada.com with your order number, if available, and the email address used for the purchase or qualifying order.
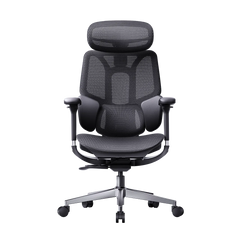
Your code is the next step.

Open your gift-card email, check the balance and expiry information, then keep the code ready for your chair order.

View gift-card details →

Relevant Product

You May Also Like

DIY Craft Desk Setup for Miniature Painting and Back Comfort DIY Craft Desk Setup for Miniature Painting and Back Comfort HBADA / The Hobby Desk DIY & Miniatures DIY craft workspace / Miniature painting Tiny eyes.A little lessleaning in. Make room for miniature painting and other DIY projects, with a craft desk setup that brings the details closer and gives your back somewhere comfortable to rest. just thefinishing touches A familiar plan.A surprisingly full evening. You’re painting an eye on a figure barely taller than a paint bottle. The first attempt looks a little startled. You wipe it off, try again and bring the miniature closer. Somewhere in the process, your shoulders have followed it. A DIY craft workspace often grows one project at a time. Paint bottles take over a shelf, a cutting mat claims the desk, and the chair is whatever was already there. Before your next miniature painting session, check whether the setup leaves room for your hands and lets you sit comfortably near the work. Where should you start? Set the chair so your feet and back have support, then bring the workpiece into a comfortable viewing position. Check the lighting with your hands in place. This guide is about arranging a DIY hobby desk, rather than building the desk itself. Bring the detail work closer Raise the miniature before leaning farther forward. When a figure sits flat on a low cutting mat, it is tempting to bend down towards it. A stable painting handle can make the model easier to hold and rotate. Find somewhere comfortable for your forearms, then check the working height. A secure riser may help bring the piece closer, provided there is still room for your hands. Test the arrangement with a clean brush first. Loose boxes are an awkward place to balance something you have spent hours building. Watch your shoulders. Raising the work too far can leave your arms hovering. Look for a position where the detail is visible and your forearms can rest comfortably. You may need to adjust both the model and the chair. Lighting for the tiny bits Check where your painting hand casts a shadow. Hold the miniature and a clean brush as you normally would. Now move the task light. Your hand should not block the detail you are trying to see. A lamp with an adjustable arm gives you room to change the angle as you turn the figure. If you use magnification, arrange it around your comfortable seated position. Having to duck under the lens for every brushstroke is a reason to reposition it. Recheck the setup when you move from a small figure to a larger model. Set the light from the chair. That is where you will be using it. The chair and workbench relationship Give your forearms somewhere to settle. Look at how your arms meet the desk. A hard edge can feel uncomfortable during close work, especially if you keep leaning into the same spot. Reposition the chair and workpiece before adding padding. Anything you add should stay secure and clear of wet paint. Armrests can help when they reach a useful position. If they hit the desk and leave you too far away, adjust or flip them up where the chair allows. Make sure your forearms still have comfortable support from the work surface. Where P2 Max fits in Our HBADA P2 Max ergonomic office chair combines flip-up armrests with adjustable seat depth and a separate lumbar support section. For a DIY craft desk, those controls give you ways to refine the fit as you move between painting and other small tasks. Measure the desk clearance first. Set the seat so you can sit back comfortably, then adjust the lumbar contact. The chair should let you approach the work without having to stretch across the table. A working desk, not a display shelf Organize your DIY craft desk around tonight’s project. A full paint collection looks satisfying on a shelf. The few colors you are using tonight belong somewhere easier to reach. Put them beside the palette so each color change does not become a stretch across the desk. Give the rinse water a stable spot away from electrical equipment and your elbow. Leave somewhere safe to put the miniature down. Getting up is simpler when you already know where the wet model can go. The same approach works for dollhouse building and other small-scale DIY projects. A tiny figure can turn in your hand; a miniature room may need a stable working platform that you can reposition between tasks. Bring the side you are working on within reach, rather than reaching through the whole scene. When assembly becomes painting Put blades and other sharp tools away before switching tasks. Follow the paint and adhesive instructions for ventilation. Breathable chair mesh does not provide room ventilation. Check the fit before opening the paint Start at your feet. Find a supported seat height. Keep your feet on the floor or a stable footrest. If a high table requires a higher seat, revisit foot support instead of leaving your feet hanging. Sit back and check the space behind your knees. Adjust seat depth if the front edge presses into them. Refine the lumbar contact. It should let you sit back without feeling pushed forward. Make small changes and check the fit again. Pick up the miniature and a clean brush. See whether the position still works when your hands return to the task. These seating checks draw on the basic principles in OSHA’s workstation chair guidance , including supported feet and back, appropriate seat fit and arm support that allows relaxed shoulders. Here, we are applying those principles to a hobby desk. If you are comparing chairs for your craft room, our chair-fit buying guide can help you work through the measurements before choosing a model. When the paint needs a moment Put the model down and change position. Drying time is a convenient chance to stand up and step away. When you return, look at the figure from a little farther back. It can be useful to see the whole piece after spending so long on one detail. You do not need to hold one pose all evening. Change position and pause if something starts to hurt. Persistent or worsening back pain deserves advice from a healthcare professional. Adjusting a chair cannot identify the cause. Questions from the DIY desk A few practical details. What should I look for in a chair for a DIY craft desk? Start with seat height, usable seat depth and comfortable lower-back contact. Check whether the armrests allow you to approach the work surface. Compare these features with your table height and the tasks you do most often. Can an ergonomic office chair work for miniature painting? Yes, when it fits your body and works with the desk. Arrange the miniature and lighting around a comfortable seated position. You should not need to lean forward continuously to see the detail. Should I flip the armrests up when painting miniatures? Try adjusting them first. If they still block access to the desk, flipping them up may give you more room. Check that the work surface provides comfortable forearm support when the armrests are out of the way. Will a different chair stop back pain while crafting? A well-fitted chair can support a more comfortable setup, but back pain can have several causes. Review the workpiece height and reach distances too. Seek professional advice if pain persists or worsens. Before the next DIY evening Start with the part you keep working around. If the armrests keep you too far from the table, measure the clearance. If you cannot settle against the backrest, check the seat depth. Those details give you a useful starting point when choosing a chair for your hobby space. Take a closer look at P2 Max → Keep a place for your next workspace idea. Add HBADA to your preferred sources on Google for practical chair advice and DIY workspace inspiration. Add HBADA to your preferred sources ↗ Opens Google in a new tab. Confirm your selection there if HBADA is available. HBADA E3 Pro vs SIHOO C300: Which Lumbar Support Fits You? HBADA E3 Pro vs SIHOO C300: Which Lumbar Support Fits You? HBADA / The Fit Edit Ergonomic Chair Comparison Where the backrest meets you Set your support.Find your fit. The HBADA E3 Pro 2026 and SIHOO Doro C300 approach adaptive lumbar support differently. The useful question is how each design meets your lower back at the desk you actually use. HBADA E3 Pro 2026 Three-zone lumbar support with personal fit adjustments vs. SIHOO Doro C300 Self-adaptive lumbar support in a flexible backrest Quick answer: where does E3 Pro stand out? Our E3 Pro 2026 gives you ways to personalize lower-back contact through an independently adjustable lumbar section and rotating side wings, alongside a sliding seat. The standard Doro C300 emphasizes self-adaptive lumbar support. Compare the exact configurations, then check where the support meets your body before deciding. Published by HBADA. This article compares selected published features and does not report an independent head-to-head test. “C300” refers to the standard SIHOO Doro C300, not the C300 Pro or C300 Pro V2. Features can vary by edition and market. SIHOO and Doro C300 are trademarks of their respective owner. No affiliation or endorsement is implied. 01 Versions 02 Contact shape 03 Three-zone support 04 Controls 05 Seat fit 06 Comparison 07 Choosing 08 Fit check 09 Questions 01 / The exact versions Start with the model you would actually order. A familiar product name can cover several configurations. For this comparison, our reference is the HBADA E3 Pro 2026 Edition and the standard SIHOO Doro C300 sold through its US storefront. Keep the C300 Pro and Pro V2 separate from the standard model. On our side, check the selected E3 Pro configuration too, especially the armrests and whether a footrest is included. Color alone should never be your only way of identifying the mechanism you are buying. A measurement needs a definition. A listed seat depth is the size of the seat. An adjustment range describes movement. When a page gives only one number, that figure alone does not establish whether the seat can slide. 02 / Contact shape Where support touches you matters. Lumbar support meets the inward curve of your lower back. Its height changes where that contact happens. How far it projects influences the pressure you feel, while its contour determines how it sits around your waist. These details work together. A pronounced support can feel intrusive when it meets you too low. A gentler contour may still feel misplaced if you have to slide forward to escape it. Look at the whole backrest. Backrest height adjustment and independent lumbar adjustment are different features. Raising a backrest can change lumbar contact, even when the lumbar section has no separate height control. The standard C300 combines a flexible backrest with self-adaptive lumbar support. Its US page also lists a backrest lifting range, so describing the chair as having no backrest height adjustment would be inaccurate. A support shape becomes useful when it meets your body in a position you can comfortably maintain. 03 / Central support and side wings How our three-zone lumbar design works. E3 Pro combines a central lumbar section with lateral wings. You can personalize the contact position, then allow the responsive mechanism to follow changes in posture. A Place the central support. The independent lumbar lift is approximately 2.36 inches. Start with light, comfortable contact in your lower-back curve. Increase or reduce the position gradually, rather than assuming the highest setting is best. B Shape the side contact. The rotating wings change the contour around your waist. Adjust them until the contact feels supportive without squeezing or creating a concentrated pressure point. C Let the responsive mechanism move. The lumbar system incorporates gliding movement and elastic tracking. These describe how the mechanism responds; dynamic travel should not automatically be interpreted as a manually lockable depth setting. After setting the chair, move between your normal working position and a small recline. Notice whether the contact remains comfortable. Repeatedly bracing against the support is a reason to revisit the setup. 04 / Adjustment controls What do you want to adjust independently? Our E3 Pro separates lumbar placement from backrest height. Its backrest lifts approximately 3.15 inches, and the seat offers 1.97 inches of depth adjustment. Those controls let you revisit the seat and back contact separately as you refine the fit. The current E3 Pro product page describes a 6D armrest mechanism. Check the selected configuration before ordering. The standard C300 US page describes 4D coordinated armrests and a multi-adjustable headrest. Direction counts are manufacturer terminology. They do not provide a standardized comfort score. For your desk, the useful checks are whether the arm pads reach your forearms and whether the chair can approach the keyboard without hitting the underside of the desktop. If you switch to a controller or tablet, test that position as well. An adjustment earns its place when you use it to solve a specific fit problem. 05 / Seat fit Seat depth changes how the lumbar support feels. A seat that reaches too far toward your knees can make you move away from the backrest. That changes the lumbar contact, even if the support itself is well positioned. Too little usable depth can leave you wanting more thigh support. E3 Pro’s seat slider gives you room to refine this relationship. Begin with your back against the backrest, then move the seat until you have comfortable clearance behind your knees. Keep your feet supported. What about the C300 seat depth? The standard C300 US page lists an 18.11-inch seat depth. Published listings differ on how seat-depth movement is described. Confirm the slider and usable range for the exact version under consideration. A single specification should not become a blanket claim about every C300 configuration. For a broader starting point, use our 12-question office chair buying guide to connect your measurements with the way you use your workspace. 06 / The comparison The useful differences, side by side. Selected published features. Confirm the exact US configuration before ordering. Feature HBADA E3 Pro 2026 SIHOO Doro C300 Lumbar approach Three-zone contact with independent lumbar placement and responsive movement Self-adaptive lumbar support within a flexible backrest Side contour Rotating lumbar wings Confirm the contour and available controls for the selected version Seat depth 1.97-inch adjustment travel 18.11 inches listed; confirm adjustment availability and range Backrest height 3.15-inch lift 18.11–21.65-inch backrest lifting range listed Armrests 6D mechanism described on the current product page; verify configuration 4D coordinated armrests listed Recline Up to 140° Up to 130° listed in the US product FAQ Fit check Set lumbar placement, then refine seat depth and side contact Check adaptive lumbar contact after setting the backrest Adjustment labels are manufacturer descriptions, not equivalent independent ratings. This table does not establish comparative durability, medical benefits or comfort for every user. Prices and policy comparisons are omitted because they vary by configuration, purchase date and market. 07 / Choosing your fit Why choose the E3 Pro approach? Our E3 Pro is worth a close look when you want to set the lower-back contact more precisely. Independent lumbar placement gives you a separate control to revisit when the backrest feels right around your shoulders but the support below still needs work. The wing adjustment adds another way to personalize the contour around your waist. Seat-depth movement helps you keep that contact while finding knee clearance. Together, these features give the fitting process a clear order. The C300 comparison remains useful because it highlights the distinction between adaptive movement and independently adjustable fit. Both concepts matter. Our focus with E3 Pro is giving you control over the starting position as well as support through movement. 08 / Your fit check Bring your measurements to the decision. Start with seat height. Find a position with stable foot support before judging the lumbar contour. Sit back and check knee clearance. Adjust the usable seat depth where the chair allows. Locate the lower-back contact. It should feel supportive without making you brace or move away from the backrest. Set your arm support while using your real keyboard or controller. Measure the space beneath the desk. Move through your usual positions. Recheck comfort after a short recline and when returning to desk work. Before checkout, confirm the selected configuration and read the applicable product and purchase information . A chair’s recommended height range is a starting point. People of the same height can have different leg and torso proportions, so your own measurements remain useful. 09 / Questions answered The details that deserve a second look. What is the main difference between E3 Pro and C300 lumbar support? E3 Pro combines an independently positionable central lumbar section with rotating wings and responsive movement. The standard C300 emphasizes self-adaptive lumbar support within its flexible backrest. Check how each arrangement contacts your lower back. Does the standard SIHOO C300 have backrest height adjustment? Its current US product page lists a backrest lifting range. That is different from a separately adjustable lumbar pad. The two should not be treated as the same feature. Is the C300 seat definitely fixed? A single listed seat-depth measurement is insufficient to establish that conclusion. Confirm the mechanism and adjustment range for the exact version you would receive, since published C300 listings differ. Does a higher armrest direction count mean a better fit? The label describes the manufacturer’s adjustment system. Check whether the arm pads reach the positions you need and clear your desk. More movement is useful when it solves a problem in your actual setup. Can three-zone support treat a lower-back condition? The lumbar section and wings shape the chair’s contact with your body. They are seating features, not a treatment for a medical condition. Persistent or worsening pain needs advice from a qualified healthcare professional. Your next step Give your lower back a more personal fit. If independent lumbar placement and a customizable side contour are high on your list, start with E3 Pro 2026. Review the available configuration and dimensions, then compare them with your own desk measurements. Discover HBADA E3 Pro 2026 → Keep useful chair advice within reach. Choose HBADA as a preferred source on Google for practical chair comparisons and workspace fitting guides. Add HBADA to your preferred sources ↗ Opens Google in a new tab. Confirm your selection there if HBADA is available. The Game Awards 2026: Upgrade Your Gaming Setup for the Big Night The Game Awards 2026: Upgrade Your Gaming Setup for the Big Night HBADA / The Setup Edit Gaming & Home Office The Game Awards 2026 A big night.A better seat. Your next favorite game might appear on screen. Get your space ready for the livestream, then keep it ready for the games that follow. Live show: December 10, 2026 Your setup starts here There is a familiar moment during a gaming showcase: a trailer starts, the group chat wakes up, and everyone moves a little closer to the screen. With The Game Awards approaching, we’re looking at the part of the evening you can prepare right now: the space you’ll actually sit in. When are The Game Awards 2026? The live show takes place on December 10, 2026, at the Peacock Theater in Los Angeles. Check the official event website for viewing information and updates. For your gaming setup, start with a chair that fits your body. Position the screen for easy viewing, then bring your controller or keyboard within a comfortable reach. 01 / Choose your viewing spot Desk stream or living-room screen? Watching at your desk makes it easy to follow the livestream while chatting with friends. Before the show, check that your main screen sits directly in front of you. A side monitor works well for occasional messages; keep the screen you watch most in the center. If your console shares a desk monitor, leave enough room to move the keyboard aside. You should be able to settle into the backrest with the controller close to your body, rather than reaching over a crowded desktop. Using a TV instead? Put your chair where you can see the whole screen without leaning forward to read small text. Leave clear space behind the chair before reclining, and keep charging cables out of its rolling path. 02 / Set the chair for the activity Your controller position changes the setup. Keyboard play usually keeps you close to the desk. Controller play gives you more freedom to sit back, which changes where your forearms need support. Adjust the armrests around that position so your shoulders feel relaxed and your elbows stay comfortably near your sides. Set the seat so your feet have stable support. Sit back and check the space behind your knees. If you keep sliding forward, revisit the seat depth and backrest position before adding another cushion. Try the setup with the controller in your hands. That is the position your chair needs to work with. A more reclined position can suit watching the show. When you return to the keyboard, bring the backrest upright enough to reach the controls comfortably. Change position during the evening and take breaks away from the screen. 03 / The HBADA chair edit Choose around the way you play. We design our chairs for spaces that often do double duty. The same desk might hold a work laptop in the afternoon and a console session that evening. Your preferred way to use that space is a useful starting point. E3 Pro2026 Edition For a work desk that becomes a gaming desk The HBADA E3 Pro 2026 ergonomic office chair brings three-zone lumbar support to a setup that moves between focused desk tasks and evening play. Use its adjustments to find comfortable back contact and arm support for each activity. E3 UltraGen 5 For a setup with room to relax Our HBADA E3 Ultra Gen 5 adds built-in massage and heating for seated relaxation. If you enjoy leaning back during a livestream, check the space available around your desk as carefully as the chair’s adjustment options. Compare the dimensions and available configurations on each product page before ordering. Leave adequate clearance for any reclining position. 04 / Finish the room Give the screen a quieter backdrop. You can create a gaming atmosphere without rebuilding the room. A soft lamp behind or beside the screen adds ambient light; place it where it will not reflect across the display. Keep the area around your feet clear so you can move the chair freely. Before the broadcast, test the audio at the volume you’ll use. Put your drink on a stable surface away from electronics. If friends are joining, arrange their seats so nobody needs to twist sideways for the entire show. Want a more coordinated look? Start with the chair color, then repeat one accent in your desk mat or lighting. A gray chair with muted violet light creates a different mood from a black chair against warm wood, even with the same desk. Upgrade before the big night Put Black Friday savings toward your seat. Planning a chair upgrade before December’s gaming calendar? Our Black Friday event is a good place to start. Check the current chair deals and available product-specific extras, then choose the configuration that works for your space. Shop HBADA Black Friday deals → Current prices, gift eligibility and delivery estimates are shown on the US store. Check the estimated delivery for your order if you want your chair before the show. Before you settle in A few practical questions Can I use an ergonomic office chair for console gaming? Yes. Check how the chair fits while you hold your controller, including forearm support and your view of the screen. At a TV, the screen position may need adjusting because the chair’s seat height can differ from a sofa. Should I recline while watching a gaming livestream? Choose a supported position that lets you see the screen comfortably. If reclining makes you lift your chin or strain to read text, adjust the screen or reduce the recline. Keep clearance behind the chair and change position during the broadcast. Is HBADA affiliated with The Game Awards? This is an independent HBADA setup guide. It does not announce an official partnership, sponsorship or endorsement by The Game Awards. Keep your next setup idea close. Add HBADA to your preferred sources on Google for more workspace guides and gaming setup ideas. Add HBADA to your preferred sources ↗ Opens Google in a new tab. Confirm your selection there if HBADA is available.