

Blog

Fix Your Office Chair in 10 Minutes: Step-by-Step Repair Guide

Fix Your Office Chair in 10 Minutes: Step-by-Step Repair Guide

A squeaky, sinking, or stiff desk chair can quickly interrupt your work and make it hard to focus. Many people think they need to throw out their chair or buy a costly new one as soon as it starts having problems.

However, learning how to fix an office chair on your own is remarkably simple and rarely requires special technical skills. Most common mechanical, structural, and alignment issues can be diagnosed and completely resolved at home in under ten minutes. By understanding the basics of modern furniture engineering, you can master fast chair repair methods, eliminate distracting noises, and restore your professional workspace to perfect working order.


Step 1: Solving the Sinking Chair Syndrome (Gas Lift Cylinder Maintenance)

Having your office chair at the right height is important for your posture, but if the gas lift cylinder fails, your chair will slowly sink during the day. When the seal inside loses pressure, the seat drops to the bottom every time you sit.

Diagnosing the Pressure Seal

Most office chairs use a gas lift cylinder filled with nitrogen and controlled by a valve. Over time, dirt or small cracks in the rubber seal can cause the gas to leak slowly.

To check for this problem, turn your chair over and look at the plastic button on top of the cylinder. Sometimes, the metal plate in the control can bend or move, pressing on the valve and making the chair sink even when you are not pressing it.

The Clean Modular Swap

If the pressure seals are worn out, using tape or clamps will only fix the problem temporarily. The best way to fix a sinking chair is to replace the cylinder completely.

· Pull the retaining clip out from the very bottom of your current wheelbase using needle-nosed pliers.

· Tap the underside of the base gently with a rubber mallet to detach the cylinder from the five-star wheel assembly.

· Twist the cylinder out from the top control chassis mechanism using an adjustable pipe wrench.

· Drop a fresh, certified gas lift into the center of the base and press down firmly to complete the assembly.

Our modern chair lines emphasize modular engineering to make this process incredibly quick. By choosing components built around clean structural connections, we ensure you can swap out core parts, like a pneumatic lift, in under 10 minutes without specialized tools.

 ergonomic chair where to buy

Step 2: Eliminating Creaks and Squeaks (Chassis Lubrication)

Noise distraction behaves like a major enemy of deep mental focus in quiet corporate settings or home offices. A loud screeching sound every time you recline or twist indicates that two dry metal surfaces are rubbing against each other.

Locating the Metal-on-Metal Friction Points

To trace the exact source of a squeak, sit in your seat and lean gently from side to side, then tilt back slowly to narrow down the noise. Turn the seat upside down on a clean rug or towel to expose the mechanical control chassis.

The main causes are often the recline hinge pin, the steel tension spring housing, or the brackets that attach the seat to the base. Over time, the original grease dries out or collects dust, becoming a gritty paste that stops working.

Applying Commercial Lubricants Safely

Do not spray random household oils onto your seating hardware, as they dry out too quickly and attract dust, which can worsen friction later. Instead, use a high-quality silicone spray or a dedicated PTFE dry-film lubricant to resolve the issue.

· Wipe down all exposed steel joints with a microfibre cloth to clear away built-up grime and old oil.

· Spray your lubricant directly into the recline spring housing and around the pivot pins.

· Activate the mechanical joints by tilting the chassis back and forth to work the fluid deep into the bearings.

· Wipe away any excess overspray with a clean towel to keep oil from dripping onto your office floor.

Our strong aluminum frames and self-lubricating recline parts are designed to minimize friction. This design helps keep your workspace quiet, even during long workdays.

same as pinmoco ergonomic chair assembly instructions 

Step 3: Tightening Loose Components and Stiff Armrests

Small movements throughout the day can slowly loosen the steel bolts that hold your chair together over time.

The 6-Month Hardware Inspection Checklist

A wobbly backrest or loose armrest usually just means your chair needs a routine check, not that something is broken. Doing a quick check every six months helps keep your furniture in good condition. Use this checklist to keep your workspace steady:

· Chassis-to-Seat Screws: Verify that all four primary mounting bolts beneath the main cushion are completely tight.

· Backrest Support Arm: Tighten the heavy-duty bolts connecting the vertical spine to the underside of the mechanical engine.

· Armrest Base Brackets: Inspect the underside connections to stop your armrests from shaking or twisting out of alignment.

· Caster Stem Sockets: Ensure each wheel stem is fully inserted into the five-star base socket to keep the chair level.

Servicing Highly Dynamic Joints

If you have an older chair with fixed arms, the brackets can loosen over time due to the pressure when you push yourself up from your desk. This is why many basic office chairs end up with wobbly arms.

Upgrading to a better chair can fix this problem. Our advanced designs spread your weight evenly, so your armrests stay tight and supportive for years.


Maintenance Blueprint: Structural Care Across Seating Tiers

Different chair designs need different maintenance routines to keep them working well and reliably.

Product Model

Key Mechanical Node

10-Minute Maintenance Focus

Tool Required

Hbada E3 Air

High-Elasticity CloudMesh Panel

Cleaning mesh pores & clearing caster debris

Vacuum attachment & soft brush

HBADA E3 Pro

3-Zone Adaptive Floating Wings

Checking internal spring tension & armrest bolts

Included M6 Allen wrench

Hbada AI-Powered x7

Sensor Core & Motorized Tracks

Battery charging & sensor surface calibration

USB-C cable & microfiber cloth


Troubleshooting Onboard Tech: The Smart Maintenance Frontier

When you switch to smart furniture, taking care of your setup involves more than just checking nuts and bolts.

Battery and Core Power Management on the Hbada AI-Powered x7

The Hbada AI-Powered x7 uses smart electronics to support posture, so you need to manage its power consumption. It runs on a removable 5,200 mAh lithium-ion battery pack that fits into the lower frame.

To ensure your active features continue running smoothly, connect the hidden charging port to a standard USB-C power adapter every few days. If the active tracking features do not initialize, slide the battery out of its secure housing to check that the metallic contact points are completely clean and free of dust.

Sensor Alignment Calibration

The tracking system uses sensitive sensors to check your posture 1,000 times per second. If you move your chair over thick carpet or bump it, you may need to reset the system.

· Clear all weight off the seat cushion and ensure the chair is resting flat on an even surface.

· Hold down the primary calibration button located on the side-mounted magnetic remote control for five seconds.

· Allow the motorized lumbar module to move through its full forward and backward range during its self-test.

· Once the system bleeps, sit in your usual working posture so the active tracking software can capture your body shape accurately.


Frequently Asked Questions (FAQ)

What tools do I need to keep in my desk drawer for basic chair maintenance?

You only need a few basic tools to keep your office chair working perfectly. Keeping a standard dual-head screwdriver, an M6/M8 Allen wrench, a small can of silicone lubricant spray, and a simple adjustable wrench nearby will let you handle almost any standard adjustment or repair in under 10 minutes.

How do I clean and maintain performance elastic mesh without damaging the fabric fibers?

To safely clean high-performance mesh, vacuum the seat and backrest panels weekly using a soft-bristle attachment to remove dust. If you spill something, blot the spot immediately with a damp microfiber cloth and a drop of mild dish soap, avoiding harsh chemicals that can weaken the elastic fibers.

Does upgrading to an active AI-lumbar tracking chair complicate regular maintenance?

Not at all. Even though the Hbada AI-Powered x7 has advanced sensors and motors, its main frame uses the same strong aluminum hardware as regular office chairs. The smart features adjust themselves, so you just need to keep the battery charged.

How often should I check and tighten the structural bolts on the underside of my office furniture?

For standard home offices, checking your primary mounting hardware every six months is ideal. If your chairs are in high-use corporate areas or hybrid hot-desking zones, inspecting the underside bolts every three months ensures the frames stay perfectly stable and safe for everyone.


Conclusion

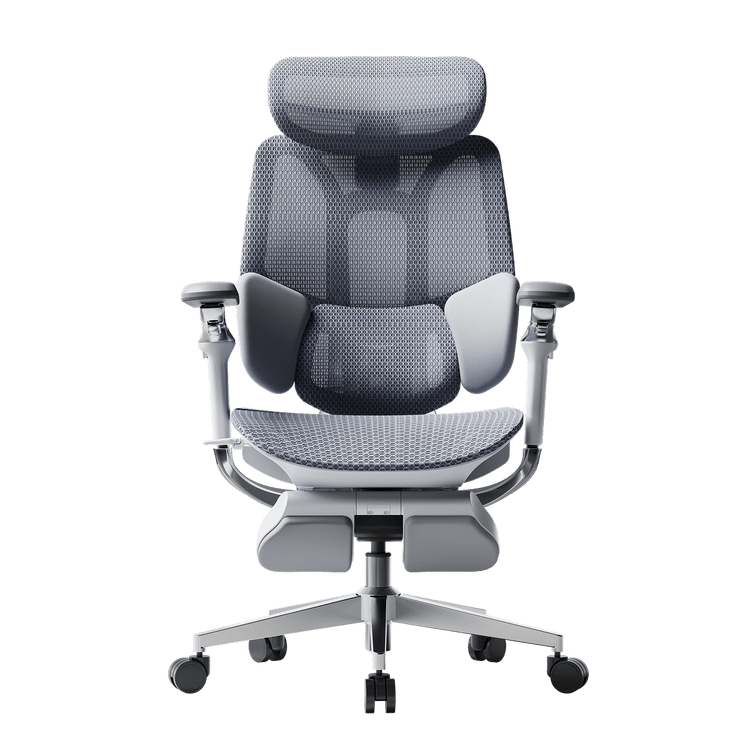
The time you spend maintaining your workspace depends entirely on the design and quality of the engineering you choose. If you want a robust, fully mechanical setup with highly accessible, spring-loaded components that are easy to adjust by hand, the HBADA E3 Pro provides an exceptionally stable and low-maintenance foundation.

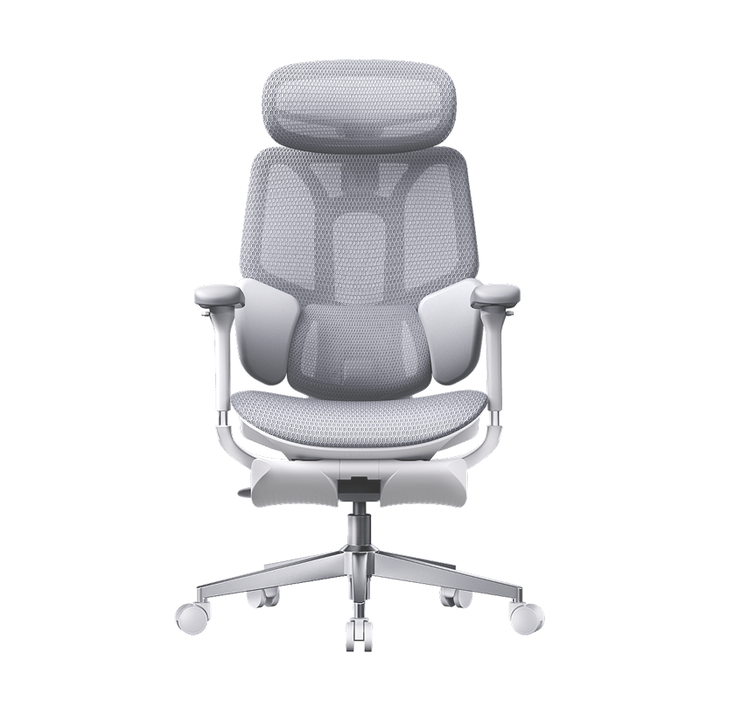
However, if you want to eliminate manual adjustments entirely, upgrading to the Hbada AI-Powered x7 is the ideal solution. The Hbada AI-Powered x7 combines durable aircraft-grade aluminum hardware with intelligent, self-calibrating software that automatically tracks your posture, minimizing physical maintenance while providing active, ongoing protection for your spine.

Relevant Product

You May Also Like

Working and Reclining in a Footrest Office Chair: A Daily Guide Working and Reclining in a Footrest Office Chair: A Daily Guide Everyday Ergonomics · Work & Breaks An ergonomic office chair with a footrest works best when you match your position to the task—not when you stay reclined all day. Quick answer: Use a supported upright or slightly reclined position for typing. Try a gentle recline for audio calls and reading, provided you can still see your screen comfortably. Extend the leg rest for a seated break if your chair is designed for it. Change positions throughout the day, and include time away from the chair. 01 · Focus Keep your keyboard close, shoulders relaxed, and feet supported. 02 · Read & Listen Try a light recline without reaching forward or straining to see. 03 · Take a Break Rest briefly, then make room for standing, walking, or another task. In this guide Why match your posture to the task? Reclining for calls and video Reclining for reading and reviewing Using short recovery breaks Task, recline, and footrest guide Your daily reclining rhythm Which HBADA chair fits this routine? Limitations and safety notes Conclusion Frequently asked questions Sources Why Match Your Posture to the Task? Answering emails, reading a proposal, and listening to a call do not ask the same things of your body. Your chair setup can change with them. For typing, choose a position that lets you reach the keyboard and mouse with relaxed shoulders and without leaning away from the backrest. That may be upright or slightly reclined, depending on your desk and chair. For listening or reading, you may prefer to lean back a little further. The important part is variation. The UK Health and Safety Executive recommends changing position and breaking up screen work rather than holding one posture for long periods. Its guidance on breaks and activity changes is useful here as general workstation advice, not as a prescribed schedule for a particular chair. Two different kinds of foot support: a pull-out chair leg rest supports your legs while reclining. A separate under-desk footrest supports your feet during seated desk work. If your feet cannot reach the floor at the correct working height, do not assume the chair’s pull-out leg rest is a suitable substitute. How Should You Recline for Calls and Video? An audio call is a good opportunity to change position. If you do not need to type or handle documents, try a small recline and let the backrest support you. Use the leg rest if it feels comfortable and is permitted by your chair’s instructions. Adjust the headrest so it supports you without pushing your head forward. If you start taking notes, bring the backrest closer to your working position instead of stretching toward the keyboard. For video calls, check your camera preview after moving the chair. A light recline may work well, but a deeper position can leave you looking up at the screen or sitting too low in the frame. Adjust the chair or camera until you can look ahead comfortably. There is no universal “video-call angle.” Screen height, camera position, and the need to type matter more than matching a number. How Should You Recline for Reading and Reviewing? Reading a long document often gives you more freedom to lean back than writing one. Try a gentle recline while keeping the text easy to see and your back supported. If you find yourself lifting your chin, craning your neck, or leaning forward again, adjust the screen position or reduce the recline. Increasing text size may help you read comfortably without moving your face closer. For a tablet or printed document, use a stand or another suitable support rather than holding it low in your lap for a long period. Return to a position with comfortable keyboard access when reviewing turns into sustained editing. A breathable mesh seat is another feature to consider, but it does not remove the need to change position or take a break. How Should You Use Recovery Breaks? A short reclined pause can be a comfortable way to stop working for a moment. Move away from the desk, check the space behind the chair, and use the recline controls as directed in the manual. Extend the leg rest if your model includes one. You do not need to reach the chair’s maximum angle. Choose a position that feels supported, look away from the screen, and leave the keyboard alone. A few minutes of seated rest can fit into your day, but it is not the same as a movement break. Alternate it with getting up, walking, or switching to a task away from the screen when you can. A break is not another working position. Leaning back while continuing to answer messages may change your posture, but it does not give you the same change of activity as stepping away from screen work. Task, Recline, and Footrest Guide Use these as practical starting points. The right position depends on your fit, workstation, and the adjustment options on your chair. The angle markings on a product page are chair settings—not universal ergonomic targets. On a phone, swipe the table sideways to view all columns. Match the chair setup to what you are doing Task Backrest position Foot or leg support What to check Typing and focused work Supported upright or slight recline Feet on the floor or a suitable under-desk footrest Keyboard and mouse remain close; shoulders stay relaxed Audio calls and thinking A comfortable light recline Optional pull-out leg rest, used as instructed No stretching forward to reach notes or controls Video calls Upright or lightly reclined Stable, comfortable foot support Screen and camera remain at a comfortable viewing position Reading and reviewing A gentle recline that preserves screen visibility Leg rest optional, depending on fit No chin lifting, neck bending, or forward reaching Short seated break A supported recline within the chair’s permitted range Leg rest extended if appropriate for the model Clear space around the chair; include movement breaks too Your Daily Reclining Rhythm You do not need a complicated schedule. Use changes in your work as a reminder to check how you are sitting. Start work Set the seat height, lumbar support, and armrests for comfortable keyboard access. Keep your feet supported. Take a call Try a light recline when listening. Come forward again if the conversation turns into a typing session. Read or review Lean back a little if the screen remains easy to see. Adjust the display rather than holding your neck at an awkward angle. Pause Stop screen work for a short break. A seated recline is one option; standing, walking, or doing another task provides a different kind of change. Return to work Retract the leg rest before moving back to the desk. Reset the backrest and check that the lumbar support still fits comfortably. Which HBADA Footrest Chair Fits This Routine? The HBADA X7 and E3 Pro 2026 both offer recline adjustments. The main distinction for this routine is the support system: the X7 uses powered lumbar tracking, while the E3 Pro combines mechanical adaptive support with manual adjustments. Powered Lumbar Tracking HBADA X7 Consider the X7 if powered lumbar tracking is a feature you want alongside reclining. Check the selected configuration and its leg-rest features before ordering. Explore the HBADA X7 Mechanical Adaptive Support HBADA E3 Pro 2026 Consider the E3 Pro if you prefer adjustable mechanical support. Select the “With Footrest” option if you want a pull-out leg rest; the product page also lists a version without one. Explore the HBADA E3 Pro The following specifications are manufacturer-listed settings, not posture recommendations. HBADA U.S. product comparison Feature HBADA X7 HBADA E3 Pro 2026 Listed recline angles 105°, 116°, 128°, 140° 105°, 115°, 130°, 140° Lumbar support AI-powered lumbar tracking 3-zone mechanical adaptive support with manual adjustments Headrest 4D dual-axis headrest 4D dual-axis headrest Listed chair capacity 330 lb (150 kg) 330 lb (150 kg) Product details checked against the linked U.S. pages on September 8, 2026. Confirm the selected model, configuration, manual, and warranty terms before purchasing. A chair’s maximum user weight is not the load rating of its extended leg rest. Limitations and Safety Notes Use the controls as instructed. Learn how your chair’s recline, tension, and locking mechanism work before leaning back. Do not force a control or move beyond the permitted range. Keep the area clear. Use a stable, level surface and leave enough room behind the backrest and in front of the extended leg rest. Do not sit or stand on the leg rest. Use it only for its intended purpose. Retract it before getting out of the chair. Check fit as well as capacity. Your seat depth, foot support, and reach to the desk matter alongside the chair’s stated maximum user weight. Stop if the chair feels unstable. Do not continue reclining if the mechanism slips, a component is damaged, or the chair develops unusual movement. Do not treat reclining as medical care. If a position causes discomfort, change it. Persistent pain, numbness, or other concerning symptoms warrant advice from a qualified healthcare professional. The Takeaway Let the Task Decide A reclining office chair with a footrest gives you more ways to sit, but you do not need to use every setting for every task. Keep typing comfortable and within reach, lean back when reading or listening allows it, and use the leg rest for supported seated pauses. Choose the X7 if powered lumbar tracking suits your preferences, or the E3 Pro with-footrest variant if you prefer mechanical adaptive support. Whichever chair you use, keep changes of position and time away from the screen in your routine. Frequently Asked Questions Should you recline during video calls? A slight recline is fine if you can see the screen comfortably and remain well framed by the camera. If you need to raise your chin, bend your neck, or reach forward to type, adjust the screen or return to a more upright position. Is reclining useful for reading long documents? A gentle recline can offer a comfortable change from your typing position. Keep the document or screen easy to see, and support a tablet or book rather than holding it low in your lap. Reduce the recline if you find yourself leaning forward again. How long should a reclined recovery break be? Treat it as a brief pause rather than a fixed-duration treatment. You might rest for a few minutes, then change activity. There is no single recline duration that suits everyone, and seated rest should not replace opportunities to stand or move. Does reclining with a footrest help your legs? A leg rest can provide a different supported position that some people find comfortable. It should not press uncomfortably against your legs or leave you feeling numb. Do not rely on a chair leg rest to treat swelling, circulation problems, or persistent pain. Can you use a footrest chair with a sit-stand desk? Yes. For seated work, adjust the desk and chair so your keyboard is within easy reach and your feet are supported. Use a separate under-desk footrest if needed. Retract the chair’s pull-out leg rest and move the chair clear before switching to standing. What recline angle should you use for typing? There is no single angle that fits every workstation. Start upright or slightly reclined, with your back supported and keyboard close. If leaning back makes you reach forward or lift your shoulders, change the chair or desk setup. Product angle markings describe available settings, not required working postures. Sources and Product Notes General workstation guidance and manufacturer specifications serve different purposes. The sources below do not establish that a particular recline angle prevents or treats a medical condition. HSE: Workstation setup and comfortable posture — general guidance from the UK Health and Safety Executive, not a statement of U.S. legal requirements. HSE: Breaks and changes of activity — guidance on varying screen-based work. HBADA U.S.: X7 Smart Ergonomic Chair — manufacturer-listed features and specifications. HBADA U.S.: E3 Pro Ergonomic Office Chair 2026 Edition — manufacturer-listed adjustments and footrest options. What Is a Smart Ergonomic Workspace? Chairs, Desks and Monitor Arms Explained What Is a Smart Ergonomic Workspace? Chairs, Desks and Monitor Arms Explained IFA 2026 · Workspace technology At IFA 2026, Ergonomics Goes Beyond the Office Chair On September 4, 2026, HUANUO announced a workspace portfolio at IFA in Berlin covering chairs, height-adjustable desks and monitor arms. Its announcement included an AI-powered standing desk with height recommendations and a desktop designed to tilt for tasks such as reading and drawing. The manufacturer’s IFA announcement highlights an idea worth considering when upgrading a home office: the chair, work surface and screen all need to fit the person using them. Product announcements describe intended features, rather than independent proof of improved health or comfort. For buyers, the useful question is what each adjustment actually changes during an ordinary working day. You can buy an adjustable chair and still find yourself reaching for the mouse. You can add a standing desk and still look down at a laptop screen. Each piece of equipment solves only part of the setup. A smart ergonomic workspace brings those parts together. Before choosing a feature list, it helps to understand which adjustments you need and how they affect one another. What is a smart ergonomic workspace? In this guide, a smart ergonomic workspace means a setup that combines adjustable seating, a suitable work surface and screen positioning, with features such as powered adjustment, saved settings or reminders where useful. The term does not mean every component uses AI or connects to the same app. In this guide The three parts of the workspace What makes an ergonomic chair smart? Manual, adaptive and powered features compared How to set up the chair, desk and screen Which part should you upgrade first? What to check before buying Where the HBADA X7 fits Frequently asked questions Three Parts, Three Different Jobs Think about your chair, desk and monitor as separate adjustments that need to work together. Buying all three from one brand is not necessary, but checking their dimensions and clearances is. 01 · Seating The Chair Determines your seated height, usable seat depth, back support and arm support. These settings affect how closely and comfortably you can approach the desk. 02 · Work surface The Desk Positions the keyboard, mouse and other tools. A height-adjustable desk can provide separate working heights for sitting and standing. 03 · Viewing The Monitor Arm Lets you reposition a compatible display without changing the keyboard height. Check the mount, weight range and desk attachment before buying. A Common Setup Problem Imagine raising your chair to reach a high keyboard. Your feet then lose contact with the floor. Adding more lumbar support will not change that height mismatch. A suitable footrest or a lower keyboard surface may be the adjustment you need. What Makes an Ergonomic Chair Smart? “Smart” can describe several different features. One chair may offer powered lumbar adjustment. Another may save a preferred setting, respond to changes in position or include controls for additional comfort functions. Ask what the feature does in physical terms. Does it move the lumbar support? Change recline resistance? Recall a saved position? Or simply send a reminder? Automatic Adjustment and Manual Fit Serve Different Purposes An automatic feature may reduce how often you operate a particular control. You still need to check the seat’s dimensions, the adjustment range and whether the support feels appropriate for your body. A chair that adjusts automatically is not necessarily a better fit than a manually adjusted chair. The useful comparison is whether the feature solves something you actually notice while working. Ask for a demonstration: “AI” on a product page does not tell you which parts move, what triggers the movement or how much control you retain. Look for a clear explanation and a model-specific manual. Manual, Adaptive and Powered Features Compared These categories can overlap within one chair. Use the table to understand the controls rather than treating the labels as a ranking from basic to best. Feature type How it works What to check Manual adjustment You move a lever, dial or component to change a setting. Can you reach the control and achieve the position you need? Mechanical adaptive support A mechanism responds to movement or load without necessarily using electronics. Does its movement and resistance suit you? Powered adjustment An electric mechanism moves a component through its available range. What requires power, and what happens when power is unavailable? Memory settings The product stores and recalls supported settings. Which settings are saved, and can different users keep separate preferences? App or reminder features Software provides controls, prompts or other supported functions. Is an account required, and can essential controls be used without the app? AI-labeled features The exact operation depends on the manufacturer’s implementation. What input does the system use, and what adjustment does it make? How to Set Up the Chair, Desk and Monitor Together For a workstation with an adjustable desk, start with the chair, then position the keyboard and screen. This is a practical order because changing your seated height affects everything above it. 1. Establish a Comfortable Seated Position Set the seat so your feet are supported and the front edge does not press into the backs of your knees. Adjust the available back and arm supports to suit you. 2. Bring the Keyboard and Mouse Within Reach Adjust the work surface so you can type with relaxed shoulders. Keep the mouse close enough that you do not have to reach sideways for it. 3. Position the Screen Independently Place your main screen in front of you and adjust its height and distance so you can read comfortably. With a laptop, a separate keyboard and mouse allow the screen to be raised without raising your hands. 4. Save a Separate Standing Setting If your desk has memory controls, save the standing position only after checking the keyboard and screen. Recheck cable slack and clearance through the desk’s full movement. 5. Try the Setup During Your Usual Tasks Write, read and use the mouse as you normally would. Change one setting at a time so you can tell which adjustment helped. Leave room for movement and changes of activity throughout the day. These basic positioning principles are consistent with HSE’s workstation posture guidance . Individual viewing needs and equipment may require different arrangements. Using a fixed desk? You may need to set the chair in relation to the keyboard first, then support your feet. If the mismatch is too large, consider a suitable keyboard tray or a desk with a more appropriate height range. Which Part of Your Workspace Should You Upgrade First? Start with the limitation you cannot solve using the adjustments you already have. That gives each purchase a clear purpose. What you notice Check first Possible next step The seat feels too deep or too high. The chair’s seat-depth and height ranges. A chair with dimensions that better fit you. You lift your shoulders to reach the keyboard. The relationship between the chair and work surface. A lower keyboard surface, appropriate foot support or an adjustable desk. You lean forward to read the screen. Text size, screen distance and placement. A suitable monitor stand or arm if the existing stand cannot position the screen. Switching between sitting and standing is awkward. Desk controls, cable restrictions and available height range. A desk with easier controls or useful memory settings. You frequently readjust one chair feature. Whether the existing setting holds and fits the task. Compare easier manual controls with adaptive or powered alternatives. The workspace fits, but you rarely change position. Your routine and opportunities to take breaks. A practical reminder or change of activity may help without new furniture. What to Check Before Buying Smart Workspace Equipment Physical Compatibility Measure the available space. Check whether the chair’s armrests clear the desktop, whether a keyboard tray leaves enough legroom, and whether a monitor arm can attach securely to the desk. For a monitor arm, confirm the display’s mounting pattern and weight against the arm’s specifications. For a moving desk, account for accessories above and below the surface, including shelves, drawers and cables. Everyday Controls A feature is easier to use when its control is accessible during normal work. Check whether you can make the adjustments you need without reaching underneath the desk, opening an app or interrupting your task. Power and Offline Operation Ask which functions depend on a battery, outlet, internet connection or app. Do not assume every powered chair or desk behaves the same way when disconnected. Check the exact model’s instructions. Accounts and Data If an app is offered, review whether it requires an account, which permissions it requests and how saved profiles can be deleted. A product being described as smart does not, by itself, establish that it collects posture data or sends information to the cloud. Service and Replacement Parts Review the return terms, warranty scope and support for electrical components as well as the frame. Ask how replacement controls, power supplies or other service parts are obtained when relevant to the product. The chair in the setup Where the HBADA X7 Fits HBADA describes the X7 Smart Ergonomic Office Chair as offering AI lumbar tracking. It is an example of applying smart functionality to a specific part of the seated experience. When considering it for your workspace, review the product’s dimensions, controls and adjustment range alongside your desk measurements. Lumbar tracking does not set your keyboard height or position your monitor, so those adjustments remain part of the setup. Compare the exact model and variant before ordering. Do not assume that features, power requirements or operating modes are identical across the X7 family. Explore the HBADA X7 Frequently Asked Questions Is an adaptive lumbar support the same as AI lumbar tracking? Not necessarily. Adaptive support may use a mechanical response to movement or load. An AI-labeled system depends on the manufacturer’s design. Check how the support moves and what controls it. Do the chair and standing desk need to connect electronically? No. They can work together through suitable dimensions and separate adjustments. Only expect electronic coordination if the manufacturers explicitly document compatibility. Is a monitor arm necessary? Only if it solves a positioning or space problem. If the monitor’s existing stand provides the height, distance and angle you need, an arm may be optional. Can I use a smart ergonomic chair with a regular desk? Yes, provided the chair’s dimensions and adjustment range work with the desk. Check keyboard height, armrest clearance and space for your legs before choosing the chair. What happens when a smart chair runs out of power? That depends on the model. Check which functions require power, which adjustments remain available and whether the manual permits normal use while disconnected. Do not assume a universal backup mode. Can smart furniture automatically create perfect posture? No feature label guarantees that outcome. Your equipment still needs to fit your body and tasks. Automatic adjustments also cannot replace changes of position and activity. Should I replace my entire workspace at once? Usually, you can assess one limitation at a time. Identify what cannot be adjusted adequately, measure the available space and upgrade the component that addresses that problem first. Sources and scope: The IFA section summarizes a manufacturer-issued announcement. HBADA feature descriptions are attributed to the official product page. This article is an equipment-selection guide, not a hands-on comparative test. HUANUO workspace portfolio announcement — September 4, 2026 HSE — Workstation posture guidance HBADA X7 — Official product information Office Chair Safety Check: 7 Parts to Inspect Before You Sit Office Chair Safety Check: 7 Parts to Inspect Before You Sit Check seven key office chair parts, recognize warning signs, and know when to stop using your chair. Includes the September 2026 Branch recall context.