
Blog

Best Office Chair for Carpal Tunnel: Complete Ergonomic Setup Guide

Best Office Chair for Carpal Tunnel: Complete Ergonomic Setup Guide

Tingling fingers by lunchtime. A dull ache creeping up your wrist. If typing all day leaves your hands numb, your chair could be part of the problem. Finding the best office chair for carpal tunnel is not about a magic cure. It is about holding your arms and wrists in a neutral, relaxed position for hours at a time. The right chair, with fully adjustable armrests and the correct height, keeps your forearms level and your wrists straight. This guide shows you which features matter and how to build a complete ergonomic setup that protects your hands.

Can an Office Chair Help With Carpal Tunnel?

Let us be clear about what a chair can and cannot do.

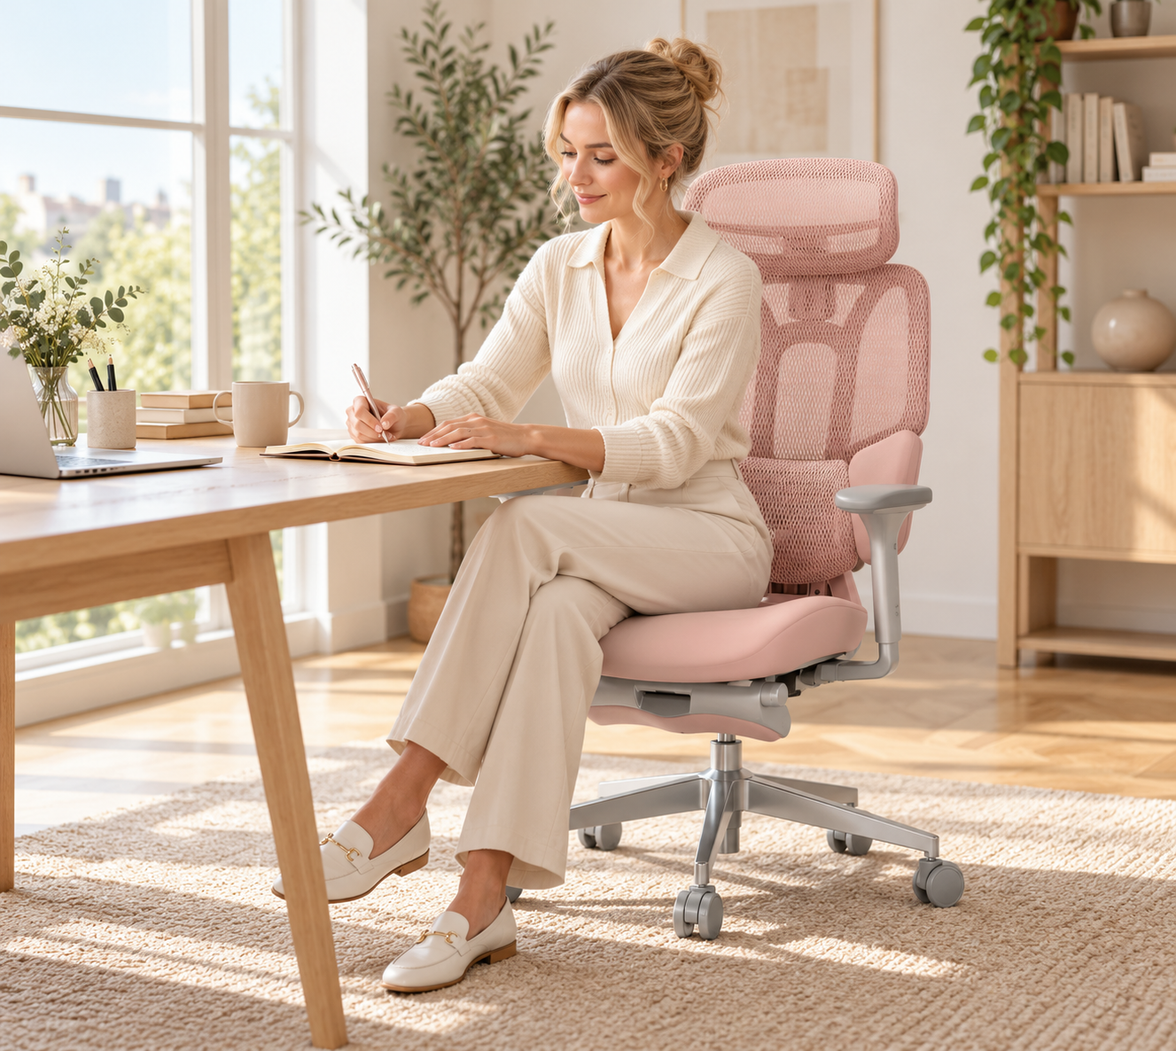
Yes, the right office chair helps with carpal tunnel syndrome, but it works indirectly. Carpal tunnel syndrome is caused by pressure on the median nerve as it passes through a narrow tunnel in your wrist, which brings tingling, numbness or pain in your thumb, index and middle fingers NHS. A chair cannot relieve that pressure on its own, but it sets the posture that keeps your wrists neutral. When your adjustable armrests hold your forearms level, and your seat height puts your elbows at about 90 degrees, your wrists stay straight, and the load eases off the nerve. Set up badly, the same chair pushes your wrists into the exact angles that make symptoms worse.

What Makes the Best Office Chair for Carpal Tunnel?

Three chair features do most of the work. Focus your money here.

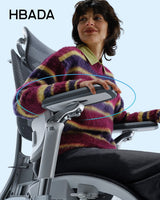
Fully Adjustable E3 Ultra adjustable armrest padding and surface dimension layout mobile banner


Adjustable armrests are the single most important feature of an office chair for carpal tunnel syndrome. They should support your forearms parallel to the floor, roughly level with your desk, so your arms do not hang and your wrists do not carry the weight while you type. Look for armrests that move up and down, slide forward and back, and rotate inward. Fixed or width-only armrests leave your elbows floating, which forces your wrists to compensate.

Correct Seat Height and Depth

The right seat height sets everything else. Adjust it so your feet rest flat, and your knees sit at about 90 degrees, which naturally brings your elbows level with your keyboard. A seat depth adjustment lets you sit fully back with two to three fingers behind your knees, so you get lumbar contact without perching forward. Perching pushes you toward the desk and drops your wrists into a bent angle.

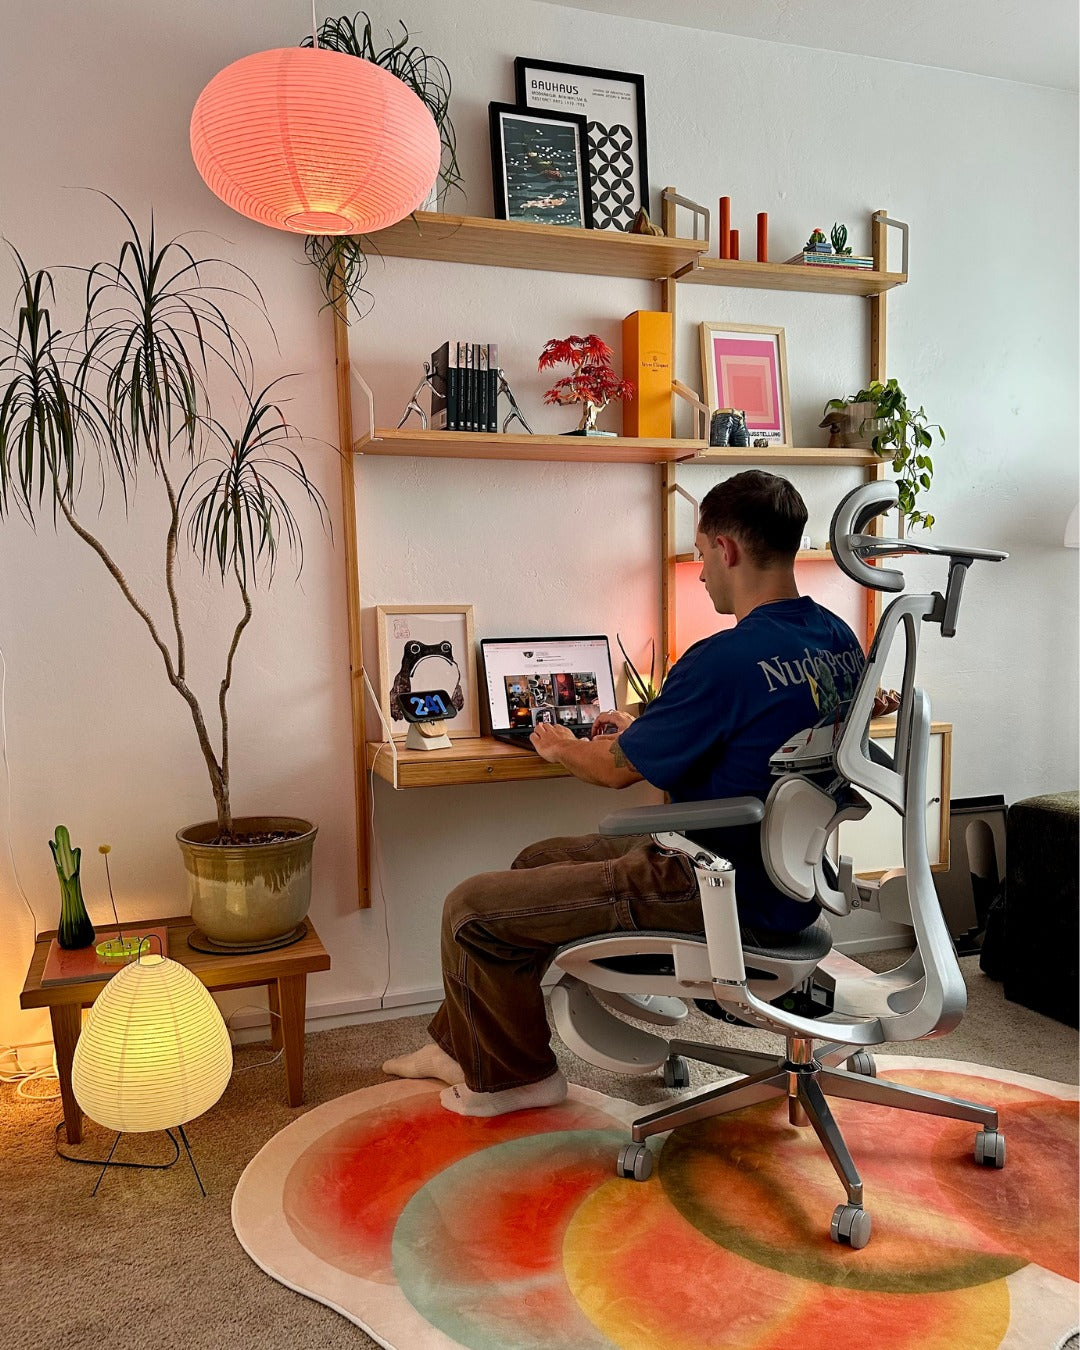
Supportive HBADA X7 Prestige ergonomic office chair side angle and Posture

Good lumbar support matters more for your wrists than it first sounds. The nerves that reach your hand start at your neck and run down your arm, so slouching shifts your whole upper body and changes your wrist angle. Firm lumbar support keeps you upright and square to the desk, so your shoulders relax and your forearms stay level. That is the foundation of a neutral wrist position.

The Complete Ergonomic Setup, Step by Step

A great chair only helps if the whole workstation is right. Work through these steps in order.

Set Your Chair First

● Raise or lower the seat so your feet are flat, and your knees are near 90 degrees.

● Sit fully back and set the seat depth to leave two to three fingers behind your knees.

● Set the lumbar support into the curve of your lower back.

● Adjust the armrests so your forearms rest level, and your shoulders stay relaxed.

Position Your Keyboard and Mouse

● Keep your keyboard flat or tilted slightly away, so your wrists stay straight rather than bent up.

● Place your mouse right next to the keyboard at the same height.

● Move the mouse with your whole arm, not just your wrist.

● If your desk is too high, raise your chair and use a footrest rather than lifting your shoulders.

Set Your Monitor

● Put the top third of the screen at eye level, about an arm's length away.

● This stops you leaning in, which drops your wrists and rounds your shoulders.

Move and Stretch Often

Static posture is still a risk, even with a perfect setup. The Health and Safety Executive advises short, frequent breaks over long, occasional ones for screen users Display Screen Equipment guidance. Every 30 to 60 minutes, stand, shake out your hands and do a few gentle wrist stretches. Vary your tasks so you are not gripping or typing non-stop.

Body part

Target position

Why it matters for your wrists

Feet

Flat on the floor or on a footrest

Gives a stable base so you do not perch and drop your wrists

Knees

About 90 degrees, thighs parallel to the floor

Sets the correct seat height

Elbows

About 90 degrees, close to your sides

Keeps forearms level for a neutral wrist

Forearms

Parallel to the floor, resting on armrests

Takes the load off your wrists while typing

Wrists

Straight, in line with your forearms

Reduces pressure on the median nerve

Monitor

Top third at eye level, an arm's length away

Stops you leaning forward and bending your wrists

Our Recommended Chairs for Wrist-Friendly Support

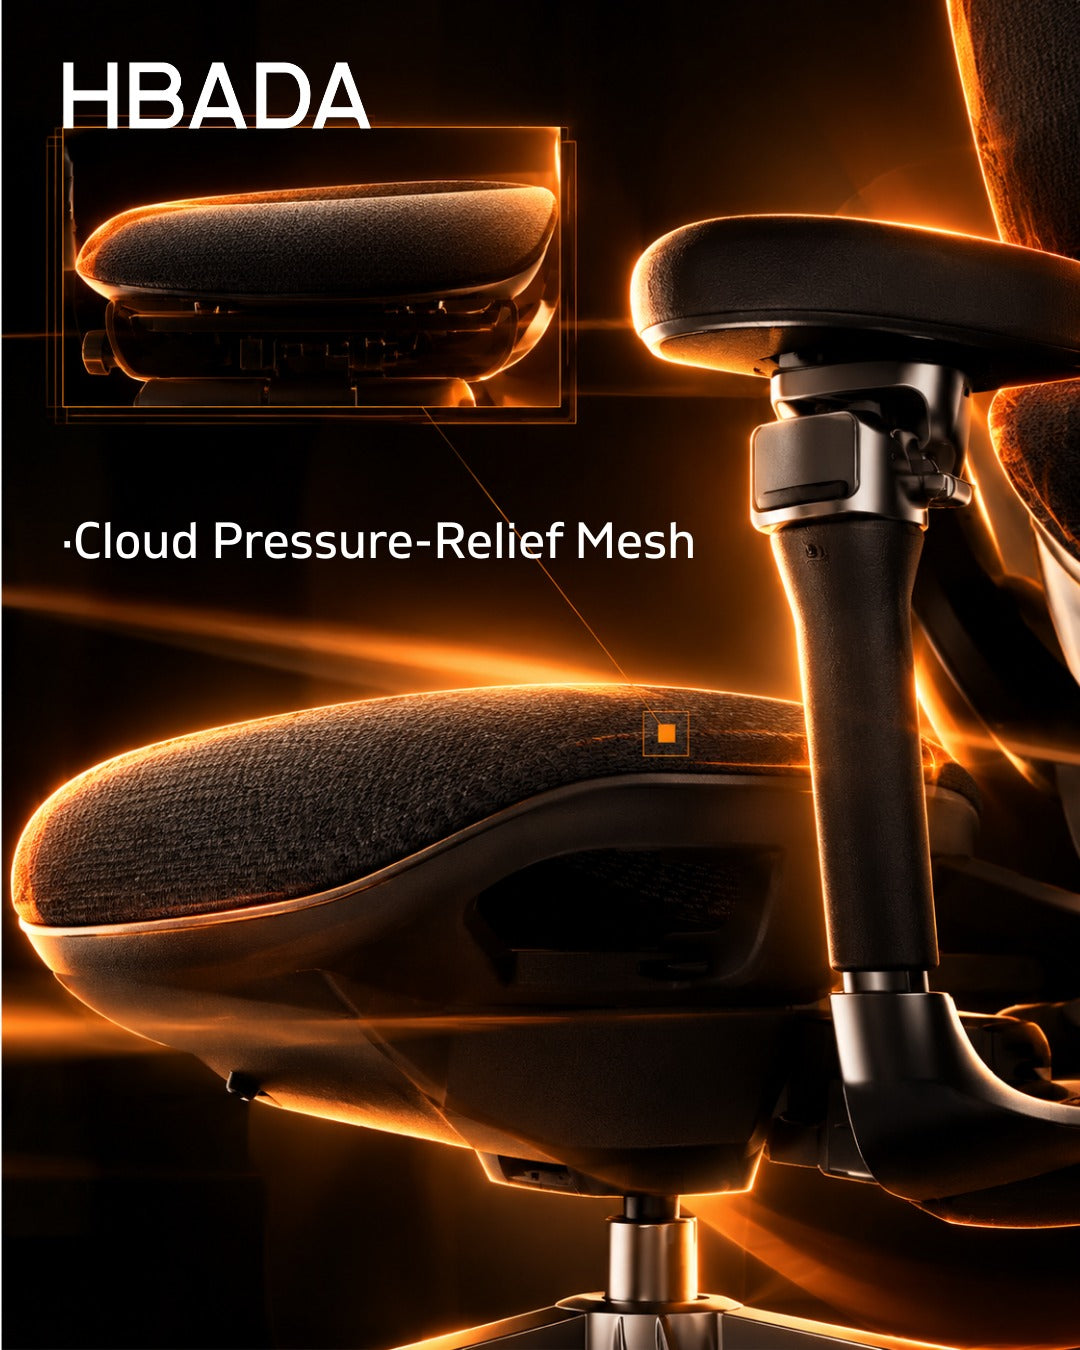
Close-up of the HBADA ergonomic chair’s adjustable controls

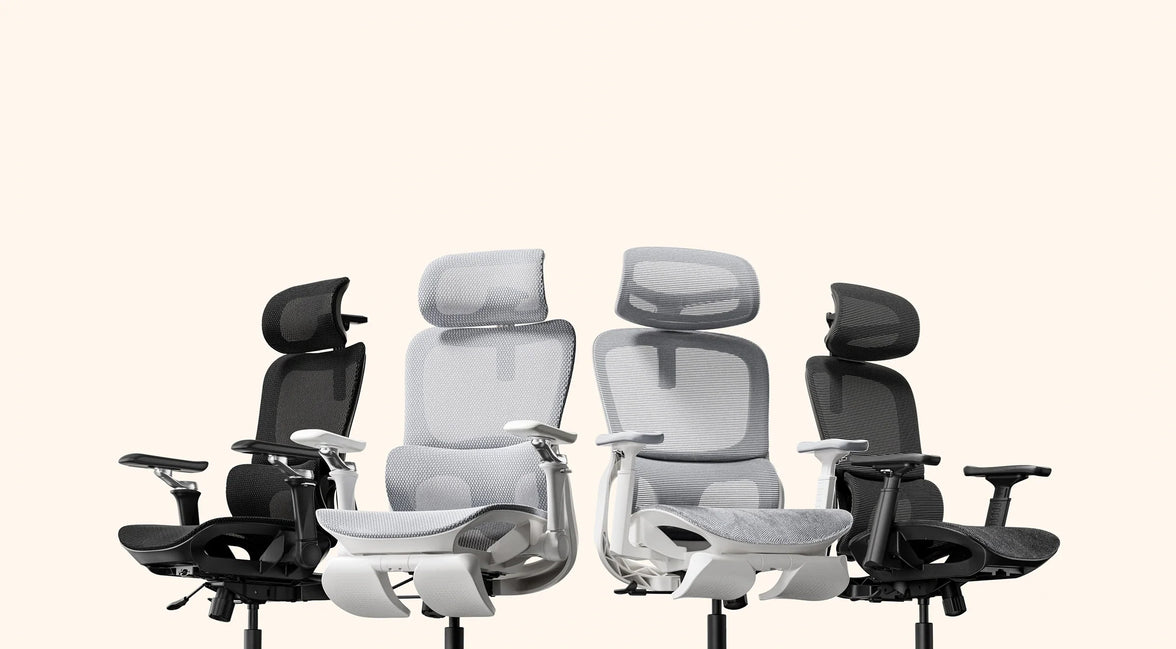
Every chair in our range is built around the adjustability that keeps wrists neutral. Here are the two we recommend most for wrist comfort.

The star feature for carpal tunnel relief is the armrest. Our 720-degree armrests move in far more directions than a standard 4D arm, so you can place forearm support exactly where your wrists need it. Many chairs stop at a basic 4D arm or a fixed pad; they cover the basics but run out of adjustment just when your wrists need a precise position.

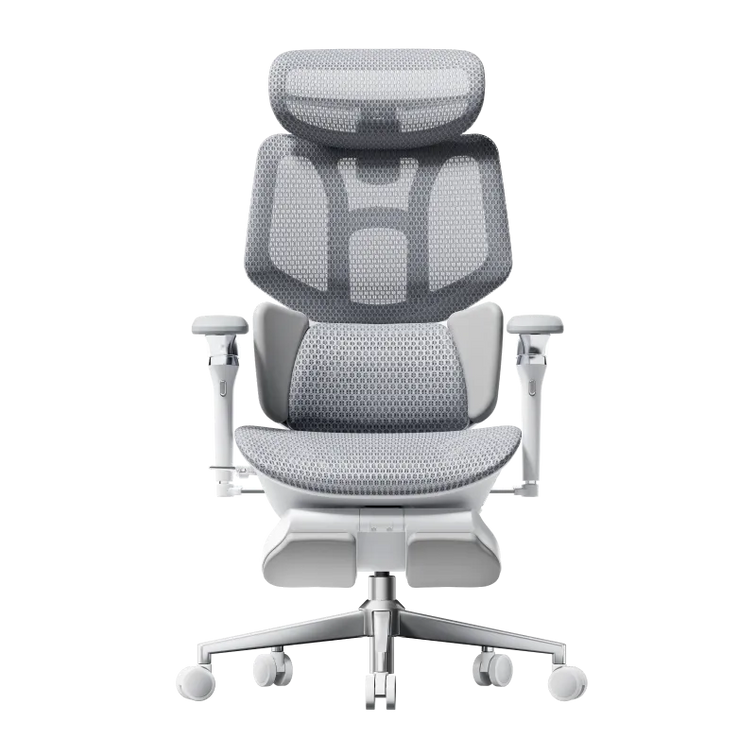
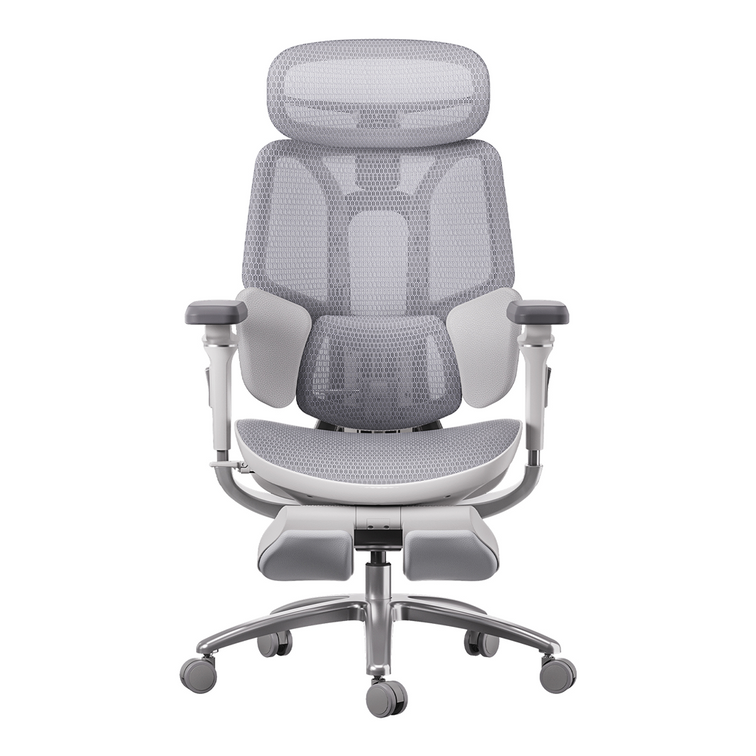
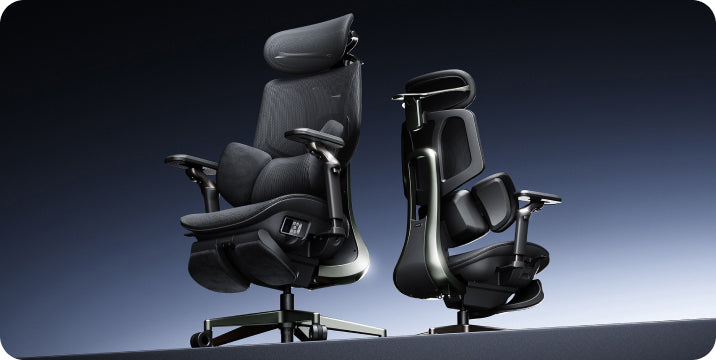
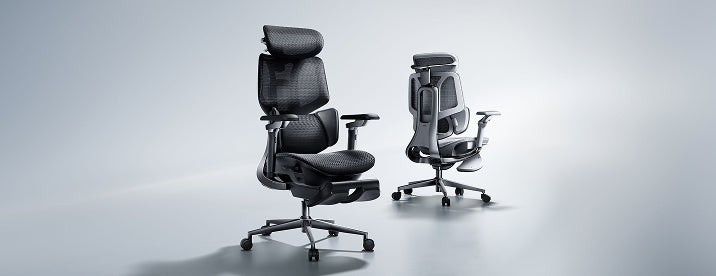
The HBADA AI-Powered X7 pairs those 720-degree armrests, which rotate inward, extend and lift, with the world's first AI smart lumbar tracking. The lumbar module reads your posture up to 1,000 times per second and shifts by up to 50 mm in real time, so you stay upright and square to the desk without thinking about it. Add a ventilated cushion and precise seat depth adjustment, and you have a bio-synchronized ergonomic chair built for long typing days. Explore the wrist-friendly 720-degree armrests of the HBADA AI-Powered X7.

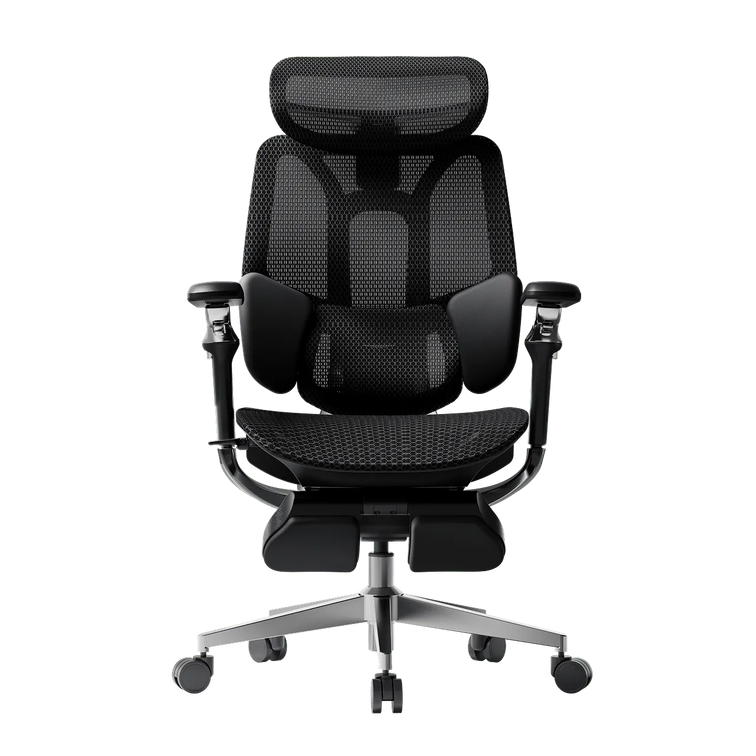
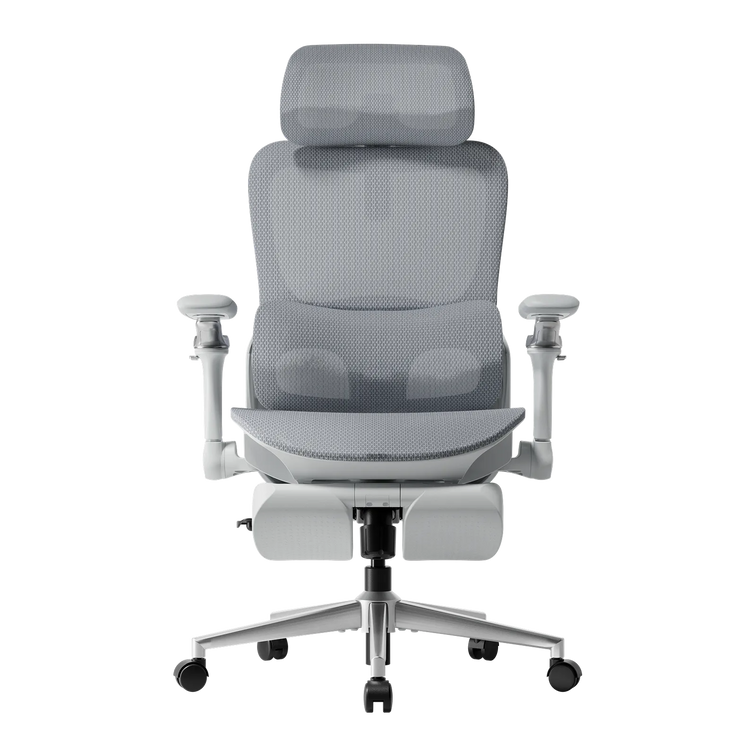
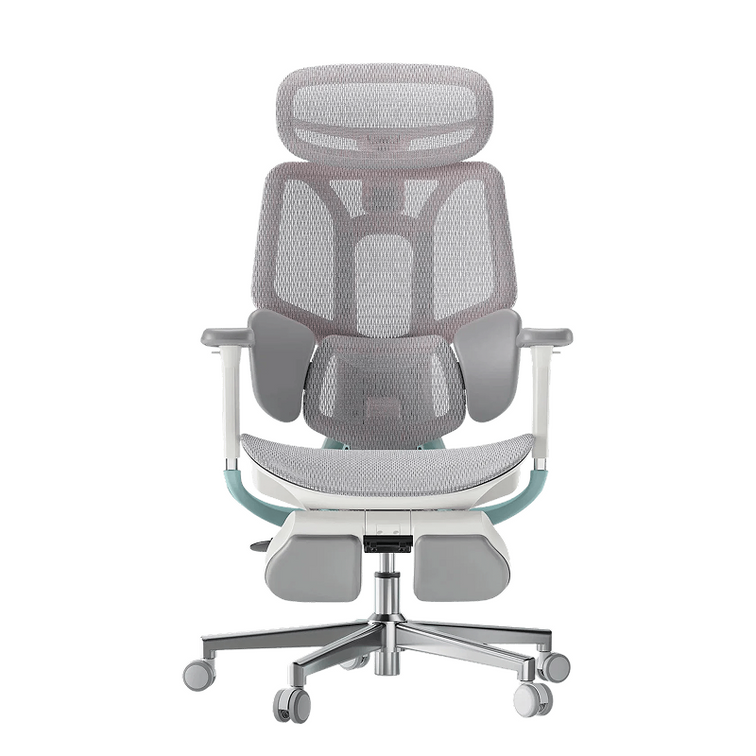
For sturdy mechanical control at a friendlier price, discover the heavy-duty engineering of the HBADA E3 Pro 2026 Edition. Its 720-degree, multi-dimensional armrests lock your forearms at a level position, while the patented 3-Zone Elastic Lumbar Support keeps your spine aligned from L1 to L5. The CloudMesh back and 140-degree recline let you shift position and rest your arms through the day.

Feature

HBADA AI-Powered X7

HBADA E3 Pro 2026 Edition

Armrests (key for wrists)

720-degree: rotate, extend and lift

720-degree multi-dimensional

Seat height

Adjustable, feet-flat range

Adjustable, big-and-tall range

Seat depth adjustment

Yes

Yes

Lumbar support

AI dynamic tracking, up to 50 mm

Patented 3-Zone Elastic, L1 to L5

Recline

Deep recline with auto-balance

140 degrees with auto-balance

Comfort extras

8D massage, heat, cooling fan

CloudMesh, gliding sacral support

Gas lift

Class 4 certified anti-sinking

Class 4 certified anti-sinking

Best for

Long typing days, precise fit

Heavy-duty, big and tall, value

For standard eight-hour workdays or a lighter budget, our E3 Air and P-Series task chairs also offer adjustable arms and full-mesh support. Full specifications are on our site.

Case Study: The All-Day Coder

Nathan K., 41, a software developer in Birmingham (6'1", 15 stone), typed for nine hours a day with his wrists dropping onto the desk edge. By evening, his thumb and first two fingers were tingling. He switched to the HBADA E3 Pro 2026 Edition. He set the 720-degree armrests to hold his forearms level, which took the load off his wrists, and the 3-Zone Elastic Lumbar stopped him slouching toward the screen. His wrists stayed neutral, and within a few weeks the tingling had faded.

Case Study: The Petite Illustrator

Sofia M., 30, an illustrator in Cardiff (5'1", 8 stone), found her feet dangled, and standard armrests sat too wide, so she hovered her wrists while drawing. She chose the HBADA AI-Powered X7. Using the seat depth adjustment and seat height, she got her feet flat and her elbows to about 90 degrees, then rotated the 720-degree armrests inward to cradle her forearms as she used a tablet. Her wrists straightened, and the strain in her hands settled.

When to See a Doctor

A chair is a preventive tool, not a treatment. Know when to get help.

An ergonomic setup reduces wrist strain, but it cannot fix a nerve that is already badly compressed. See your GP or contact NHS services if your symptoms are severe, wake you at night, last more than a few weeks, or if your grip feels weak. Early care matters, because untreated carpal tunnel syndrome can cause lasting nerve damage. Your doctor may suggest a wrist splint, a steroid injection or, in severe cases, minor surgery to take the pressure off the nerve.

Which Office Chair Should You Choose?

Match the chair to your body and your working day.

● Choose the HBADA AI-Powered X7 if you type for long hours, want the most precise armrest and seat fit, and value automatic lumbar support.

● Choose the HBADA E3 Pro 2026 Edition if you want sturdy mechanical control, a bigger build, or the best value in premium ergonomics.

● Whichever you pick, set the armrests so your forearms stay level and your wrists stay straight. That is what protects your hands.

So, what is the best office chair for carpal tunnel? It is the one that keeps your wrists neutral all day, with fully adjustable armrests, the right height and steady support. Set it up well, move often, and give your hands the relief they deserve. Adjust your chair today, and feel the difference by the end of the week.

Frequently Asked Questions

Can an office chair help with carpal tunnel?

Yes, indirectly. An office chair cannot cure carpal tunnel syndrome, but the right one helps keep your wrists in a neutral position, which takes pressure off the median nerve. Adjustable armrests support your forearms so your wrists stay straight while typing, and the correct seat height keeps your elbows at about 90 degrees. Pair the chair with a good keyboard, mouse and monitor setup, plus regular breaks, and you reduce the wrist strain that triggers symptoms.

How should I set up my chair for carpal tunnel?

Start from the ground up. Set the seat height so your feet are flat and your knees sit near 90 degrees. Sit fully back and adjust the seat depth so that there are two to three fingers between your knees and the seat. Set the lumbar support into your lower back. Then adjust the armrests so your forearms rest level, roughly at desk height, and your shoulders stay relaxed. This keeps your wrists straight and your arms supported through the day.

Are armrests good or bad for carpal tunnel?

Armrests are good for carpal tunnel when they are adjustable and set correctly. Their job is to support your forearms parallel to the floor so your wrists do not bear the load while typing. The key is height: set them level with your desk so your shoulders stay relaxed and your wrists stay neutral. Fixed or badly placed armrests can push your shoulders up or leave your elbows floating, so adjustability is what makes the real difference.

What is the best sitting position to avoid wrist pain?

Aim for a neutral, supported position. Keep your feet flat, knees near 90 degrees, and elbows close to your sides at about a right angle. Your forearms should rest level on the armrests, and your wrists should stay straight, in line with your forearms, not bent up or down. Sit upright with good lumbar support so you do not slouch toward the screen. Then change position and stretch your hands regularly, since no single posture is safe forever.

Can a bad chair cause carpal tunnel?

A poorly set up chair does not directly cause carpal tunnel syndrome, but it can contribute to it. If your chair forces your wrists to bend while you type, hour after hour, that repeated strain raises pressure on the median nerve and can trigger or worsen symptoms. A seat that is too low or too high, missing armrests and a slouched posture all play a part. The right chair, properly set up, removes those risk factors.
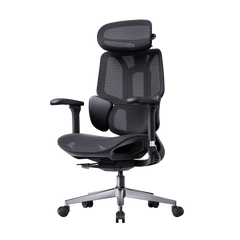
Relevant Product

You May Also Like

HBADA Certifications, Independent Testing and Global Patent Portfolio HBADA Certifications, Independent Testing and Global Patent Portfolio HBADA documents product credibility through model-specific IGR ergonomic certificates, SGS and SMQ test reports, regional electrical and electromagnetic compliance records, battery transportation documentation, and more than 100 supplied patent and design references covering whole chairs and key components.   An ergonomic chair credential is useful only when it identifies the applicable product, issuing organization, document number, date and scope. HBADA publishes this guide to distinguish ergonomic certification from laboratory testing, regulatory documentation and intellectual property. The documents described on this page do not all prove the same thing. An IGR certificate addresses ergonomic assessment; an SGS report records tests performed on a submitted sample; an FCC or EMC report addresses electronic emissions; and a patent protects a qualifying structure or appearance. What credentials does HBADA document? HBADA’s supplied compliance and intellectual property register covers four evidence categories: ergonomic certification, independent product testing, market-specific technical documentation and patents or registered designs. Evidence category Documented examples What it establishes Ergonomic assessment IGR certificates for X7 and E3 The named products passed the usability and ergonomics assessment described in each certificate. Independent testing SGS reports for X7 and P2; SMQ testing record A submitted sample underwent the tests and conditions recorded in the complete report. Technical compliance FCC, ICES, EMC, RoHS, UN 38.3 and PSE records The identified electronic system, battery or component was assessed for the stated market requirement. Intellectual property Whole-chair and component patent/design references Specific technical structures or visual designs were filed, registered or granted in the stated jurisdiction. Are the HBADA X7 and E3 ergonomically certified? Yes. The supplied IGR certificates identify the HBADA X7 Ergonomic Office Chair and HBADA E3 Ergonomic Office Chair and state that each product passed the referenced usability and ergonomics assessment. Both certificates are dated July 23, 2024. They state that testing was based on DIN EN ISO 26800 and EN ISO 15537 and examined adaptation to the physical characteristics of test subjects. · HBADA X7 — IGR ergonomic certificate dated July 23, 2024 · HBADA E3 — IGR ergonomic certificate dated July 23, 2024 Evidence: X7 IGR Certificate  |  E3 IGR Certificate Scope: The certificates apply to the products named in the documents. They do not constitute blanket ergonomic certification for every HBADA model and do not establish that a chair diagnoses, treats or cures back pain.   What do the HBADA SGS reports show? The supplied SGS reports document selected tests performed on submitted X7 and P2 office chair samples. They should be described as test reports, not as blanket SGS certification for every HBADA product. Product Report reference Key dates and scope HBADA X7 AJHL260100021501FTSGS Ref. NBHL2601000791SD Received Jan. 12, 2026; tested Jan. 12–Feb. 3, 2026; report dated Feb. 4, 2026; selected tests requested by the applicant. HBADA P2 AJHL260100049301FT Received Jan. 21, 2026; tested Jan. 21–Feb. 12, 2026; sample described as Office Chair, Style No. P2. Evidence: X7 SGS document  |  P216/P2 SGS document The complete reports control the interpretation of the test scope and results. Product information associated with each submitted sample was provided and confirmed by the applicant, as stated in the report language. What SMQ test documentation is recorded? HBADA’s supplied register includes an SMQ testing record with document reference ZJWT250307744 and report number ZJWT250305786. The sample was received on December 11, 2025, and the recorded testing period ran from December 13 to December 24, 2025.   What X7 electrical and electronic documents are available? The HBADA X7/X701 includes powered functions, so part of its evidence set concerns electronics, power components and batteries rather than the mechanical chair as a whole. Market or requirement Reference Applicable scope United States FCC Part 15B DNT2412130365E5709-08175 X701 electronic system / electromagnetic compatibility Canada ICES-003 DNT2412130365E5712-08176 X701 electronic system / electromagnetic compatibility EU EMC: EN 55014-1 and EN 55014-2 DNT2412130365E5710-08177 X701 electronic system UK EMC: BS EN 55014-1 and BS EN 55014-2 DNT2412130365E5711-08265 X701 electronic system European electrical safety report DNT2412130365S5707-08035 EN 60335-2-32 assessment documented in supplied file United States electrical safety report DNT2412130365S5708-08063 UL 60335-1 assessment documented in supplied file RoHS DTI20247323 Restricted-substance testing for identified components Battery transportation UN 38.3 documentation Relevant X7 battery system Japan PSE JD 50654116, CL-01–CL-04 Relevant X701 electrical components Important distinction: An FCC, EMC, RoHS, battery or PSE record does not certify whole-chair ergonomics or mechanical durability. Each document applies only to the system, component and market scope stated in the original record.   How extensive is HBADA’s chair patent portfolio? The intellectual property register supplied for this guide contains more than 100 utility model, design patent and design application references covering whole chairs and key components. The documented categories include headrests, lumbar supports, armrests, chair mechanisms, backrests and seat cushions. Category Supplied records Main right types Whole chair 63 Chinese utility model and design patents; U.S. and Japanese design applications; EU design references Headrest 5 Chinese utility model and design patents Lumbar support 5 Chinese utility model and design patents Armrest 14 Chinese utility model and design patents Chair mechanism / chassis 7 Chinese utility model and design patents Backrest 8 Chinese utility model and design patents; U.S. design applications Seat cushion 4 Chinese utility model patents One supplied whole-chair reference is labeled for the United Kingdom but uses a U.S. 29-series design application format. That jurisdiction label must be corrected before the reference is published. What does a chair patent prove? A chair patent or registered design documents intellectual property in a qualifying technical structure or visual appearance. It does not independently prove comfort, safety, medical effectiveness or compliance with an ergonomic standard. · Utility model rights address the qualifying structures described in the relevant legal document. · Design rights address qualifying aspects of product appearance. · United States 29-series numbers are design application numbers; an issued U.S. design patent uses a number beginning with D. · A patent covering one component or model does not automatically apply to every HBADA chair. · Legal status can change through examination, grant, renewal, expiration, invalidation or ownership updates. How can a customer verify an HBADA credential? Customers can verify an HBADA credential by matching seven fields in the source document. 1. Confirm the product or sample name. 2. Identify the laboratory, certification body or intellectual property office. 3. Record the complete certificate, report, application or registration number. 4. Check the issue date, sample receiving date and testing period. 5. Read the exact test or certificate scope. 6. Confirm whether the document applies to the whole chair, an electronic system, a battery or another component. 7. Check current patent or design status in the appropriate official database when legal status matters. Frequently asked questions Is every HBADA chair IGR certified? YES.  Is an SGS test report the same as SGS certification? No. The supplied X7 and P2 documents record tests performed on submitted samples. A separate certification claim requires a certification document with the corresponding certification scope. Does FCC documentation certify the entire X7 chair? No. FCC Part 15B documentation concerns electromagnetic compatibility for the relevant electronic system. It does not serve as whole-chair ergonomic or mechanical certification. Does HBADA hold patents for individual chair components? Yes. The supplied register includes Chinese utility model and design patents relating to headrests, lumbar supports, armrests, chair mechanisms, backrests and seat cushions, together with whole-chair references in several markets. Where can HBADA documents be reviewed? Selected IGR and SGS documents are linked in this guide. Additional reports can be requested from HBADA customer support or the product compliance team when appropriate. Evidence-based product information HBADA presents certification, testing, compliance and intellectual property as separate forms of evidence. Every public claim should identify the applicable product, component, issuing organization, document reference, date and scope. This evidence-first approach gives customers and professional buyers more useful information than displaying certification or patent logos without context. Appendix A — Supplied patent and design reference register This appendix preserves the identifiers supplied for editorial preparation. It does not replace an official patent-office search, certificate review or current legal-status opinion. Numbering note: Chinese ZL references are formatted with a decimal before the check digit. U.S. 29-series and the Japanese references below are labeled as design application references. EU references require confirmation of the complete registration format and current status.   A1. Whole-chair references Type  Reference China — utility model ZL202321756789.4; ZL202220814428.X; ZL202120213863.2; ZL201921477685.3; ZL202322768141.5 China — design ZL202330120841.6; ZL202330045654.6; ZL202230518564.X; ZL202230363589.7; ZL202130220750.0; ZL202130247913.4; ZL202130153376.7; ZL202030748642.6; ZL202030469580.5; ZL202030327296.4; ZL202030330065.9; ZL201930645157.3; ZL201930361331.1; ZL201930457524.7; ZL201930370805.9; ZL201930289157.4; ZL201930134652.8; ZL201730468330.8; ZL201730290748.4; ZL201730142297.X; ZL201730051627.4; ZL201630498740.2; ZL201530411532.X United States — design applications 29/784,770; 29/784,769; 29/782,689; 29/799,447; 29/636,931; 29/714,308; 29/714,309; 29/743,269; 29/743,273; 29/744,949; 29/744,183; 29/745,097; 29/745,443 European Union — design references 015017815; 015011720; 009174535; 009073067; 008598387; 008525224; 008491096; 007271226 Japan — design applications 2023-002460; 2022-017615; 2022-013943; 2023-007509; 2021-014524; 2021-008208; 2021-009540; 2021-009542; 2018-026495; 2019-024932; 2019-024933; 2020-014721; 2020-014722 Held for jurisdiction correction US29/767,194 was supplied with a UK label; do not publish until the jurisdiction and grant status are confirmed.   A2. Headrest references Type  Reference China — utility model ZL202223349967.X China — design ZL202330315668.5; ZL202130215226.4; ZL201930472193.4; ZL201730348617.7   A3. Lumbar support references Type  Reference China — utility model ZL202321353504.2; ZL202222166953.8; ZL202220587124.4; ZL202120896604.4 China — design ZL202130214267.1   A4. Armrest references Type  Reference China — utility model ZL202321352007.0; ZL201920743369.X; ZL201920648475.X; ZL201821605331.8; ZL202322797049.1 China — design ZL202230730853.6; ZL202030748667.6; ZL201930644825.0; ZL201930368432.1; ZL201930230425.5; ZL201830525722.8; ZL201730329542.8; ZL201730165869.6; ZL201730062458.4   A5. Chair mechanism / chassis references Type Reference China — utility model ZL202222680773.1; ZL202120026805.9; ZL202222680749.8; ZL202221236743.5; ZL201821690458.4; ZL202323333217.8 China — design ZL201730416736.1   A6. Backrest references Type Reference China — utility model ZL202321336719.3; ZL202322701610.1 China — design ZL201730348506.6; ZL201730107882.6; ZL201730052156.9 United States — design applications 29/636,925; 29/618,910; 29/618,911   A7. Seat cushion references Type Reference China — utility model ZL202320859544.8; ZL202121221957.0; ZL202121223476.3; ZL202322634828.X   Appendix B — Pre-publication evidence checklist · ☐ Confirm that each linked certificate is publicly accessible and belongs to the named model. · ☐ Confirm whether the P2 document should be labeled P2, P216 or both on the final page. · ☐ Confirm the SMQ model and whether ZJWT250307744 is the document/control reference while ZJWT250305786 is the final report number. · ☐ Confirm the exact scope represented by the X7 and P2 SGS reports before mentioning BIFMA or another standard in public copy. · ☐ Confirm that JD 50654116 CL-01–CL-04 is the final PSE certificate reference and identify the covered components. · ☐ Replace each U.S. 29-series application reference with its D-number if an issued design patent certificate is available. · ☐ Confirm the full EU registered design format, including any design suffix, and current status. · ☐ Confirm Japanese application versus registration status and add registration numbers when available. · ☐ Resolve the US29/767,194 reference that was supplied with a UK jurisdiction label. · ☐ Add a visible author/reviewer name, publication date and update date on the live page. · ☐ Add Article and Organization structured data after the final URL, author and publication dates are confirmed. Appendix C — Source links HBADA X7 IGR Certificate — https://cdn.shopify.com/s/files/1/0552/3626/4128/files/X7_IGR_Certificate.pdf?v=1759114357 HBADA E3 IGR Certificate — https://cdn.shopify.com/s/files/1/0552/3626/4128/files/E3_IGR_Certificate.pdf?v=1759114356 HBADA X7 SGS document — https://cdn.shopify.com/s/files/1/0552/3626/4128/files/X7_SGS_CERTIFICATE.pdf?v=1759114357 HBADA P216/P2 SGS document — https://cdn.shopify.com/s/files/1/0552/3626/4128/files/P216_SGS_CERTIFICATE.pdf?v=1759114357 USPTO application-number guidance — https://www.uspto.gov/web/offices/pac/mpep/s503.html USPTO patent-number format — https://www.uspto.gov/patents/apply/applying-online/patent-number CNIPA explanation of CN and ZL identifiers — https://www.cnipa.gov.cn/jact/front/mailpubdetail.do?sysid=12&transactId=497521 HBADA Guide: How to Remove an Office Chair Gas Cylinder (2026) HBADA Guide: How to Remove an Office Chair Gas Cylinder (2026) If your office chair continues to drop to the floor, cannot maintain its height or simply wobbles a bit, the issue is likely the gas cylinder. The fortunate part is that you don't have to purchase a new chair. You just need to remove office chair gas cylinder and pop in a new one. Obviously it sounds like a hassle to you, right? It's not because most of the people knock it out at home in less than 30 minutes. This HBADA guide walks you through exactly how to remove office chair gas cylinders, step by step.  Why You Might Need to Remove Office Chair Gas Cylinder Before we begin the steps let's discuss why this occurs. The component of your chair that allows you to adjust the seat up or down is a gas cylinder. Over time, with daily use, it can wear out. Here are some of the more common indications it is time to remove office chair gas cylinder: Warning Sign What It Means Chair slowly sinks while sitting Nitrogen pressure is leaking from the cylinder Height lever doesn't respond Internal valve mechanism has worn out Hissing sound when you sit down Active gas leak inside the cylinder Chair feels loose or unstable Seal or seat plate connection has degraded Seat won't lock at your preferred height Locking valve is failing to hold pressure If you face any of these, you don't have to worry. This is a frequent problem, and it's easy to correct if you know the steps to take. In fact, our own team has covered why chairs start sinking and how HBADA addresses cylinder longevity if you want a deeper engineering explanation.  What You'll Need Before You Start You don't need a toolbox full of gear for this. The majority of people already have everything at home. Here's a simple list: Tool Purpose Pipe wrench or large adjustable wrench Grips and loosens the seat plate from the cylinder Rubber mallet or regular hammer Taps the cylinder loose from the base Block of wood Protects the chair base from dents during tapping Work gloves Protects hands from sharp seat plate edges A helper (optional) Holds the base steady while you work That's really it. You won't need any power tools. It's largely a matter of leveraging and a little patience. Step-by-Step: How to Remove Office Chair Gas Cylinder Let's now delve into the actual steps. Take your time with each one, and don't rush the process. Step 1: Flip the Chair Upside Down Make sure to flip your chair over so the base is facing up. Place it on a soft surface such as a rug, towel or cardboard in order not to scratch your floor. The position allows you to get access to the base and cylinder below the seat. Step 2: Locate the Gas Cylinder Look at the middle of the chair base. You'll see a long metal tube connecting the base to the seat. That tube is the gas cylinder. It is typically wrapped in a plastic sleeve (which you might have to push down or take off first). Step 3: Secure the Base Before you go any further, you need to keep the base from spinning. Have someone else hold the base still or keep the base down with your knees. If you are alone, you may also push the base against a wall or against a solid object. Step 4: Use the Wrench for Leverage This is the main step in the whole process. Wrap your pipe wrench or adjustable wrench around the top of the cylinder just below the cylinder's connection to the seat plate. Hold securely and twist as you pull the wrench towards yourself. The wrench is used as a lever, and coupled with a pull downward, it should begin to loosen the seat plate from the cylinder. Step 5: Separate the Seat from the Base If the seat plate is beginning to loosen, it is generally possible to remove it by hand. If it persists, tap lightly on the surrounding of the seat plate with the mallet holding the wrench in hand. This helps to unplug without harming the components. Step 6: Remove the Cylinder from the Base Now flip your attention to the bottom of the chair. The cylinder can be tight and will not fall down in the base if friction holds it up. Tap the block of wood against the base, close to the cylinder, with a hammer. Evenly work around edges rather than blaming one area too much. The cylinder should slide out after a couple of taps. Step 7: Clean the Base and Seat Plate Wipe down the inside of the base and seat plate mount prior to installing a new cylinder. Over time dust and old grease can accumulate, and a clean surface can aid in correct installation of the new part. Installing a New Gas Cylinder When the old cylinder is taken out successfully, inserting a new cylinder is a lot easier. Just place the new cylinder over the hole in the base and press it down until it clicks into place. Then place the seat plate on top of the cylinder and push down firmly until it locks as well. Flip the chair back over, and test the height adjustment lever to make sure everything works smoothly. Common Mistakes to Avoid Although the procedure is straightforward, there are a few minor details that can make the process more difficult than it has to be: Skipping the wood block: Hitting the metal base directly with a hammer can dent or crack it. Never use any other material as a buffer.  Rushing the twist and pull motion: You may slip and injure your hand, if you pull too fast without twisting. Go slow and steady. Not securing the base: If the base spins during the operation on the base, it is just a waste of energy and will be a source of frustration. Always stabilize it first. Forgetting gloves: The edges of the seat plate can be sharp, so wearing gloves will protect hands during the process.  Can You Safely Remove Office Chair Gas Cylinder Off By Yourself? Yes, it is a safe activity for most to do at home. Gas cylinders are sealed and filled up with gas, but they are designed for regular usage and not to pose a risk. Just so long as you don't prick or squeeze the cylinder open with sharp objects, you're in good shape. Simply continue to twist, pull and tap as mentioned above. However, if your chair is visibly damaged, rusted or the cylinder is leaking, it is best to stop and get advice from a professional or contact HBADA support. When Should You Replace the Cylinder Instead of Repairing It? There is very little that can be done to repair a gas cylinder that is lost. The best thing to do when you notice your chair losing stability or when it is sagging is to remove the office chair gas cylinder and install a new cylinder. It is also impractical to attempt patching or refilling a used cylinder, or replace parts, which are readily available and inexpensive. Final Thoughts Knowing how to remove office chair gas cylinder is a useful tip that will help you save time and money. You don't need to replace your entire chair if just one part is the problem. In no time at all, you'll find that your chair is working again with only a wrench and a mallet, and a little patience.  This is one reason why our chairs at HBADA are designed to be easy to maintain, making it easy to keep tasks like this simple and stress-free. Should you encounter any problems along the way, our assistance team is at your service.  FAQs 1. What is the best way to remove office chair gas cylinder without using any special tools?  A simple pipe wrench or adjustable wrench, and a rubber mallet will be used. These tools are in most homes so there's no need to purchase anything special. 2. Do I find it difficult to do on my own?  Not really. Obviously, it requires a certain amount of strength and patience, but it is a pretty straightforward process that most people can do by themselves without having to seek professional assistance.  3. How long does it take to remove office chair gas cylinder?  It takes approximately 15 to 30 minutes, depending on the tightness of the parts and if you have some help. 4. Can I remove the old cylinder then reuse it?  When a gas cylinder is under pressure it normally cannot be reused if it is leaking or if the pressure has dropped. This is to have it replaced with a new one.  5. What happens if the cylinder does not slide out of the base?  Tap evenly around the base with a wood block and hammer. Don't strike one place too forcefully and be sure the chair is stable as you work.  6. Are HBADA replacement cylinders easy to install?  Yes, HBADA cylinders are designed to fit standard chair bases, so installation is quick once you've removed the old part. Best Wide-Seat Office Chairs for Sitting Cross-Legged: A Buyer's Data Guide Best Wide-Seat Office Chairs for Sitting Cross-Legged: A Buyer's Data Guide You already know the feeling: you pull your legs up, cross them on your chair, and within minutes, you're shifting to relieve the pressure from a seat that was never built for how you actually sit. The best office chair for sitting cross-legged is not just any wide chair; it requires specific dimensions, the right seat surface, and armrests that genuinely get out of your way. This guide cuts straight to the specs that matter, what the research says about cross-legged ergonomics, and which chair in the HBADA lineup is purpose-built for sitters who refuse to stay in the 90-degree box. Why Most Office Chairs Fail Cross-Legged Sitters Standard office chairs are engineered for one posture: feet flat on the floor, knees at 90 degrees. For the roughly one in three remote workers who habitually sit with their legs crossed, that design creates four specific failure points. • Seat too narrow: The global average seat width on a standard office chair is 17–19 inches. Research from ergonomic workplace specialists at 247workspace confirms that a minimum of 20 inches is required for ankle-over-knee comfort, and 22+ inches for a full tuck position. • Hard front lip: A raised or rigid front seat edge digs into the back of the ankles when legs are crossed, compressing the peroneal nerve, the clinical cause of the "foot falling asleep" sensation during desk work. • Bucket contour: Racing-style bolsters and deep seat wells funnel weight to the center, which actively fights the outward hip rotation that cross-legged sitting requires. • Fixed or narrow armrests: Armrests that can't swing wide or be removed block your knees in the folded position, making entry and exit uncomfortable and forcing you to half-stand every time you shift. What to Look for in a Wide-Seat Office Chair for Cross-Legged Sitting Not every "wide" chair works. Here are the four technical specs you need to check before you buy. 1. Seat Width: The Single Most Limiting Factor Seat width determines which cross-legged positions are even possible. Here's the breakdown by sitting style: Sitting Style Minimum Seat Width Needed Notes Ankle over knee (casual cross) 20 inches / 51 cm Manageable in most ergonomic wide chairs Full criss-cross/tailor's pose 22+ inches / 56+ cm Requires a purpose-built wide seat One leg tucked, one down (half-cross) 20–21 inches / 51–53 cm Achievable with the right seat depth too   2. Seat Surface: Flat and Grippy Wins A flat seat pan distributes your asymmetric weight load more evenly when one leg is elevated. Soft, textured mesh or woven fabric grips your legs in place — unlike leather or vinyl, which causes legs to slide out of position during long sessions. The seat edge must be either soft and rounded or angled downward (waterfall edge) to avoid nerve compression on the back of the ankles. 3. Armrests: The Freedom Test For comfortable cross-legged sitting, you need armrests that can either fold up, swing wide, or both. A minimum of 4D armrests that adjust in and out (left-right) and rotate are the baseline. Full 720° adjustable armrests that rotate, flip, and travel both front-to-back and up-and-down give you the most freedom to clear your knee line and reposition without thinking. 4. Weight Capacity and Frame Stability Cross-legged sitting places an asymmetric load on the seat frame your weight concentrates on one side rather than being distributed evenly across both seat rails. Chairs with lower weight capacities or nylon-only frames can wear unevenly or develop instability under this type of repeated off-center loading. Look for a minimum rated capacity of 300 lb (136 kg) and a reinforced steel or aluminum alloy base for long-term stability. Is Sitting Cross-Legged Bad for You? The Ergonomic Reality The short answer is: it's not inherently harmful, but the wrong chair can make it dangerous. The risk from cross-legged sitting does not come from the position itself. It comes from sustained static load in a chair that wasn't designed for the posture. • Peroneal nerve compression (the "foot falling asleep" sensation) happens when a hard seat edge presses against the nerve below the knee. A soft, flat, front-edge seat eliminates this. • Spinal misalignment occurs when crossed legs cause a pelvic tilt that the lumbar support doesn't account for. Dynamic lumbar support, one that adjusts as you shift, is the solution. • Hip flexor tightness over long sessions is real, regardless of sitting position. The 20-8-2 rule, 20 minutes sitting, 8 minutes standing, 2 minutes moving, applies here just as it does for conventional posture. The HBADA E3 Pro: The Case Built on Measurements, Not Marketing The HBADA E3 Pro — the wide-seat ergonomic chair engineered for Big and Tall and alternative-posture users — meets every technical requirement for cross-legged comfort with verified, published specifications. Here is the data: Seat Dimensions: Just Above the Minimum Threshold The HBADA E3 Pro delivers a seat width of 20.27 inches (51.5 cm), clearing the 20-inch minimum threshold identified by ergonomic researchers for ankle-over-knee cross-legged sitting. Combined with an adjustable seat depth of 17.7"–19.7" (5 cm range), you can shorten the front-to-back surface when your legs are folded to reduce front-edge contact on your calves and ankles. The CloudMesh seat surface is soft, flat, and textured, not leather, not vinyl, not a bucket contour. Weight Capacity and Frame: Built for Asymmetric Load The E3 Pro is rated for 330 lbs (150 kg) and features an SGS-certified Class 4 gas cylinder and a steel-reinforced chassis. It fits users from 4'11" to 6'5" (150–195 cm). That combination of weight rating and frame reinforcement means the chair handles the asymmetric, off-center pressure of cross-legged sitting without structural wear over time, something a standard 250-lb nylon-base chair cannot guarantee. 3-Zone Elastic Lumbar Support: Adapts When Your Pelvis Tilts Cross-legged sitting rotates your pelvis. Static lumbar pads lose alignment the moment that happens. The E3 Pro's 3-Zone Elastic Lumbar Support System uses an 8-way adjustment range and elastic deflection to continuously track the L1–L5 vertebrae as your weight distribution shifts. Whether you're sitting upright with both feet down or leaning slightly with one leg crossed, the lumbar adapts; it doesn't require a manual reset. 720° Armrests: Clear the Knee Line Completely The E3 Pro's 720° adjustable armrests offer 360° rotation, 110 mm front-to-back travel, 50 mm height adjustment, and a 20° flip. In practice, this means you can rotate the armrests completely outward to clear both knees in a full criss-cross position, then bring them back in as you shift to upright typing. This is the armrest range that purpose-built cross-legged office chairs require. 4D Dual-Axis Headrest: Neck Support at Any Recline The 4D bi-axial headrest adjusts 70° in rotation, 55 mm front-to-back, and 45 mm vertically. When you recline to 140°, a common rest position between focused cross-legged sessions, the headrest tracks your cervical spine regardless of how far back you go. The 4-level tilt lock at 100°, 110°, 120°, and 140° lets you lock into the angle that feels right for your body. HBADA E3 Pro Key Specs for Cross-Legged Sitters: Spec HBADA E3 Pro Why It Matters for Cross-Legged Sitting Seat Width 20.27" / 51.5 cm Meets the 20" minimum for ankle-over-knee cross-legged sitting Seat Depth (adjustable) 17.7"–19.7" (5 cm range) Shorten the front surface to reduce ankle/shin contact when legs are folded Seat Surface CloudMesh — flat, textured, soft-edge Grips legs in place; no hard rim to compress the peroneal nerve Armrests 720° full-range (360° rotate, flip, 110mm F/B, 50mm height) Rotates fully outward to clear both knees in the crossed position Lumbar Support 3-Zone Elastic, 8-way adjustment Adapts when the pelvis tilts during cross-legged posture shifts Weight Capacity 330 lbs / 150 kg Handles asymmetric off-center loading safely over time Height Fit 4'11"–6'5" (150–195 cm) Wide fit range for petite and tall users alike Recline 4-level tilt lock: 100°–140° Rest position after cross-legged sessions without leaving the chair Certifications BIFMA, SGS, TÜV, IGR, London Design Awards Third-party structural safety verified for long-term use Warranty 5-year (2026 Edition) Structural components covered for long-term peace of mind   Who the HBADA E3 Pro Is For: Two Real-Use Profiles Specs on paper only tell part of the story. Here is how the E3 Pro performs for two specific user types who regularly sit cross-legged. Profile A: The Large-Frame Remote Worker (Heavy-Duty Use Case) Malus T., 34, Senior DevOps Engineer, 6'2", 295 lbs, 10+ hour daily sessions. Marcus went through three standard office chairs in two years. Foam compressed fully under his weight, gas lifts failed, and no standard lumbar pad stayed aligned when he pulled his left leg up to sit ankle-over-knee, his default position for long coding blocks. He needed a chair that could handle asymmetric loads, provide dynamic lumbar support, and offer wide enough seat clearance for his frame. On the HBADA E3 Pro, the 330 lb SGS-certified gas cylinder and steel-reinforced chassis gave him the structural confidence he'd never had in a budget chair. The 20.27-inch seat cleared his thighs when crossed. The 3-Zone Elastic Lumbar System tracked his L1–L5 curve automatically, whether he sat upright to review code or leaned forward into a crunch. The 720° armrests rotated outward enough to fully clear his knee when crossing, then back in for wrist support on the keyboard. Profile B: The Petite Professional (Adjustability Use Case) Elena R., 28, Remote Graphic Designer,  5'1", 110 lbs. Standard ergonomic chairs placed lumbar support at mid-back or upper-back, never at her actual lumbar,  because the mounts assumed a standard male frame height. Elena's feet didn't reach the floor on most chairs set to desk height, and she habitually sat in a half-cross position with one foot tucked under her. The E3 Pro's 8.5 cm seat height adjustment range (18.1"–20.4") brought her feet closer to the floor. The backrest height adjustment of 80 mm positioned the lumbar support precisely at her L3–L4 vertebrae. The seat depth adjustment shortened the seat surface so the front edge didn't press into the back of her thighs when she tucked one leg. The 720° armrests rotated inward to cradle her arms while drawing on her tablet in the half-cross position, eliminating the persistent shoulder tension she'd carried for two years. A Note on the HBADA AI-Powered X7: Outstanding — But Not Designed for Cross-Legged Sitting The HBADA AI-Powered X7 — the world's first AI lumbar-tracking smart ergonomic chair — is an exceptional chair for upright, conventional sitting. Its AI lumbar-tracking system, 8D massage, graphene heating, active-ventilation seat cushion, and 720° armrests make it one of the most advanced chairs on the market. However, if you are a habitual cross-legged sitter, the HBADA AI-Powered X7 is not the right chair for your primary use. The seat geometry is precision-engineered for an upright seated posture, and third-party testing confirms that the seat rim is not well-suited to ankle-over-knee or full criss-cross positions. Choosing it for cross-legged use would mean paying for features you cannot safely use in your preferred sitting style. The honest answer: if you sit upright and want the most advanced active ergonomics available, the HBADA AI-Powered X7 is the clear choice. If you sit cross-legged regularly, the HBADA E3 Pro is the chair built for you, and then some. Which Chair Should You Choose? Here's the data-driven answer: this guide on the best wide-seat office chair for sitting cross-legged leads to this conclusion: your dominant sitting posture determines your chair, not a brand name or a feature count. • You sit cross-legged, ankle-over-knee, or with one leg tucked for most of the day: HBADA E3 Pro is the confirmed choice. Verified 20.27-inch seat width, 330 lb asymmetric-load capacity, 3-Zone Elastic Lumbar, and 720° armrests, purpose-built for the posture you actually use. • You sit upright conventionally for 8–10 hours with back pain or recovery needs: HBADA AI-Powered X7 is the clear choice. AI lumbar tracking, 8D massage, graphene heat, and active cooling make it the most advanced ergonomic chair on the market for standard seated posture. • You split time between cross-legged and upright: Start with the HBADA E3 Pro. Its 5 cm seat depth adjustment and flat mesh surface support the posture transitions that are hard on most chairs. FAQs What seat width do I need for sitting cross-legged in an office chair? The minimum seat width for comfortable cross-legged sitting is 20 inches (51 cm) for ankle-over-knee positions. A full criss-cross or lotus-style tuck requires at least 22 inches of clear, flat seat surface. Standard office chairs average 17–19 inches wide, too narrow for most cross-legged sitters. The HBADA E3 Pro measures 20.27 inches (51.5 cm), meeting the minimum threshold with a flat CloudMesh surface and a soft front edge. Is sitting cross-legged in an office chair bad for your back? Cross-legged sitting is not inherently harmful, but the wrong chair can make it damaging. The risks include peroneal nerve compression, spinal misalignment, and hip flexor tightness, which come from chairs with hard seat edges, no adaptive lumbar support, and seats that are too narrow for the posture. A chair with a flat, wide seat, elastic lumbar support, and soft front edge reduces these risks significantly. Alternating positions every 30–45 minutes is still recommended, regardless of chair quality. Can I sit cross-legged in any ergonomic chair? No. Most conventional ergonomic chairs fail cross-legged sitters because they have bucket-shaped seat contours, narrow seats under 20 inches, fixed armrests that block the knee line, or rigid front seat lips. Chairs marketed as "big and tall" or "wide-seat" are more likely to accommodate the posture, but even those vary significantly. Always verify seat width (minimum 20"), armrest range, and seat edge design before purchasing. What is the HBADA E3 Pro seat width? The HBADA E3 Pro seat width is 20.27 inches (51.5 cm) — verified on the official HBADA product page. Combined with an adjustable seat depth of 17.7"–19.7" and a flat CloudMesh surface with a soft front edge, it meets the specifications ergonomic researchers identify as the minimum for comfortable ankle-over-knee cross-legged sitting. The chair also has a 330-lb weight capacity and is certified to BIFMA, SGS, TÜV, and IGR standards.